Create a New AR Project
Create, View, and Manage AR Projects (Worldspace) on XenseAR Portal
After successfully creating and processing a 3D Space, the system allows you to create AR Projects (Worldspace) based on that spatial data.
Each Worldspace represents a complete AR experience where you can:
- Link a 3D Space
- Configure project information
- Design AR content
- Publish to the XenseAR application
Available Actions
Users can:
- Create a new project and configure display content
- View and edit existing projects
- Design and place AR content using XenseAR Unity Editor
1. Create a New Project (Worldspace)
Step 1
From the Menu Bar, select Xense Creator.
Step 2
Click Create Project → The system opens the project creation page.
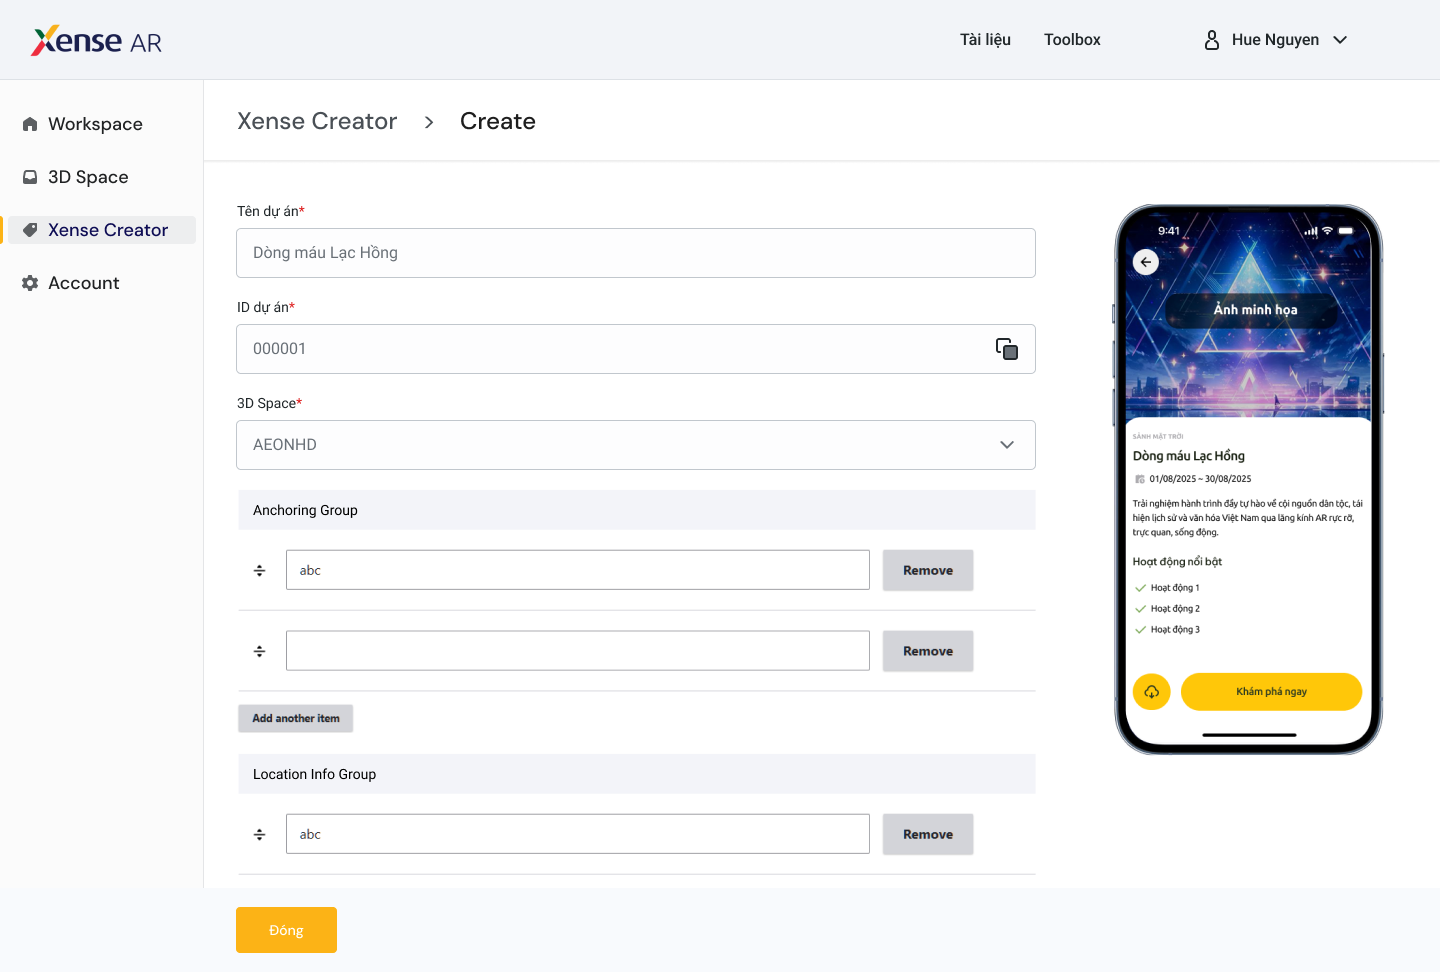
Step 3 — Fill in Project Information
| Field | Description |
|---|---|
| Project Name | Identifier name for the AR project |
| 3D Space | Spatial data used to anchor virtual content |
| Anchoring Group | Logical grouping of AR anchors in the 3D Space |
| Location Info Group | Group of destination points (used for navigation features) |
| Thumbnail Image | Project cover image |
| Description Images | Illustrative images for the project |
| Location | Physical location of the experience |
| Time | Event or activation time |
| Project Description | Detailed project information |
| Experience List | AR interaction activities included in the project |
| Front-end URL | Link used to display the project on app or web |
| Dynamic Occlusion | Enable/disable real-world object occlusion for AR content |
Step 4
After completing all required fields, click Save to create the project.

Step 5 — Design AR Content in Editor
After configuring the project on the Portal:
- Open XenseAR Unity Editor
- Load the linked 3D Space
- Place objects, configure anchors, and refine AR content
ℹ️ Info
All spatial content editing is performed inside the Unity Editor environment.
Step 6 — Publish the Project
Once content creation and editing are completed:
- Return to the Portal
- Click Publish
- Submit for review
After approval, the AR experience will be available on the XenseAR application.
2. Access and Manage Existing Projects
Step 1
From the Menu Bar, select Xense Creator.
Step 2
The system displays a list of projects associated with your account.

Step 3
Click on a project to view detailed information.
Step 4
Click Edit to modify project information.
Step 5
After making changes, click Save to update the project.
⚠️ Warning
If a published project is edited, it will revert to Draft status and must be re-submitted for approval.
Related Documentation
- 3D Space Creation & Management Guide
- XenseAR Unity Editor Guide
Refer to the respective documentation sections for detailed workflows.