Guide to Creating AssetBundles in Unity (workflow for 3D models)
This document describes the complete workflow from receiving a model to building an AssetBundle.
1. Prepare the source model
Models are typically provided in the following formats:
- FBX (
*.fbx) - OBJ (
*.obj) - GLTF / GLB (
*.gltf,*.glb) - Blender (
*.blend) - Separate textures:
- PNG
- JPG
- TGA
- EXR
2. Import the model into Unity
Drag the FBX or GLB file into the Project and keep it in a dedicated folder for easier management.
Material Setup
After importing, Materials often have missing textures or incorrect shaders, so check the Mesh Renderer and reassign textures as needed.
Recommended shader:
Universal Render Pipeline/LitCreate a Prefab
Do not build directly from the model file.
The Prefab is the asset that will be placed into the AssetBundle.
Prefab creation flow:
Model → Hierarchy → Drag into the Prefabs folder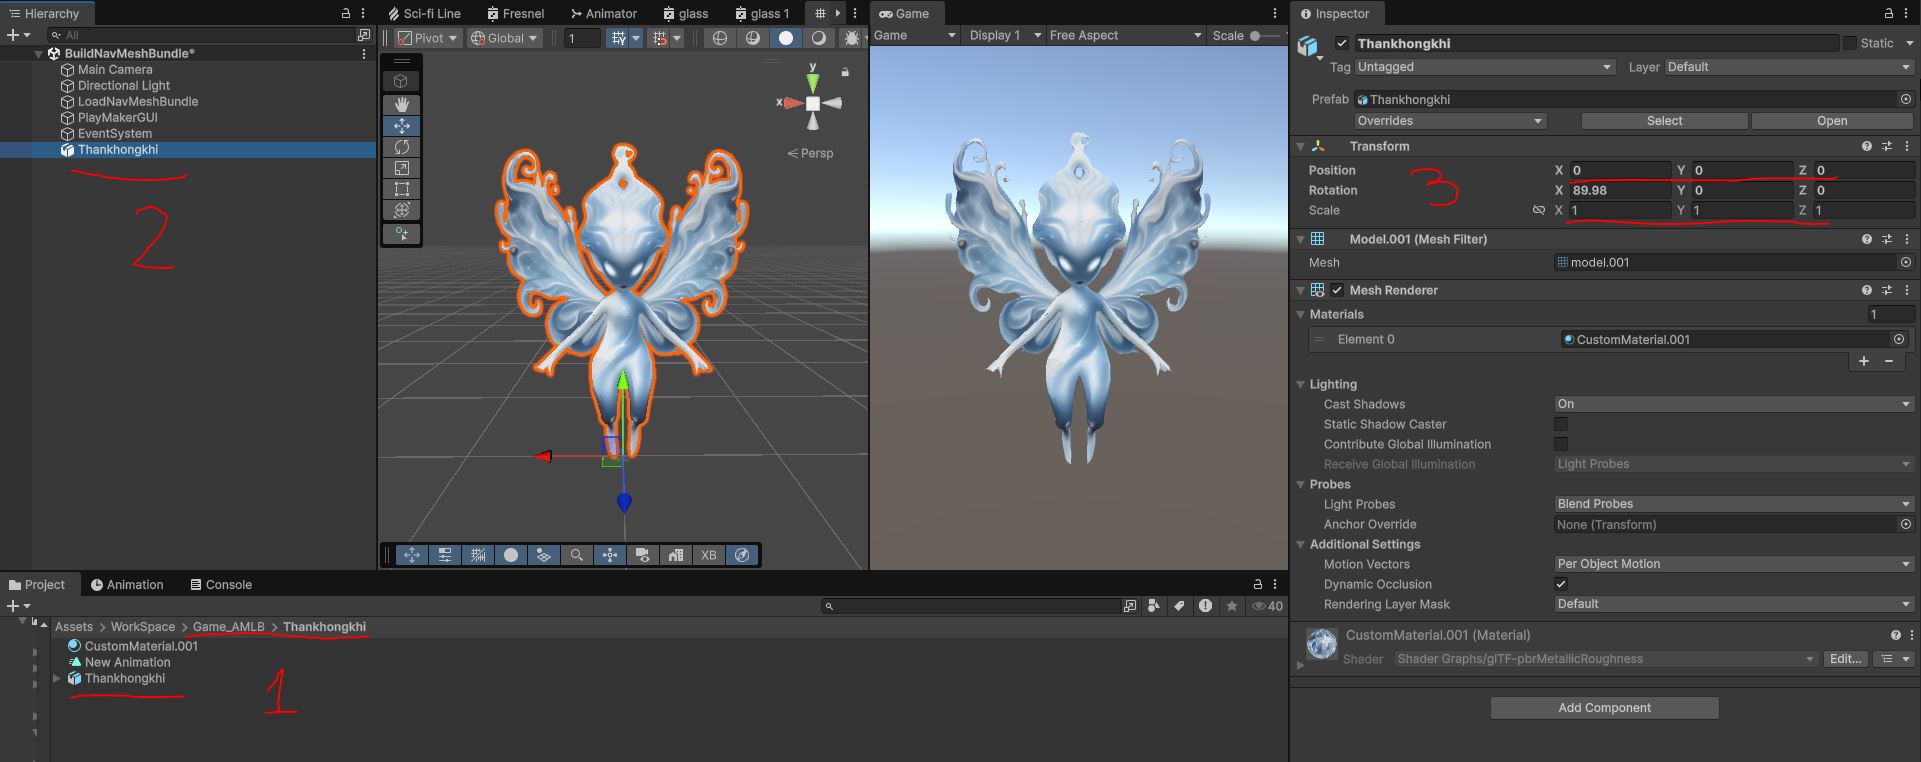
Note: It is recommended to place the Prefab at position
(0,0,0)with Scale =1for easier handling later.
Assign an AssetBundle Name
Select the Prefab you want to use.
In the Inspector window, at the very bottom, you will find:
AssetBundle = NoneClick it to create Asset Labels.
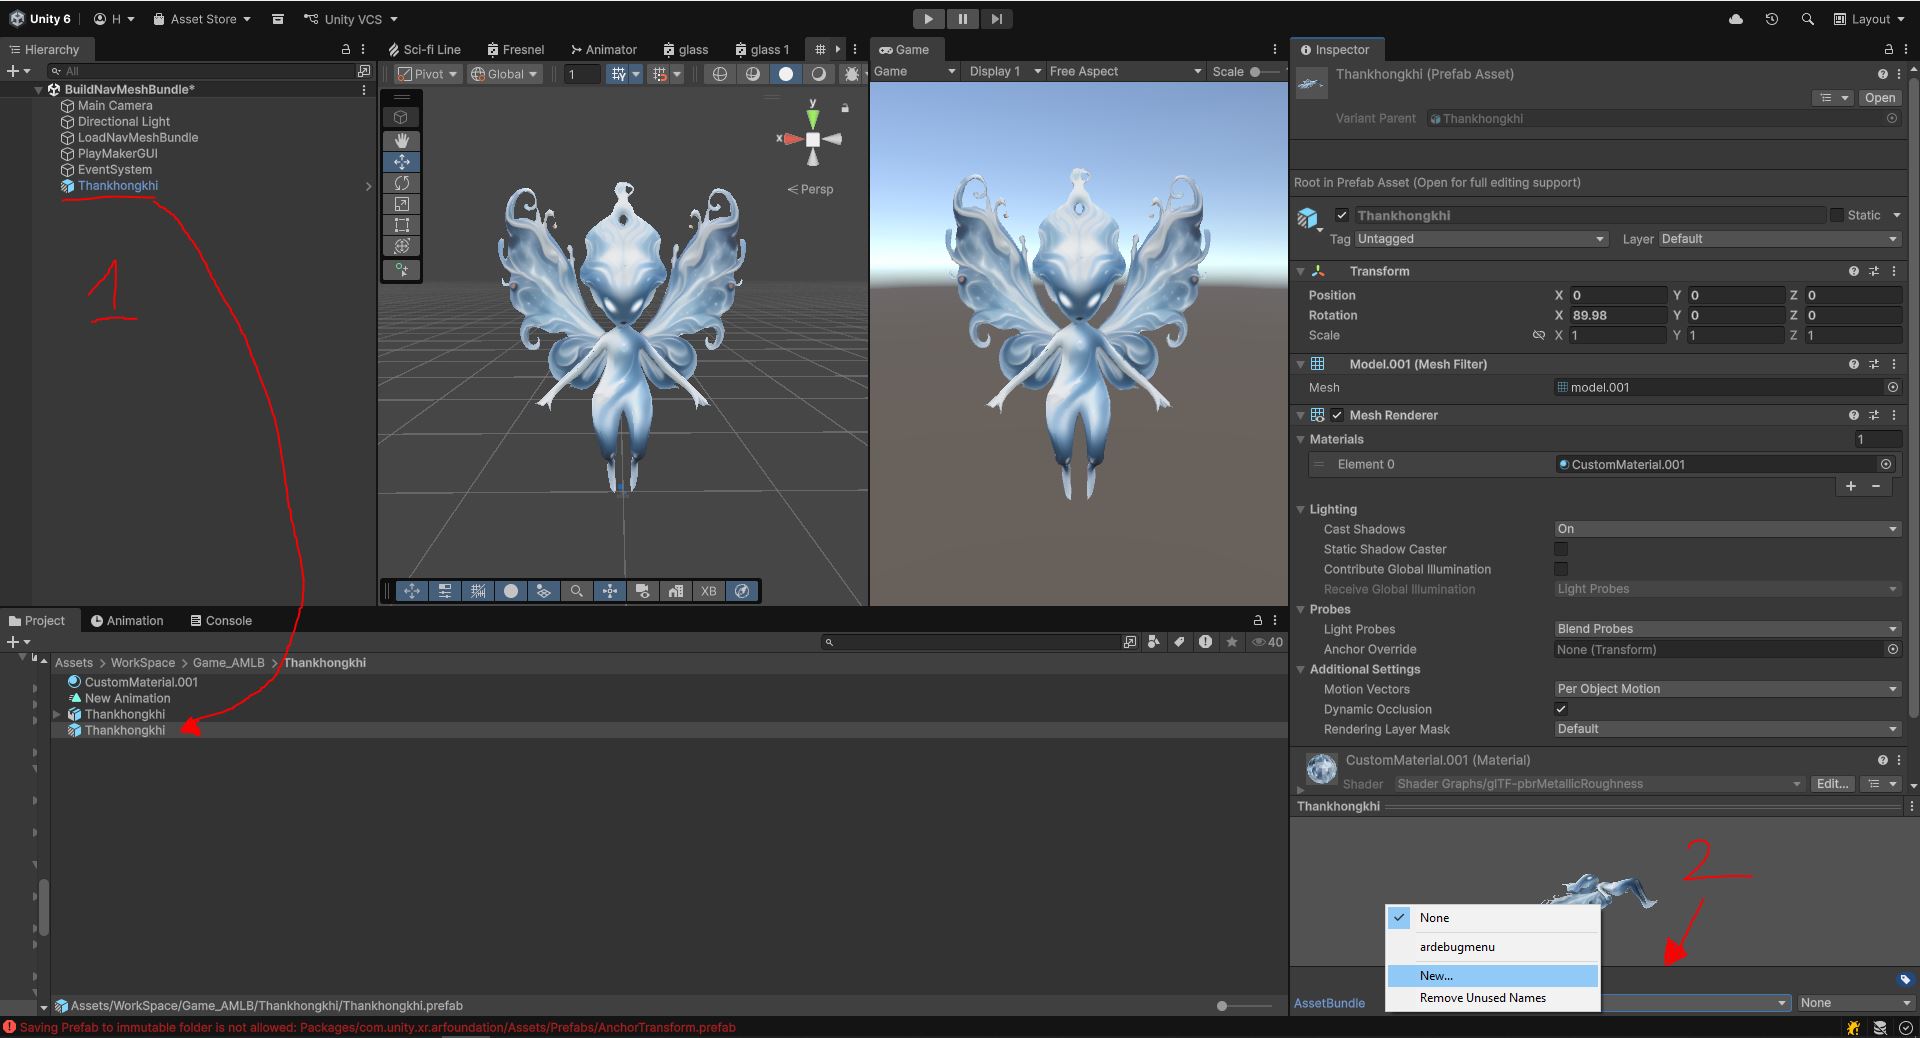
Naming Conventions
| Recommended | Avoid |
|---|---|
| building_a | Test |
| building_b | New Bundle |
| factory_01 | Bundle1 |
Build AssetBundle
After assigning the AssetBundle Name, proceed to build by:
- Select the target platform.
- Click Build.
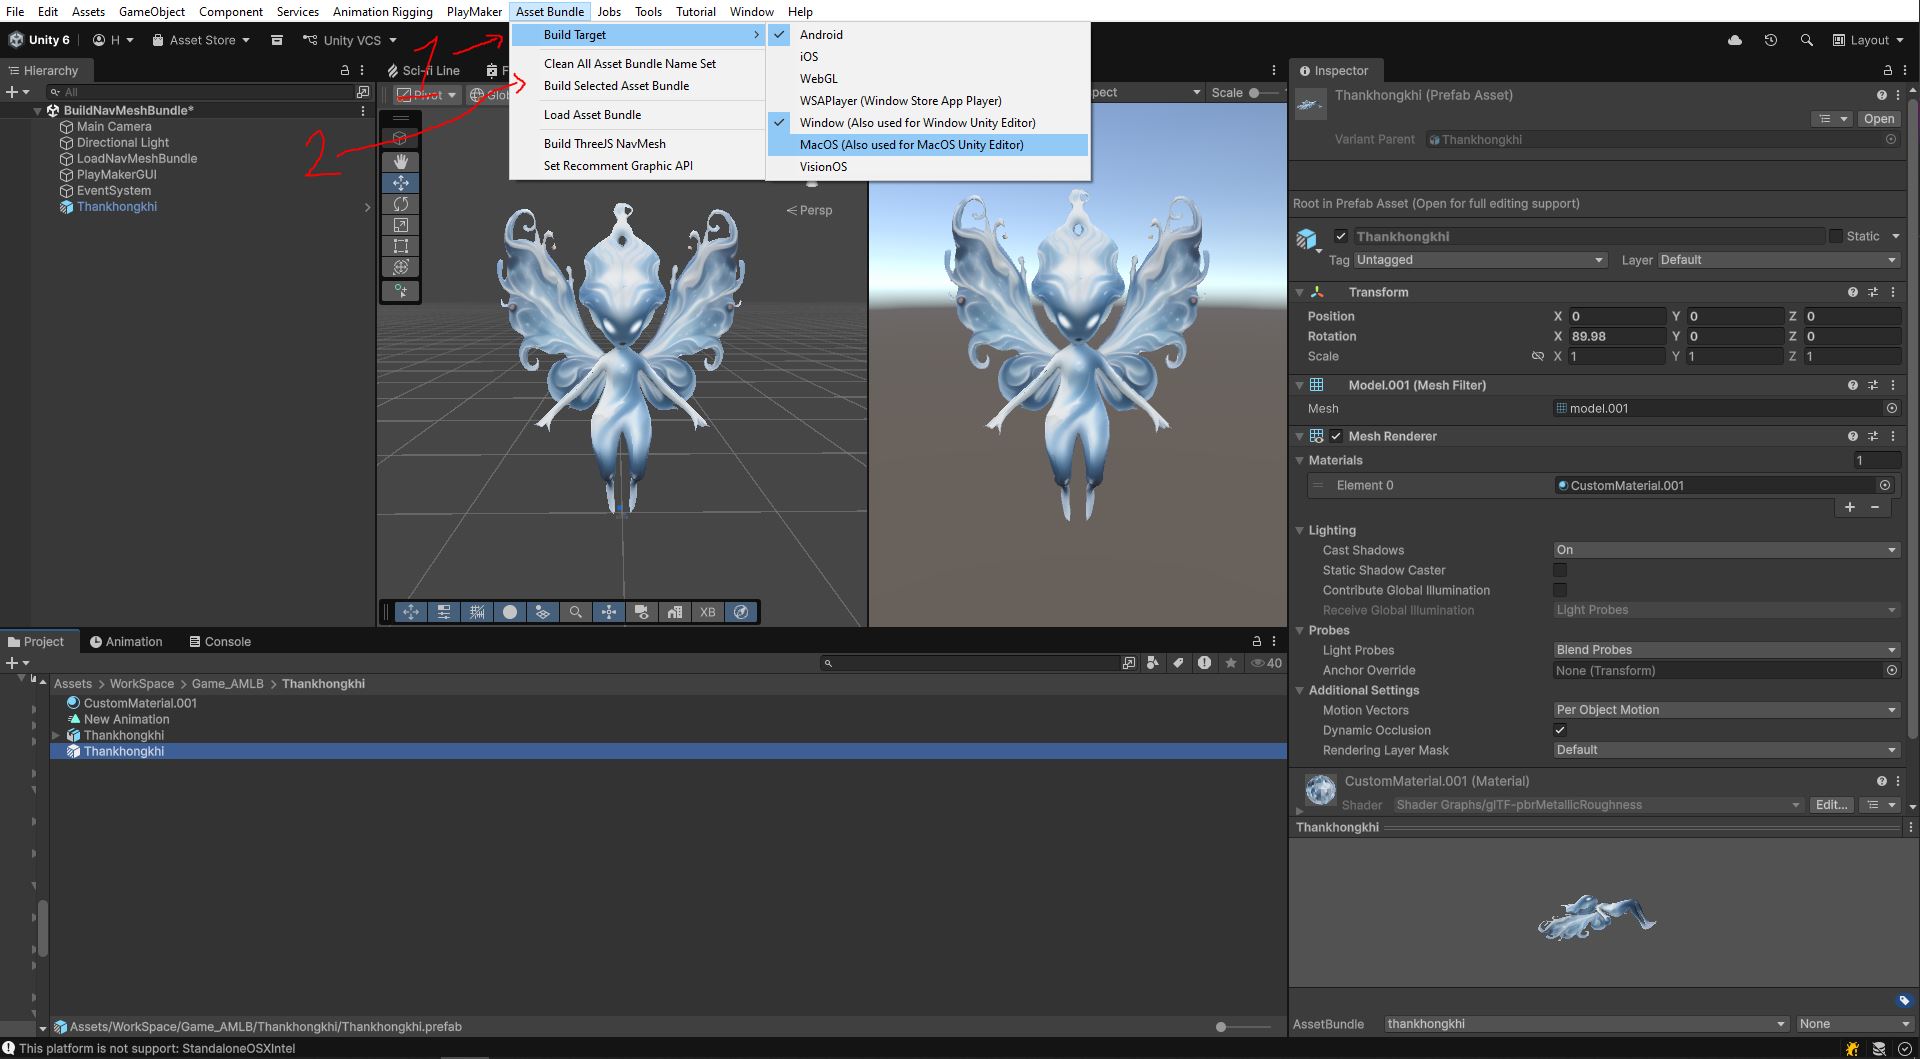
Result
Once the AssetBundle has been built successfully, the system will display a result window.
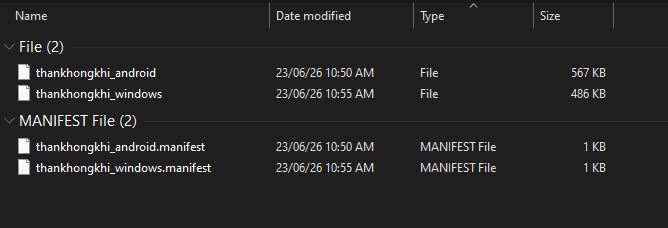
These AssetBundle files will be:
- Uploaded to the server
- Used to create new content in AR space