Xense AR Integration Guide for Using VPS Services in Android Native Apps
1. Download the Latest Template Project
Download the latest Template Project here .
2. Copy Required Libraries
Navigate to the libs directory and copy the following files into the libs directory of your target project (create the folder if it does not exist).
Copy the unityLibrary-release.aar file into the libs folder of the target project (important).
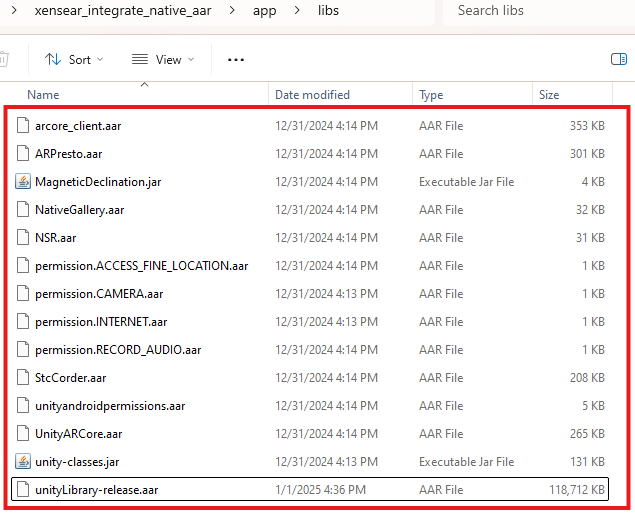
Note: Starting from version
2.0.0, the library is distributed separately from the Template Project. You can download the library package at the end of this document.
3. Configure the Project
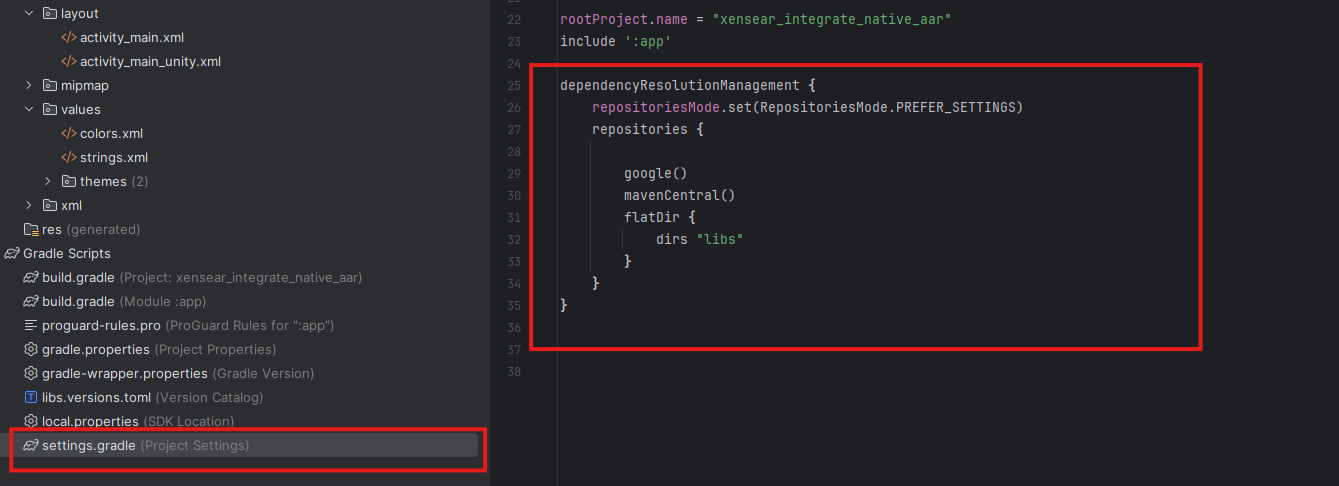
3.1 Add the Script to settings.gradle
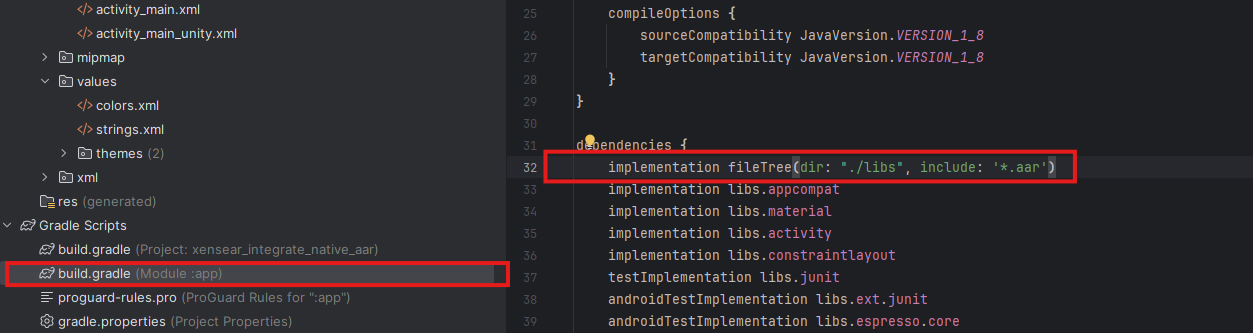
3.2 Add the Script to build.gradle
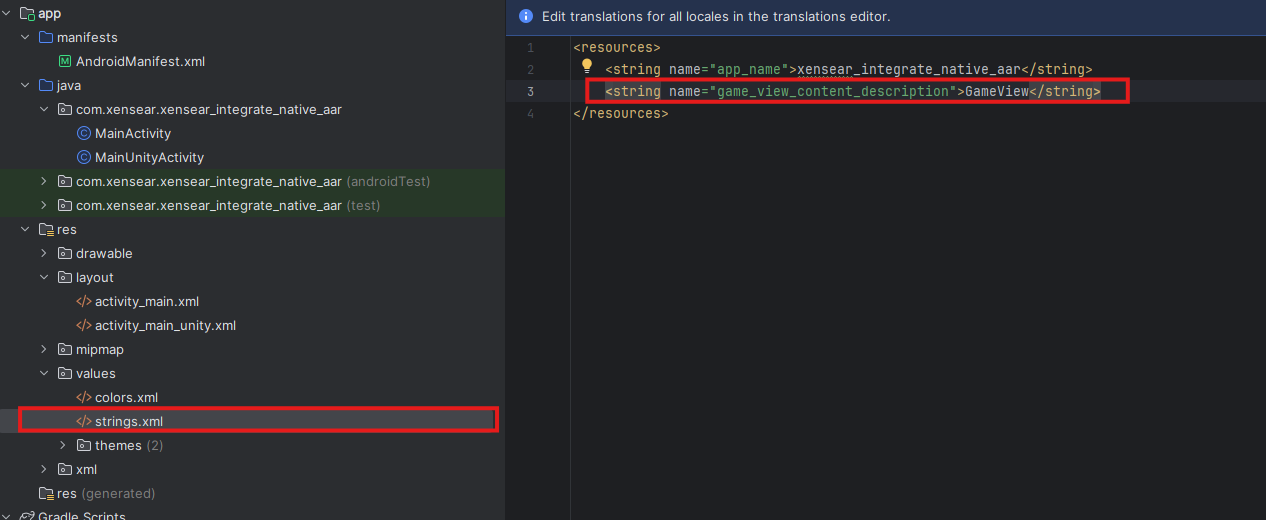
3.3 Add the Required Values to strings.xml
3.4 Sync Project with Gradle Files
After completing the above changes, select Sync Project with Gradle Files in Android Studio.
4. Create a Communication Activity
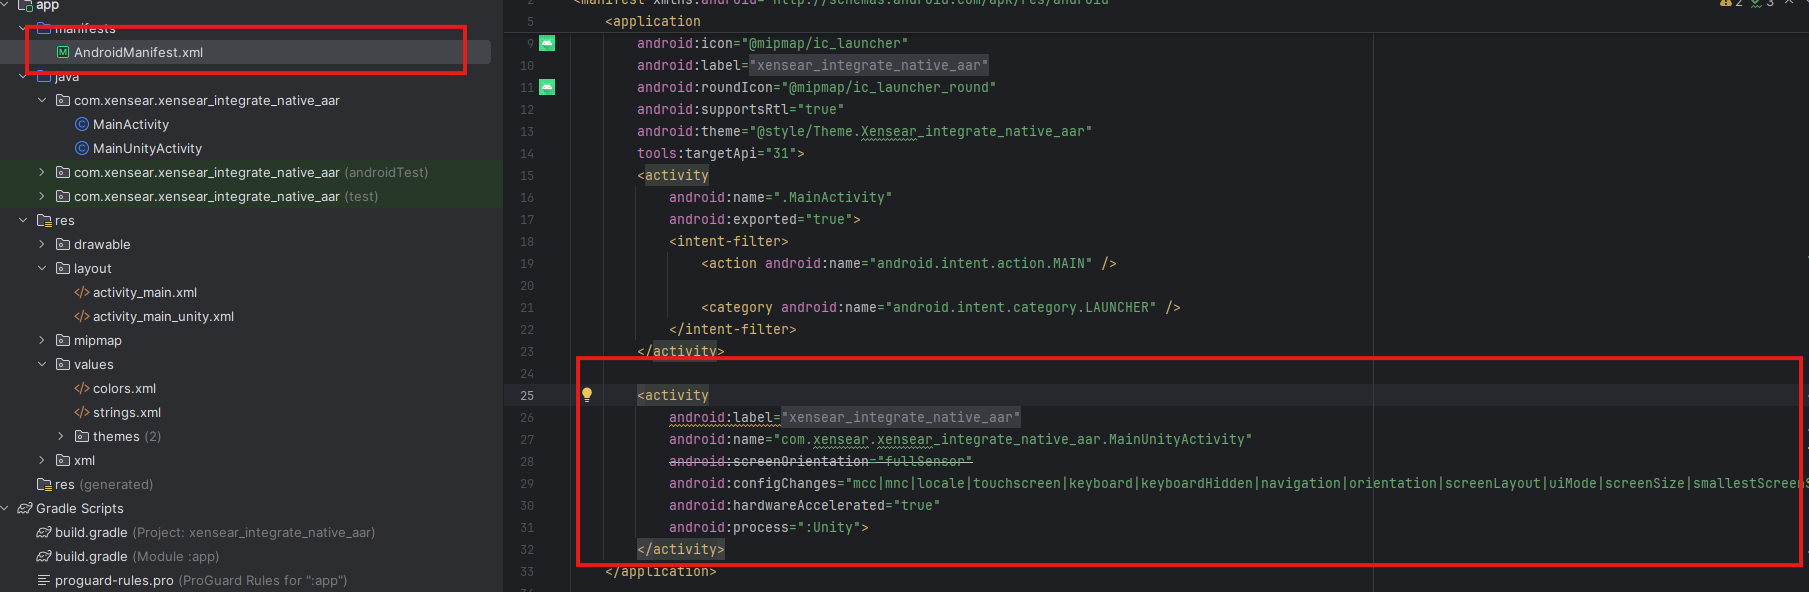
Create an Activity that extends CommunicationActivity and add its declaration to AndroidManifest.xml.
5. Send Messages to Unity
5.1 Declare the Communication Object
Declare the object used to communicate with Unity.

5.2 Send Messages Using SendCommandString
Send messages to Unity through the SendCommandString method.
5.3 Open the UI Provided by Xense
To open the UI provided by Xense, send messages with the following types in the same order as implemented in the Template Project:
- Send
updateSymmetricKeyandupdateEncryptedConfigafter receiving thewebviewReadymessage from Unity. - Send
updateHomeScreenUrlafter receiving theunityReadymessage from Unity.
updateSymmetricKey
Updates the Symmetric Key. This message must be sent first.
The key is provided through the Xense Portal.
updateEncryptedConfig
Updates the Encrypted Configuration Key.
The key is provided through the Xense Portal.
updateHomeScreenUrl
Updates the Home Screen URL.
The URL is provided through the Xense Portal.