Add Spatial Data (3D Space)
Create, View, and Manage 3D Space on XenseAR Portal
The XenseAR platform provides two types of 3D Space for building and deploying AR projects:
- User-created 3D Space: Users capture and upload spatial data. The system processes and generates a 3D mesh.
- Community-provided 3D Space: Users can directly use available 3D meshes from the XenseAR community library.
I. User-Created 3D Space
1. Register a New 3D Space
Step 1 — Prepare and Record Spatial Data
Users must capture and process spatial data before uploading to the Portal.
Refer to the recording guide:
👉 Spatial Map Recording Guide
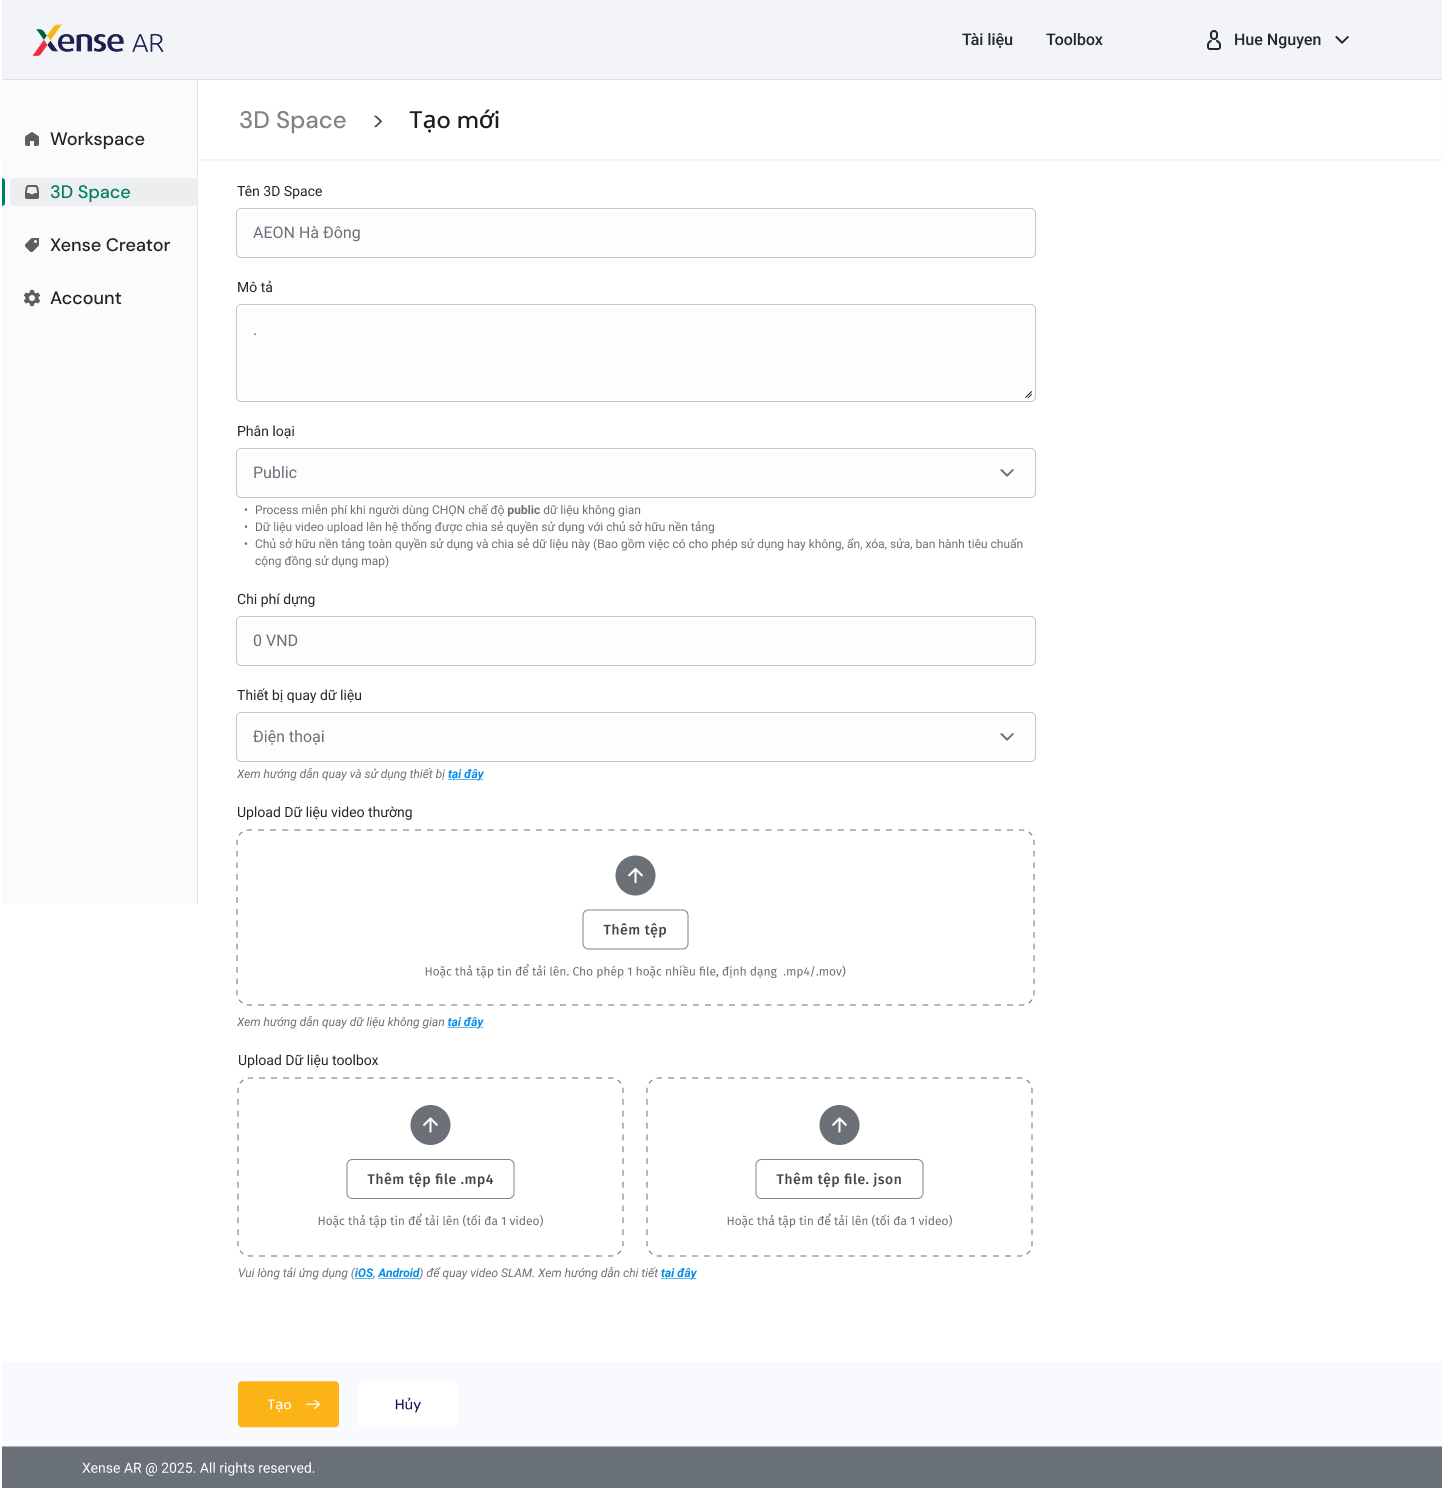
Step 2 — Select Create 3D Space
Navigate to:
3D Space → Create New
The system opens the 3D Space creation page.
Step 3 — Enter 3D Space Information
Provide required information such as:
- Space name
- Description
- Recording device
- Data type
- Additional metadata
Step 4 — Upload Data to Portal
Depending on the recording device, the Portal displays corresponding upload fields.
A. Recorded with 360 Camera
- 360 Video Data (
.360) — One or multiple files - Toolbox Data —
1 .mp4 file + 1 .json file - Trajectory Data —
1 .json file
B. Recorded with Mobile Device
- Toolbox Data —
1 .mp4 file + 1 .json file - Standard Video —
.mp4or.mov
⚠️ Warning
- Drag & Drop is supported.
- Upload only the required file formats.
- Data cannot be modified after clicking Save.
Step 5 — Submit 3D Space Request
After completing information and uploading files:
Click Create to start the processing workflow.
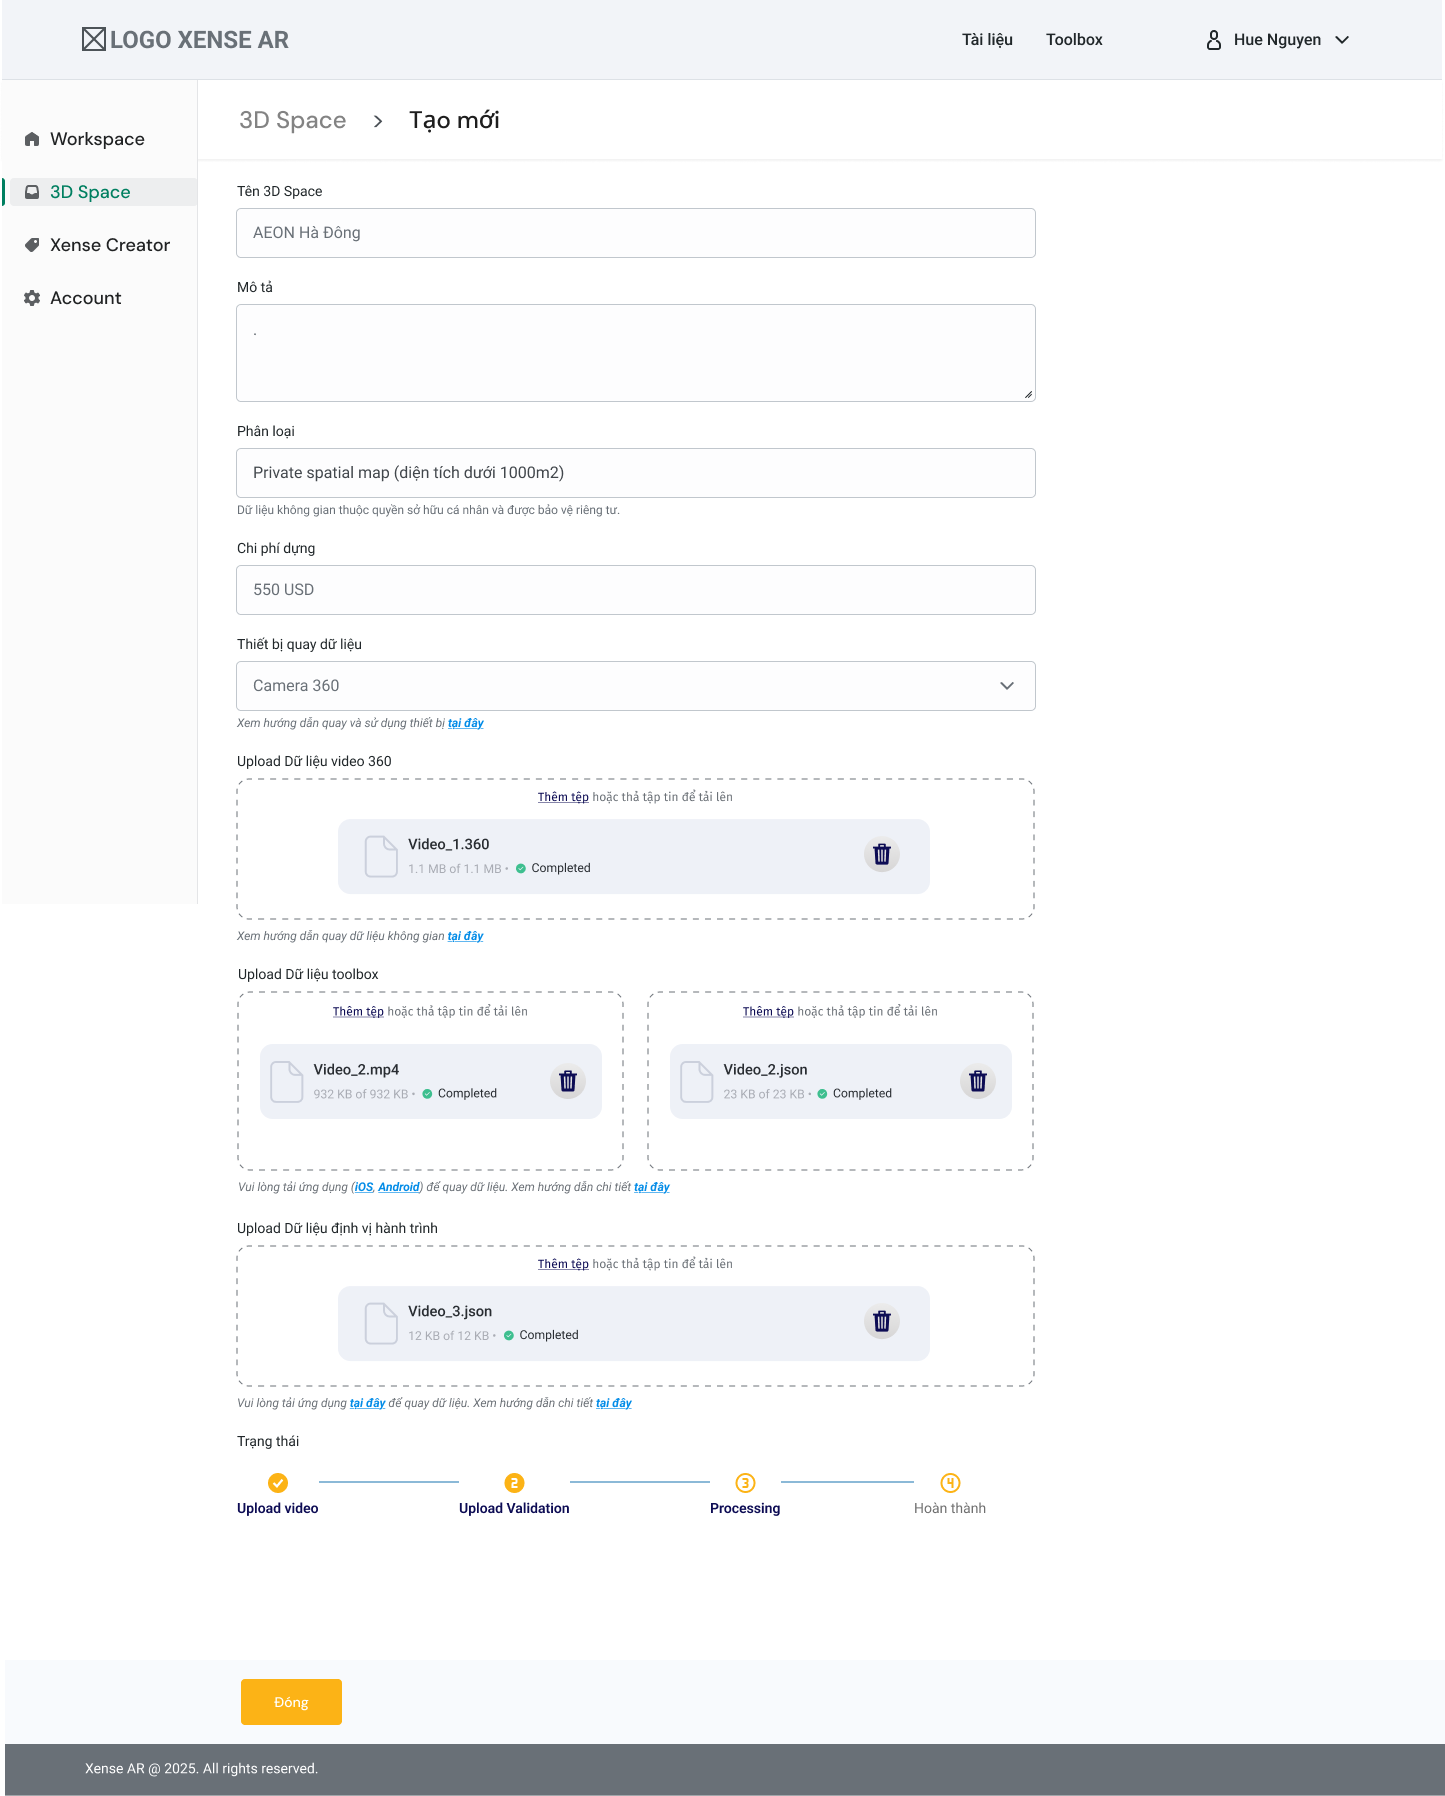
2. Track Processing Status
Step 1
Navigate to:
3D Space → Created

Step 2
Select a 3D Space to view detailed processing status.

| Status | Description |
|---|---|
| Validate | System verifies uploaded files |
| Processing | Data is being processed |
| Complete | 3D mesh generation completed successfully |
| Fail | Processing failed — error message displayed |
3. View 3D Mesh in Unity Editor
Step 1
Log in to XenseAR Unity Editor using your Portal account.
Step 2
The system displays all 3D Meshes associated with your account.
Step 3
Click Import Mesh to add it into the Scene.
Step 4
Create a new AR Project (Worldspace) linked to the selected 3D Space.
After that:
- Design AR content
- Place objects
- Configure anchoring
- Refine interactions
ℹ️ Info
All AR content editing is performed inside Unity Editor.
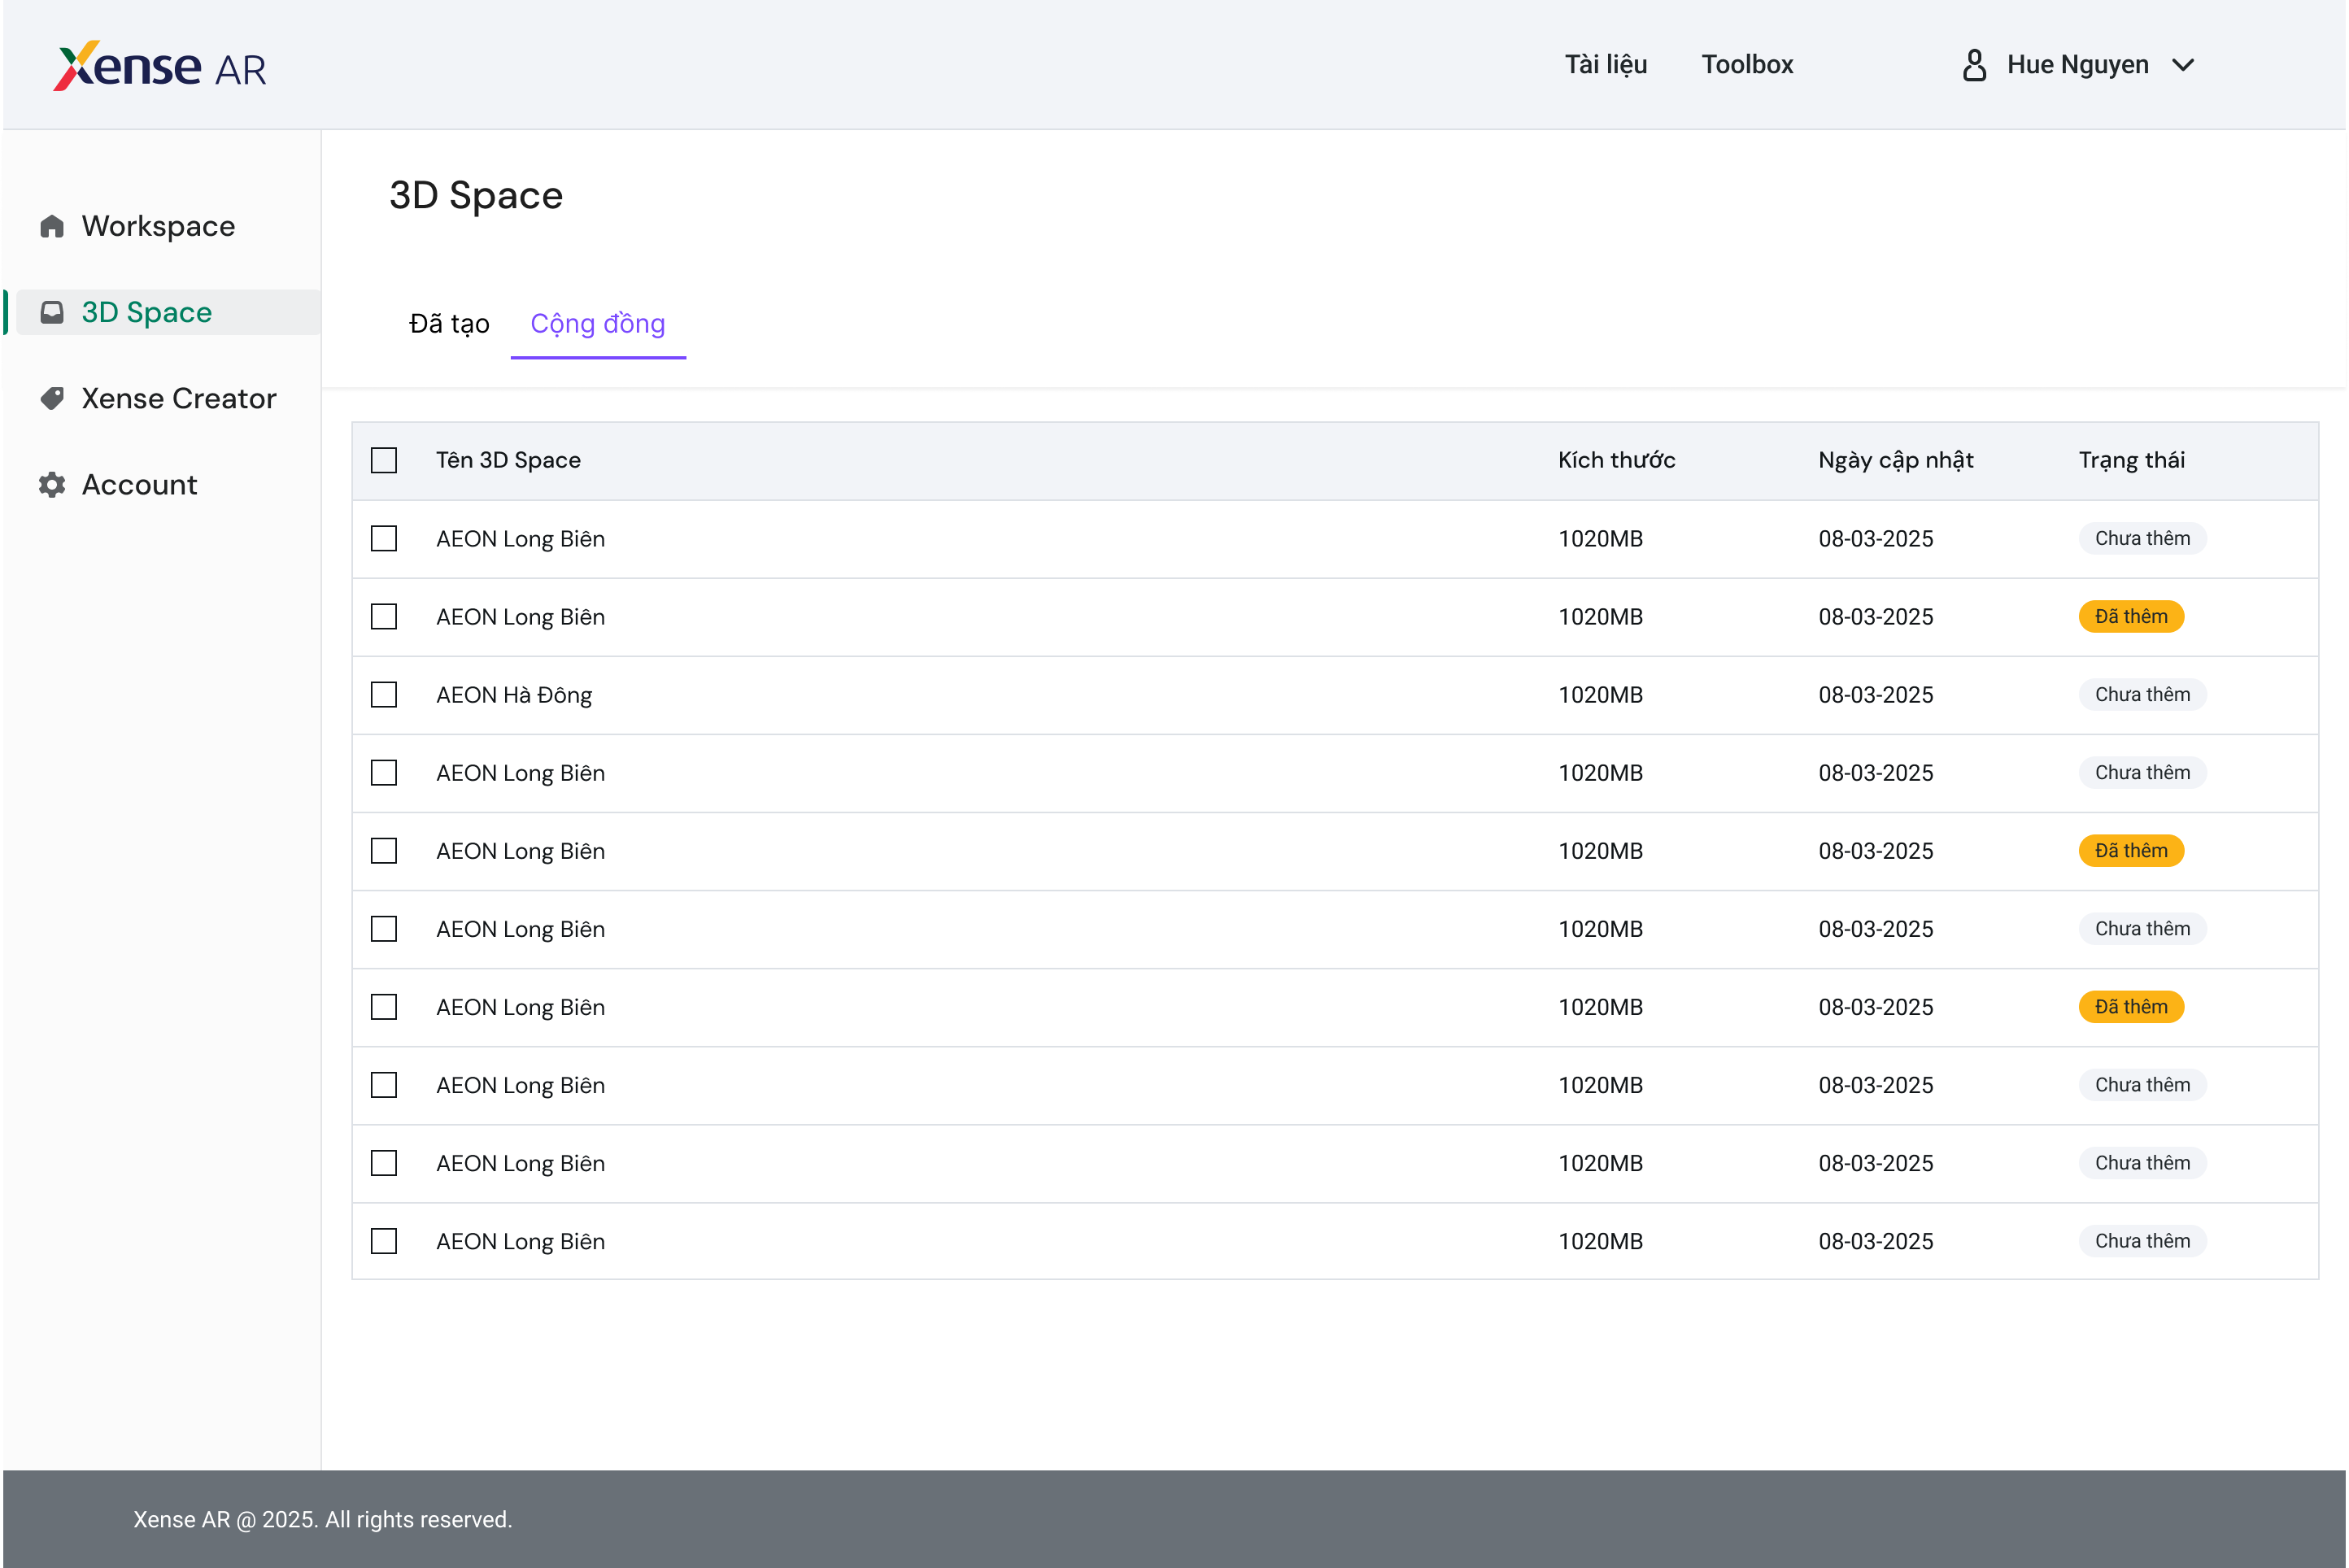
II. Community-Provided 3D Space
1. View and Add Community 3D Space
Step 1
Go to the Community section on the Portal.
Step 2
Browse the list of community-contributed 3D Spaces.
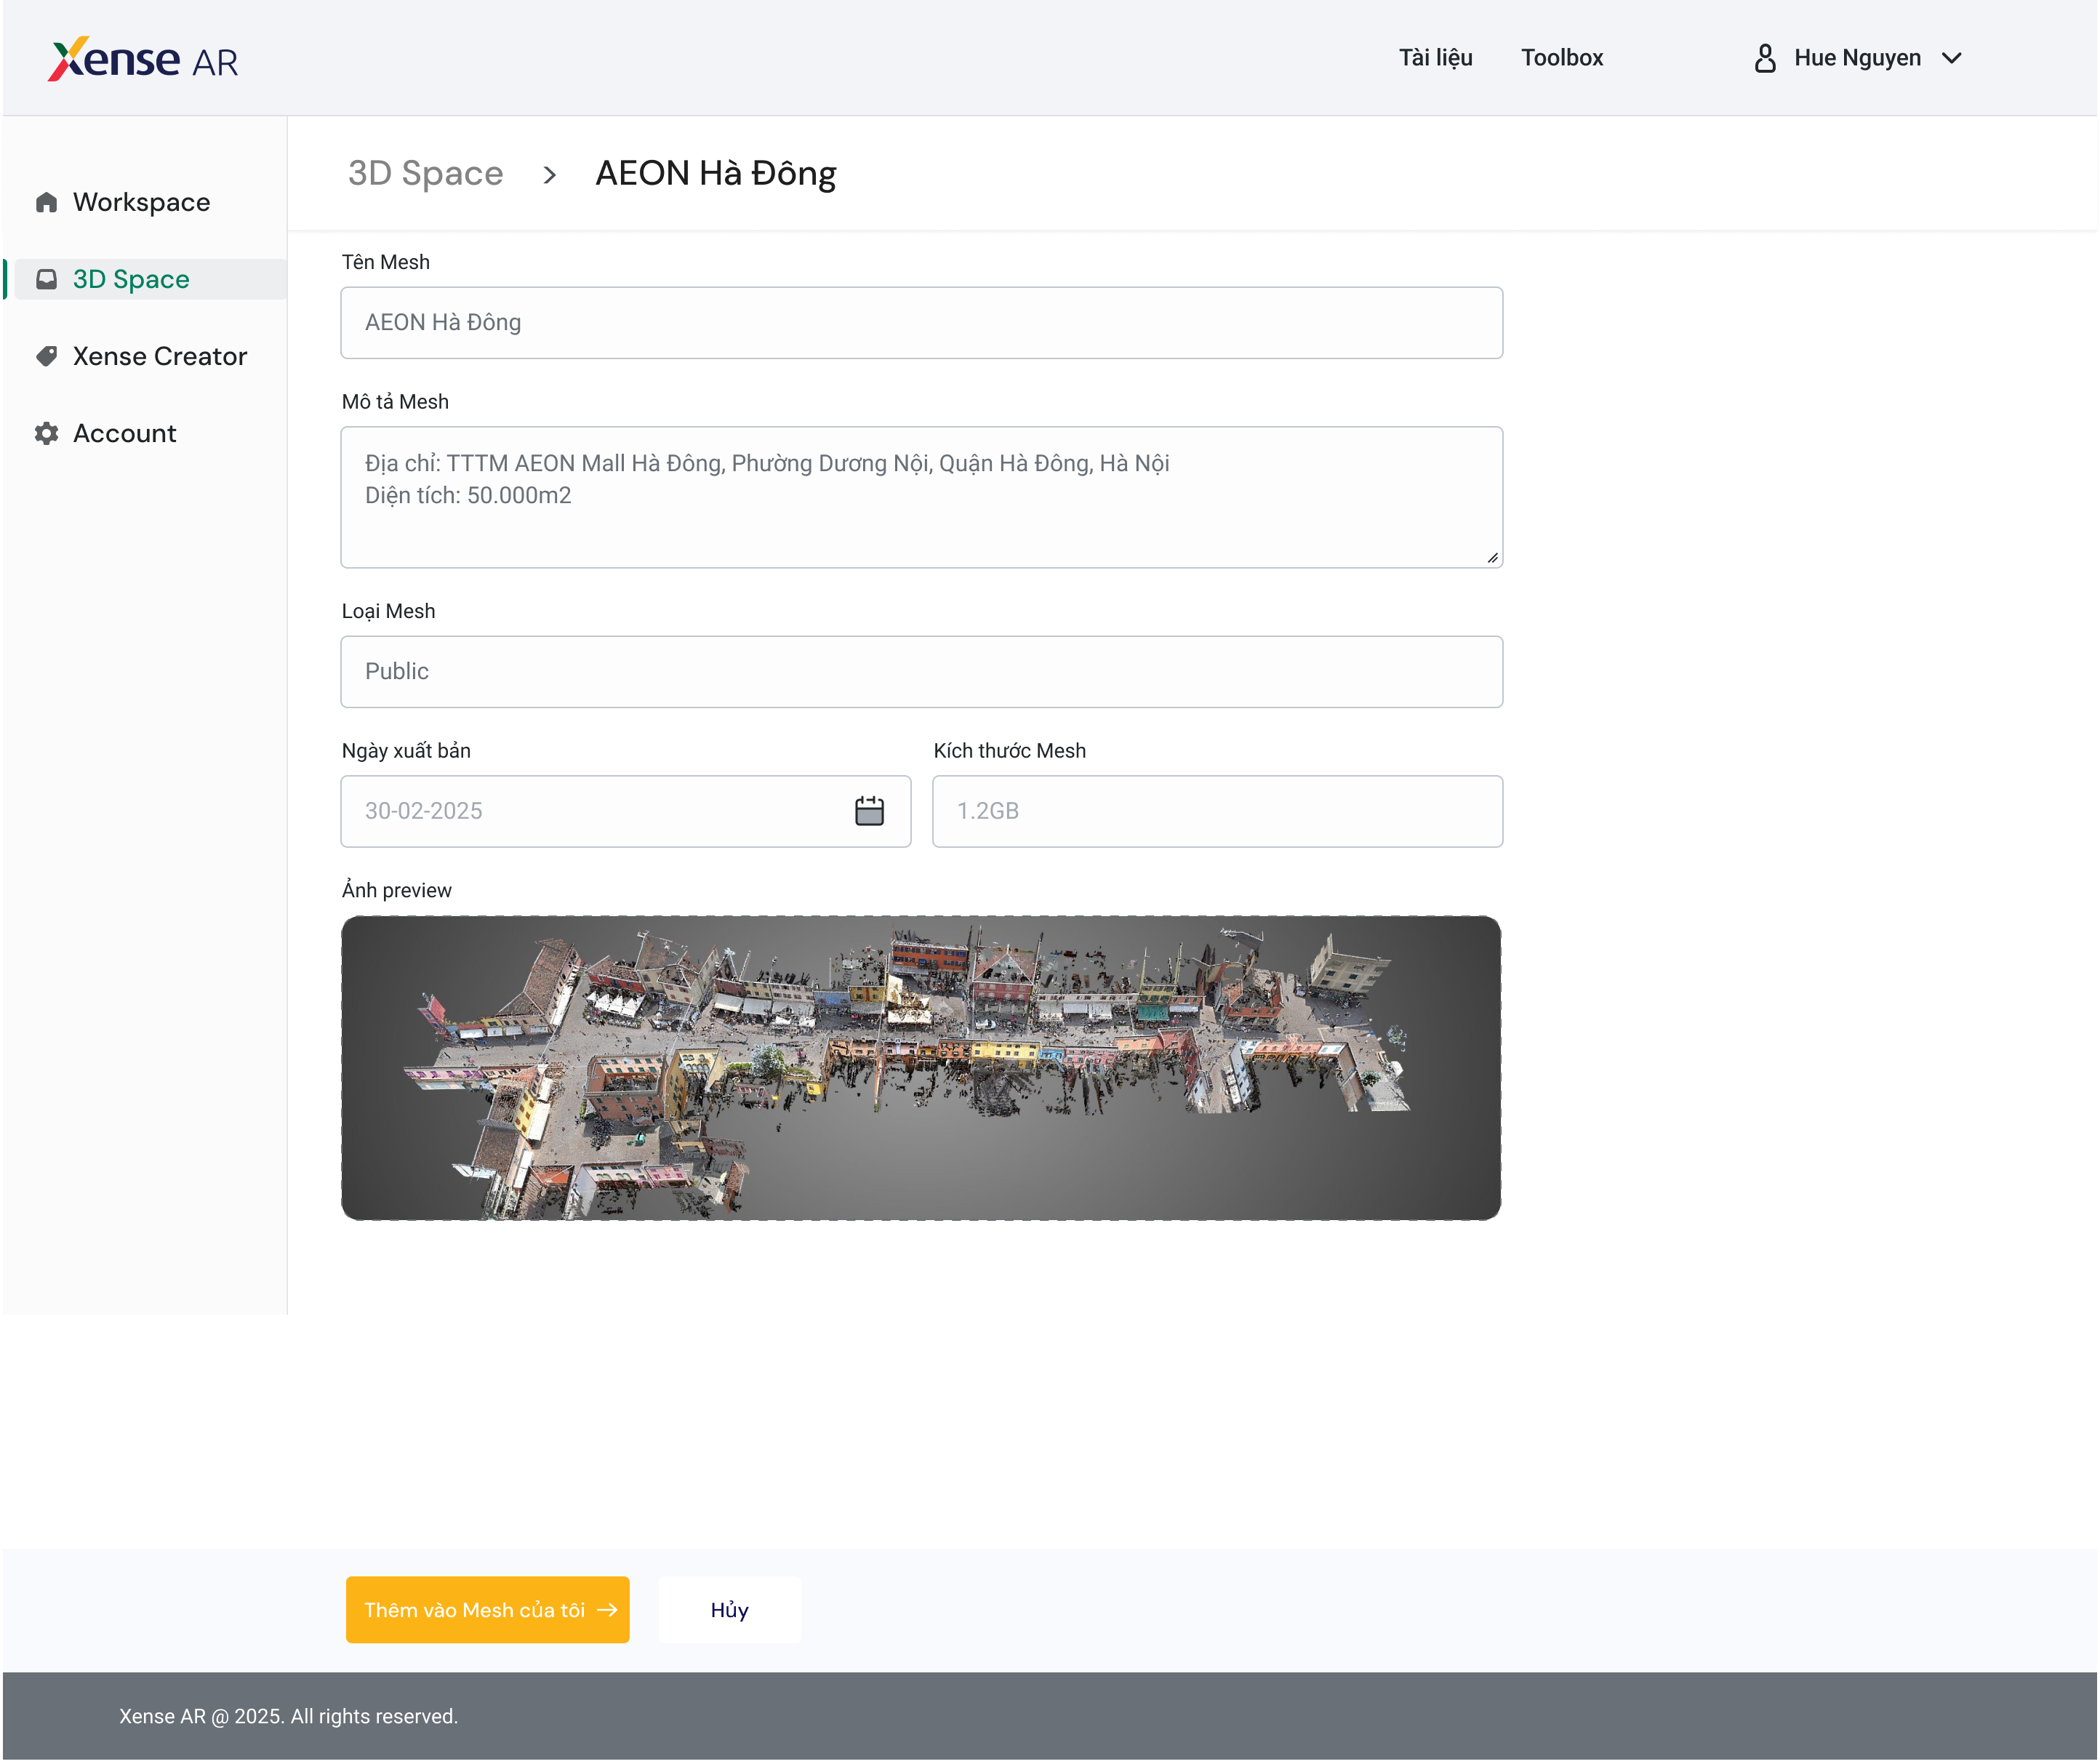
Step 3
Select a 3D Space to view detailed information.
Step 4
Click Add to My List to save it to your personal library.
2. View Community 3D Mesh in Unity Editor
Step 1
Log in to XenseAR Unity Editor using your Portal account.
Step 2
The system displays:
- Your owned 3D Meshes
- Community meshes added to your library
Step 3
Click Import Mesh to display it in the Scene.
Step 4
Create a new AR Project (Worldspace) linked to the selected 3D Space.
Then proceed to design, anchor, and refine AR content within Unity Editor.
⚠️ Warning
Ensure the selected 3D Space matches your intended physical location to avoid AR misalignment.