360 Camera Filming Guidelines
Filming with a 360 Camera – Optimal Solution for Large Spaces
Using a 360 camera enables fast and efficient recording of large areas, up to 500,000m².
This is an ideal solution for building detailed spatial data to support large-scale AR experiences.
Main contents:
- General Requirements
- 360 Camera Trajectory Planning Guide
- Spatial Video Recording Guide.
General Requirements
| No. | Equipment | Required | Detailed Requirements |
|---|---|---|---|
| 1 | Video Recording Device (360 Camera) | Required | Use 360 cameras such as GoPro Max, Insta360, etc. - Advantage: Only one pass per route is needed to capture the entire space (instead of 6 passes when using a phone). - Suitable for large and complex spaces. |
| 2 | Correct Data Collection App | Required | Use a smartphone (iPhone or Android), preferably iPhone 12 or later. - Install and use the XenseAR ToolBox application in Calibration mode to record correct data. |
| 3 | Trajectory Data Collection App | Required | Use a smartphone (iPhone or Android), preferably iPhone 12 or later. - Install and use the XenseAR ToolBox application in Trajectory mode to record trajectory data. |
| 4 | Tripod for Mounting Devices | Required | Use a tripod to mount both the 360 camera and the smartphone (for trajectory recording) during filming. |
| 5 | Stabilizing Gimbal | Optional | Can be used to improve video stability, but not mandatory. |
360 Camera Trajectory Planning Guide
| Section | Detailed Instructions |
|---|---|
| Objective | - Capture all viewpoints and standing positions within the space. - Ensure frame-to-frame continuity in the video. - Plan trajectories for areas larger than 1,000m² with complex paths, multiple corners and turns. - For spaces with strong lighting differences or sudden transitions (e.g., gates, tunnels), limit passing through these areas when possible. |
| Trajectory Planning Principles | - Scan the entire space by designing fully covered routes. - Each path must be recorded at least twice (3+ times if complex). - Follow closed-loop paths to ensure continuous data. - For large spaces: divide into smaller zones, ensuring at least two connecting paths between zones. - Avoid common mistakes: single-pass recording, no loops between zones, missing narrow passages. |
| How to Draw the Trajectory | Step 1: Collect a 2D map - Outdoor areas: Google Maps, AutoNavi. - Floor plans / Construction drawings. - Survey and sketch the space manually if needed. Step 2: Draw a trajectory suitable for the space - Follow main pathways and create loops around areas. - Pay attention to connection points between zones to avoid blind spots. - Suggested tools: GIF Maker, GIF Brewery, or any tool that allows drawing route trajectories. |
| Common Trajectory Samples | Sample 1: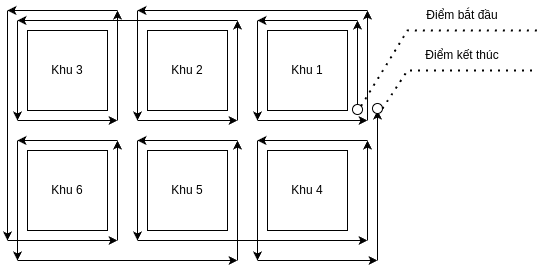 Sample 2  |
| Principle Violations | 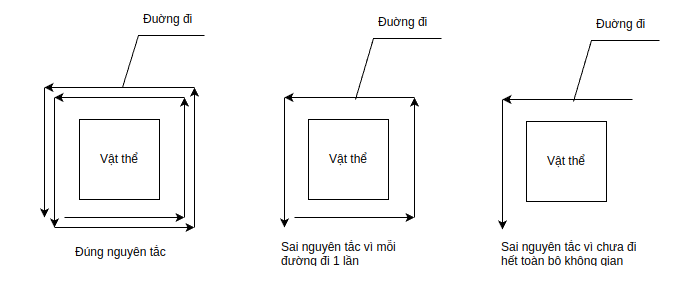 |
| Trajectory Example |  |
Detailed 360 Camera Filming Workflow
| No. | Task | Objective | Details & Suggestions |
|---|---|---|---|
| 0 | Preparation | Prepare equipment and environment | - Survey the area and draw the movement trajectory before filming. - Fully charge the smartphone and 360 camera. - Recommended operator height: 1.55m–1.70m for optimal camera angle. - Walking speed: ~0.5m/s for stable footage. - Distance to objects: optimal 2m (minimum 0.5m in narrow spaces). |
| 1 | Step 1: Device Setup | Properly mount equipment before recording | - Mount the 360 camera and smartphone on a tripod or support stick. - Position the 360 camera ~30cm above head level, ~15cm above ground clearance. - Set recording quality to 5.6K – 25FPS. 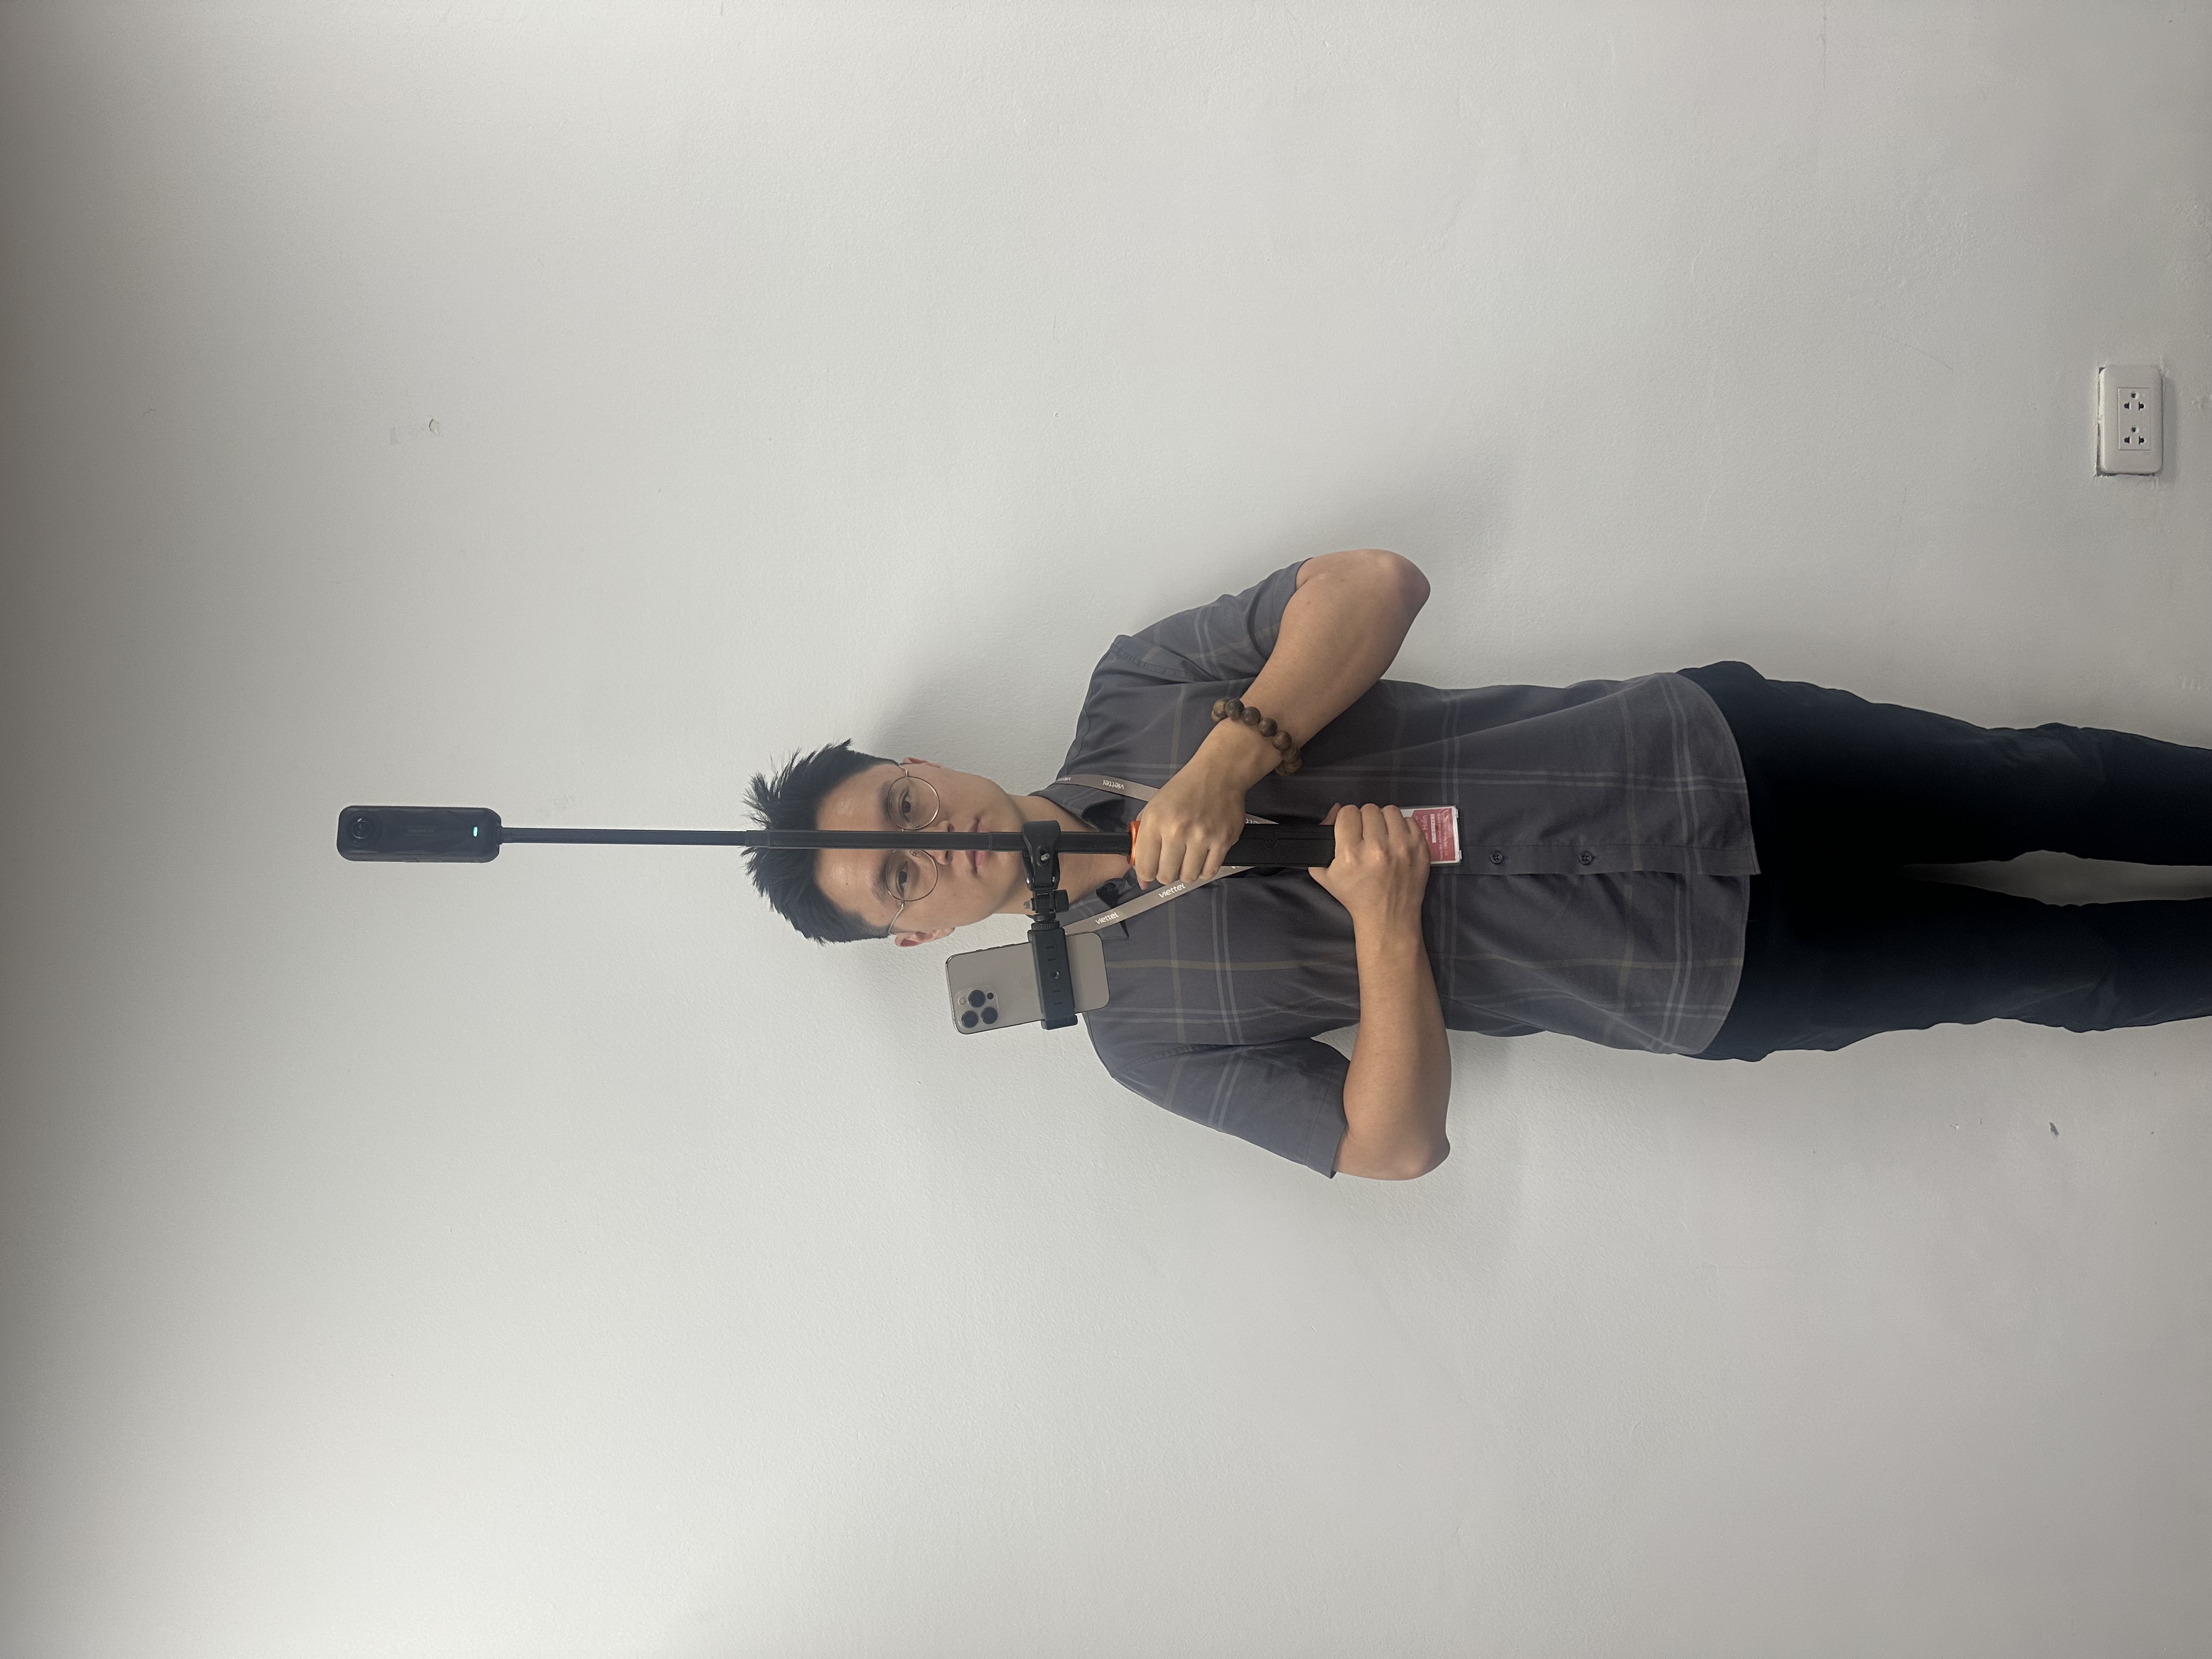 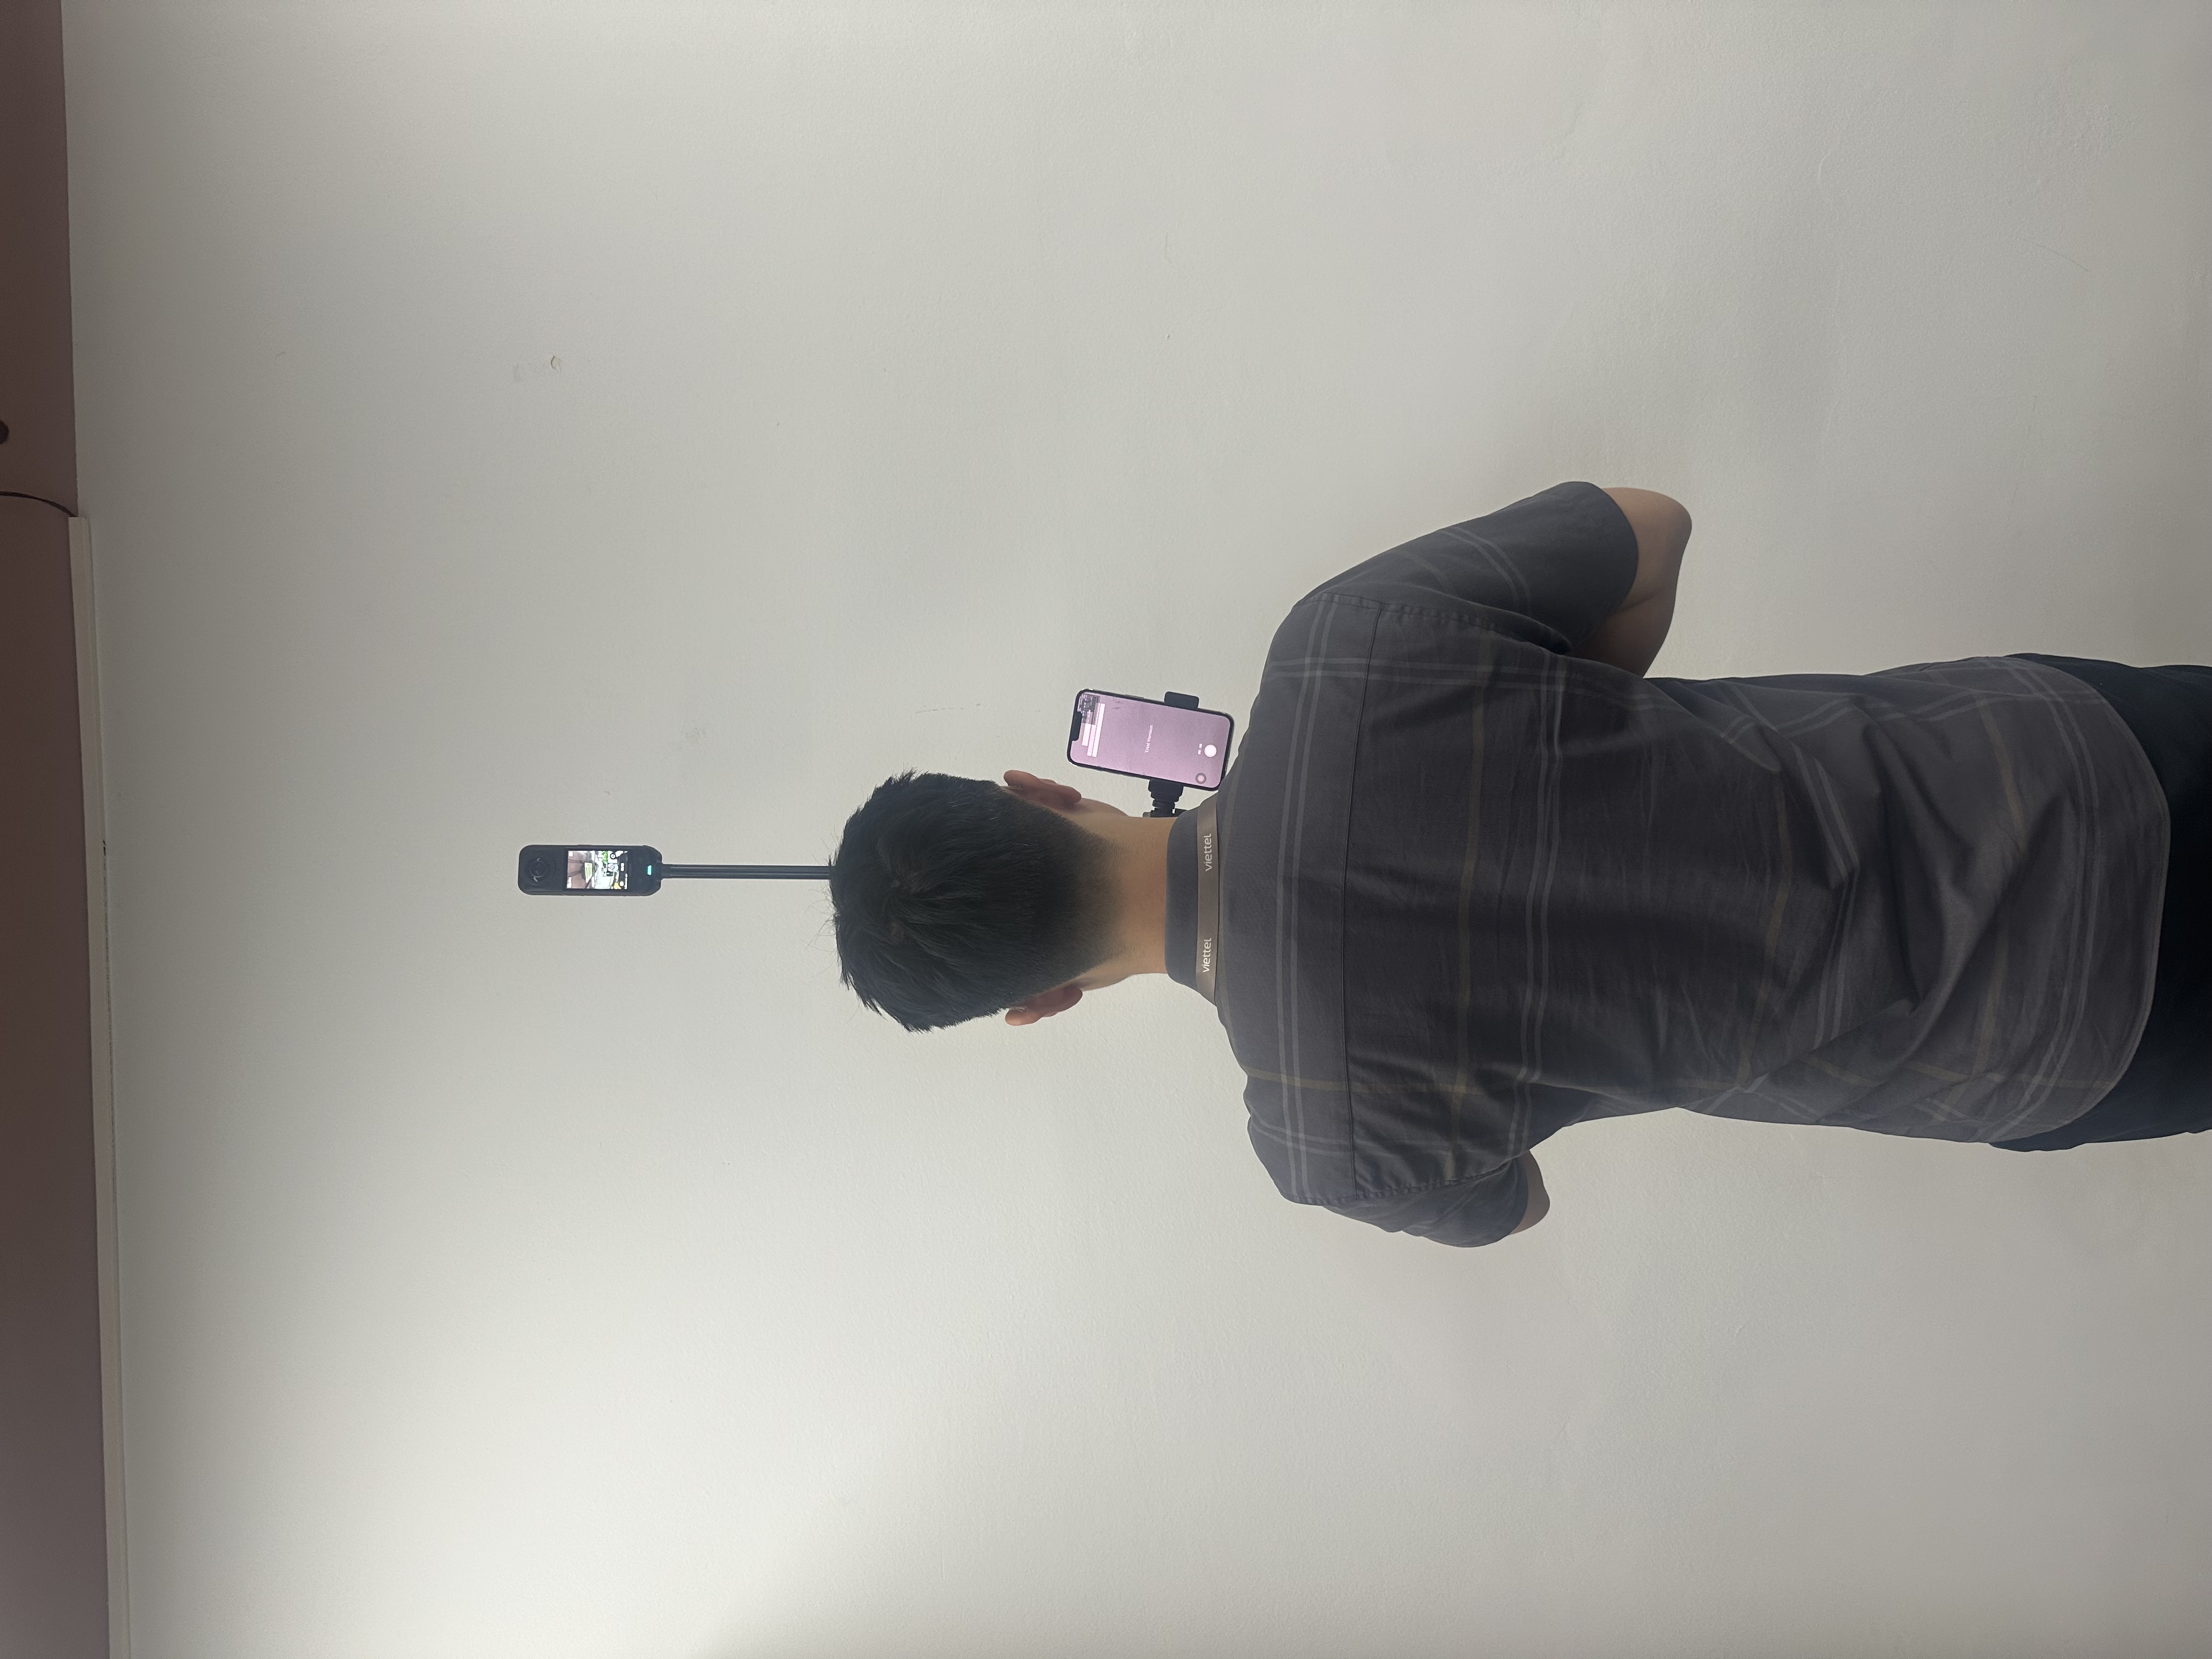 |
| 2 | Step 2: Data Recording | Record synchronized 360 video and phone data | - Open XenseAR ToolBox in Trajectory mode on the smartphone. - File naming format: Name_yyyymmdd_traject (e.g., OfficeA_20250407_traject). - Press record on the phone first, then immediately (< 1 second) press record on the 360 camera. - Keep XenseAR ToolBox running continuously during recording. - Move strictly according to the pre-drawn trajectory.  |
| 3 | Step 3: Stop Recording | Properly end the recording session | - Stop recording on the smartphone first, then stop recording on the 360 camera. |
| 4 | Step 4: Record Correct Data | Calibrate the virtual space | - Record correct data following the instructions in the XenseAR ToolBox User Guide section. |
| 5 | Step 5: Post-Processing Data | Collect all required data files | Copy all data to a computer: - 360 Camera: files with .360 extension. - Smartphone (XenseAR ToolBox): Calibration Trajectory - Note: When recording large spaces, the 360 camera may split long videos into multiple smaller files. |
| 6 | Step 6: Upload Data | Submit data for system processing | - Upload all files to the developer portal or send them to platform support staff. |
Last updated on