LABELING EDITOR USER GUIDE
1. Overview
Labeling Editor is a feature that allows users to create and manage information labels (Labels) on the map space in XenseAR Web Editor.
Labels are used to mark, identify, and provide visual information about locations or objects on the map. Users can configure the displayed content, position, and related properties of a Label directly within the editing environment.
After the configuration is completed, Labels can be displayed in the XenseAR App when users access the corresponding deployment area.
Important Note: The Labeling Editor only supports displaying Labels in the App when the Spatial Map is created/imported using the “Import Map 2.5D” function.
For Maps imported using “Import 3D Mesh” or “Import 3D Titles”, Labeling is not supported for display in the App.
2. Purpose
Labeling Editor is used to:
- Create Labels at specific locations on the Map.
- Define names and informational content for Labels.
- Specify the display position of Labels.
- Configure Label display properties.
- Manage and edit existing Labels.
- Check Label positions in the 3D space.
- Display Label information in the App when users experience AR.
3. Requirements
Before using Labeling Editor, make sure that the following requirements are met:
- The user is logged in to XenseAR Portal.
- A Project has been created or selected.
- The Project is linked to the appropriate Spatial Map.
- The Spatial Map must be imported using the Import Map 2.5D function.
- The Map has been successfully loaded into Web Editor.
- The user has permission to edit the Project.
Important Map Requirements
| Map Type | Labeling Editor | Display Labels in App |
|---|---|---|
| Import Map 2.5D | ✅ | ✅ |
| Import 3D Mesh | ✅ | ❌ |
| Import 3D Titles | May not be supported | ❌ |
Recommendation: If a Project requires Labeling, select Import Map 2.5D when preparing the Spatial Map.
4. Accessing Labeling Editor
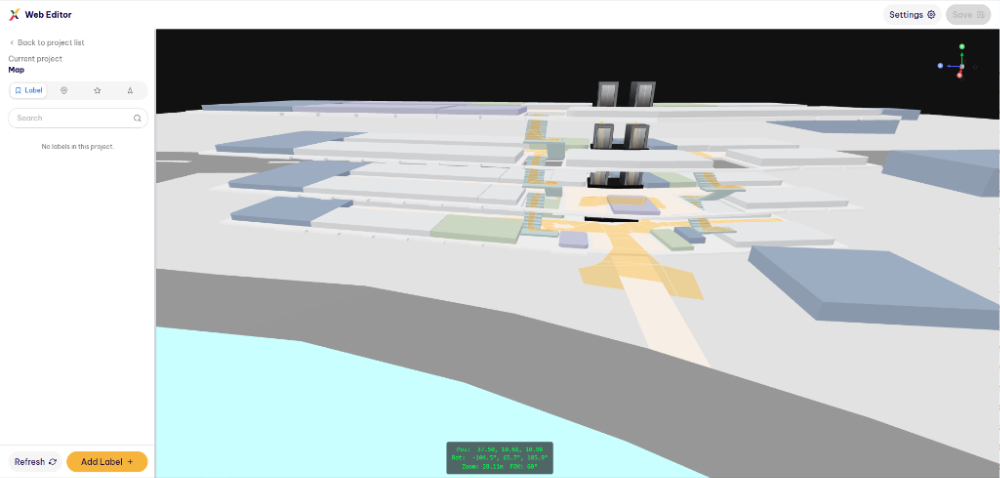
Navigate to Web Editor → Map Editor → Open Project → Label.
After opening the Project in Web Editor:
- Open the Labeling Editor tab.
- Check the current Map.
- Make sure the 3D space has been fully loaded.
- Identify the area where the Label needs to be placed.
Note: If a Label has been created but does not appear in the App, check the type of Map being used. Make sure the Map was imported using Import Map 2.5D.
5. Creating a New Label
After accessing the Labeling Editor tab:
Web Editor → Open Project → Label
Step 1: Select the Label Position
In the 3D space, identify the location where the Label should be created.
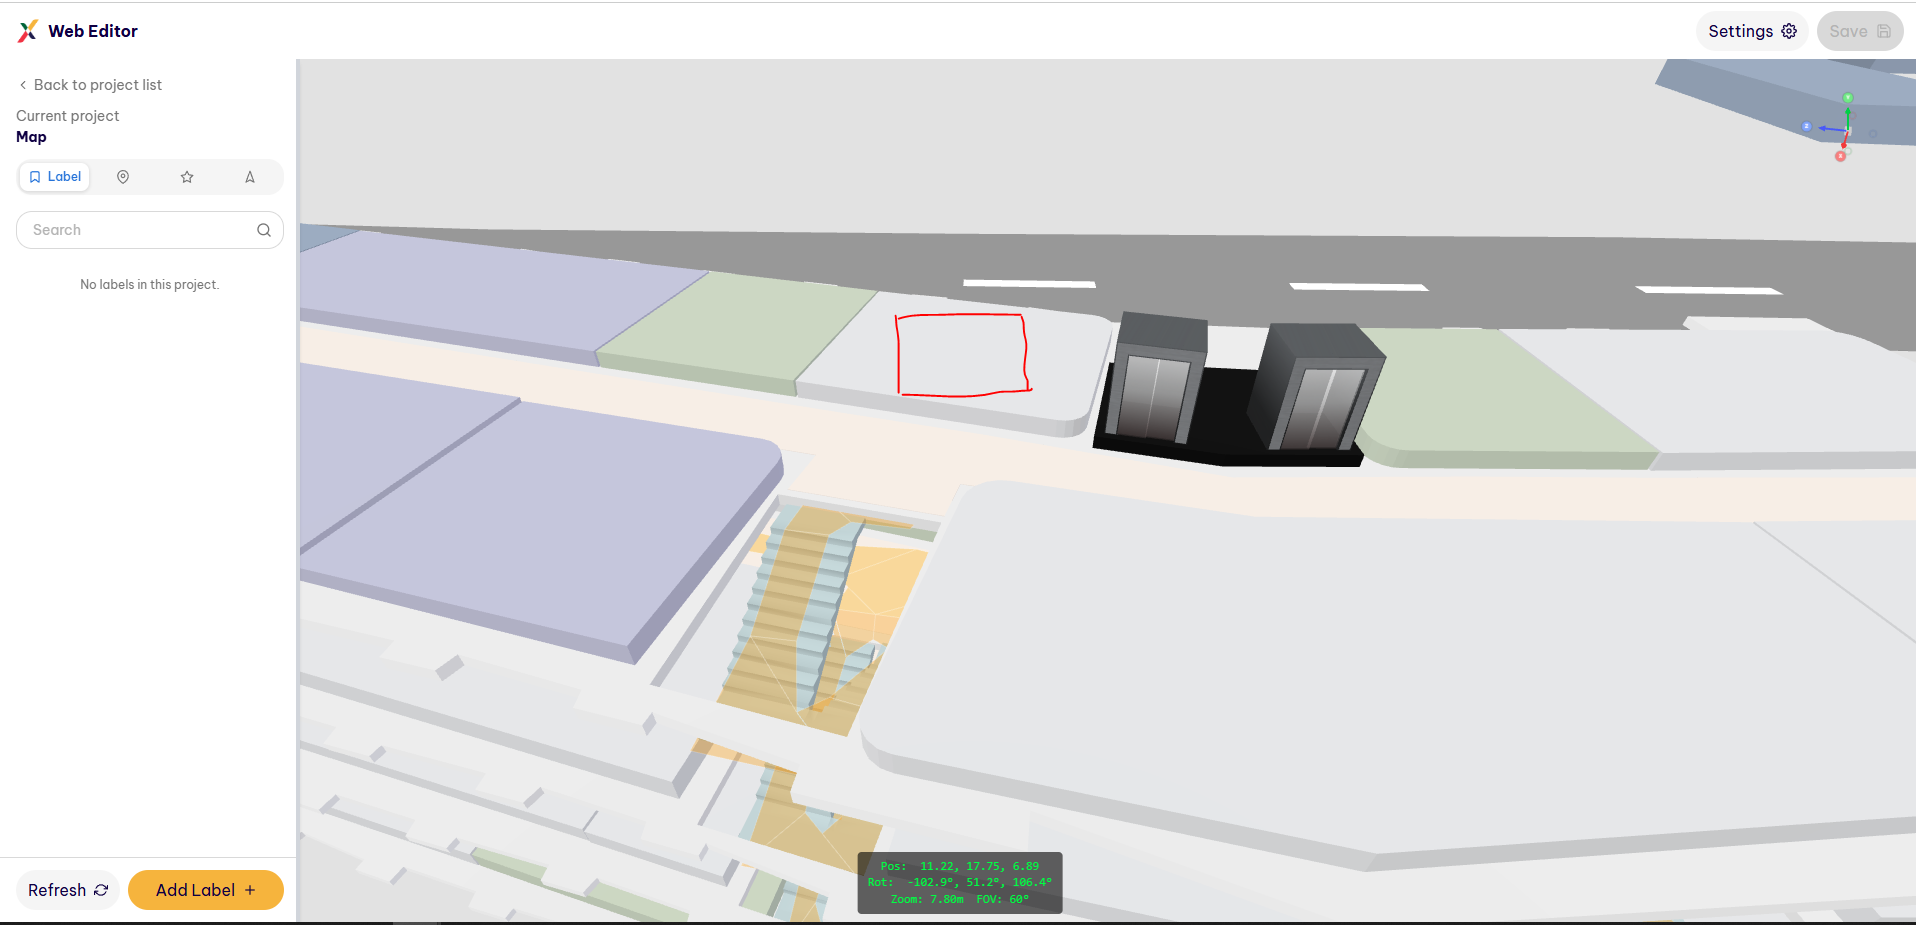
The Label position should correspond to the actual location of the object or area for which information is being provided.
Step 2: Create a Label
Use the “Add Label” function in Labeling Editor to add a new Label.
Follow these steps:
- Select “Add Label”.
- Click in the 3D space to specify the position.
- Enter the “Label Name”.
- Add an image link for the Label, if applicable.
- Click “Save”.
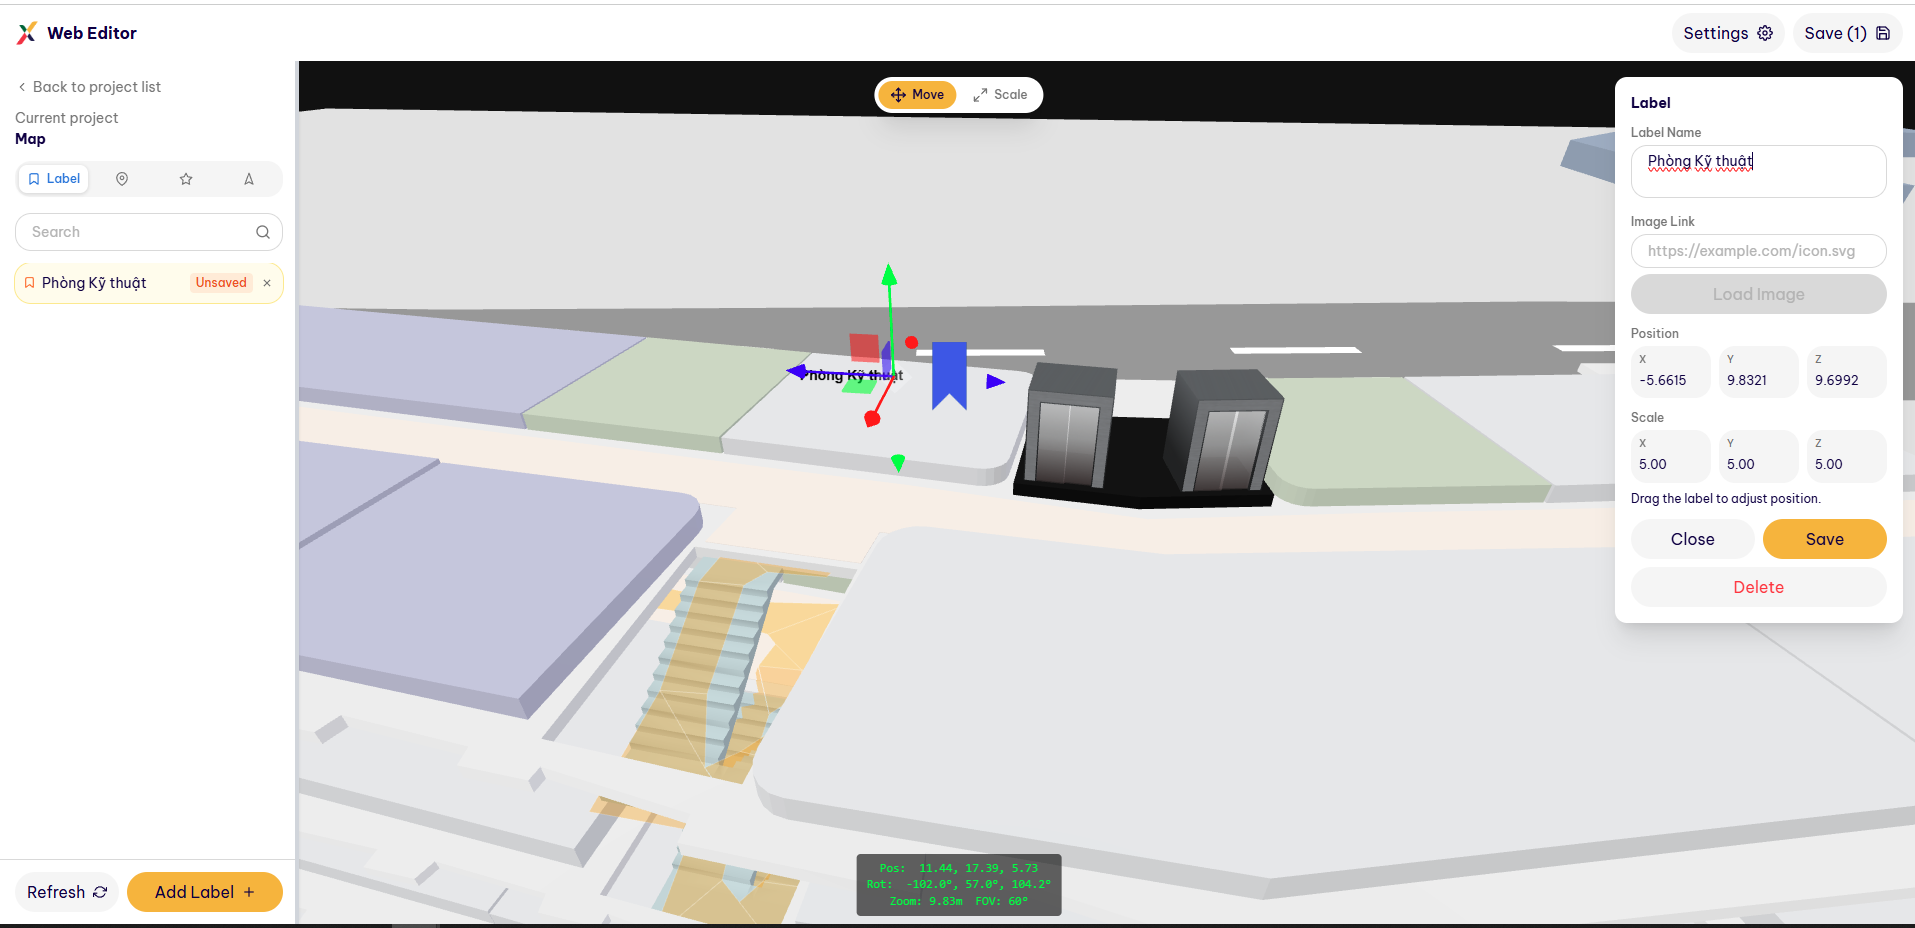
After creation, the Label will be displayed at the corresponding position in the 3D space.
6. Editing a Label
After creating a Label, users can adjust its position to ensure that it is accurately placed in the space.
Position
Set the Label position along the following axes:
- X: Horizontal position.
- Y: Height position.
- Z: Depth position.
Adjust the position directly in the Scene or through the Position parameters if they are available in the interface.
Scale
Use Scale to change the size of the Label.
When adjusting the size, make sure the Label’s scale is appropriate for the actual dimensions of the deployment space.
During the editing process, regularly check the position and size to ensure that the Label is appropriate for the real-world space.
To edit an existing Label:
- Select the Label to edit in the Scene or Label list.
- Edit the required information.
- Adjust the position or display properties.
- Check the result directly in the Scene.
- Click Save to save the changes.
7. Deleting a Label
To delete a Label:
- Select the Label to delete.
- Use the Delete/Remove function.
- Check the Scene to make sure the Label has been removed.
- Click Save to save the changes.
Note: Carefully check the Label before deleting it to avoid accidentally removing information currently being used in the Project.
8. Checking Labels in Web Editor
After completing the configuration:
- Check the Label position in the 3D space.
- Check the displayed name and content.
- Check the number of Labels created.
- Verify that each Label is positioned correctly.
- Click Save to save the Project.
A Label being displayed correctly in Web Editor does not necessarily mean that it will be displayed in the App if the Project uses an unsupported Map type.
Remember: Labeling is only supported for display in the App when using a Map imported with Import Map 2.5D. This is a mandatory requirement when deploying a Project that uses the Labeling feature.