Guide to Creating an AssetBundle in Unity (3D Model Workflow)
This document describes the complete workflow, from receiving a 3D model to building an AssetBundle.
1. Prepare the Source Model
Models are typically provided in the following formats:
-
FBX (
*.fbx) -
OBJ (
*.obj) -
GLTF / GLB (
*.gltf,*.glb) -
Blender (
*.blend) -
Individual textures:
- PNG
- JPG
- TGA
- EXR
Refer to Content Specifications
2. Import the Model into Unity
Drag the FBX or GLB file into the Project and place it in a separate folder for easier management.
Material Setup
After importing, Materials may have missing textures or incorrect shaders. Check the Mesh Renderer and reassign the textures as needed.
The recommended shader is:
Universal Render Pipeline/LitCreate a Prefab
Do not build the AssetBundle directly from the model file.
The Prefab is the asset that will be included in the AssetBundle.
Prefab creation flow:
Model → Hierarchy → Drag into the Prefabs folder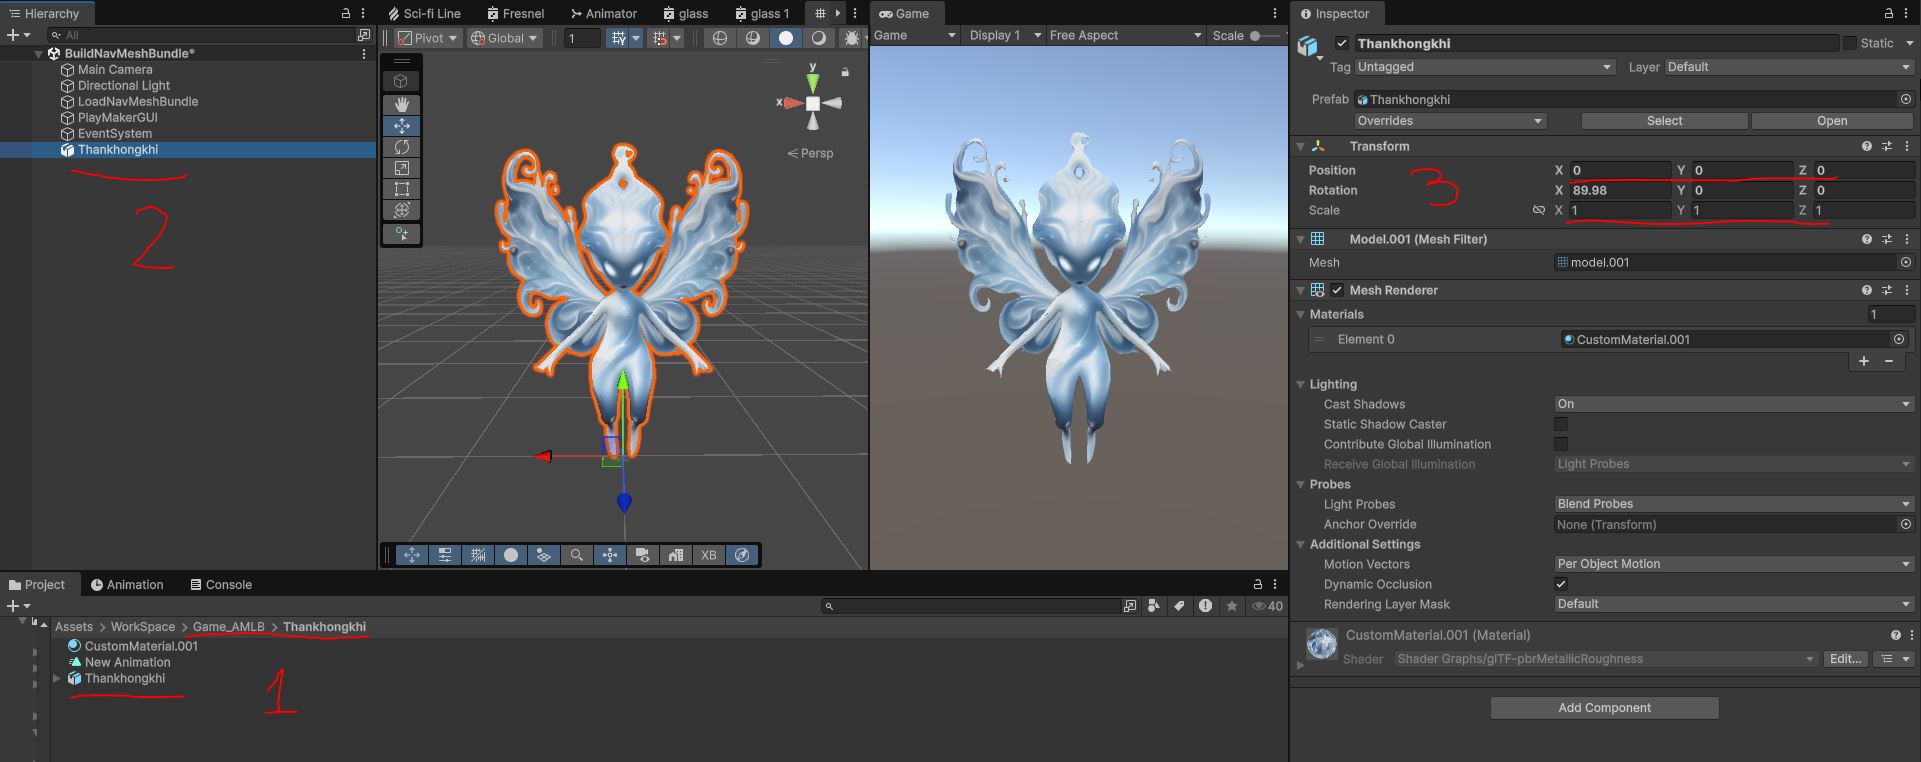
Note: It is recommended to set the Prefab position to
(0,0,0)and Scale to1for easier processing later.
Assign an AssetBundle Name
Select the Prefab you want to use.
In the Inspector window, scroll to the bottom to find:
AssetBundle = NoneClick it to create an Asset Label.
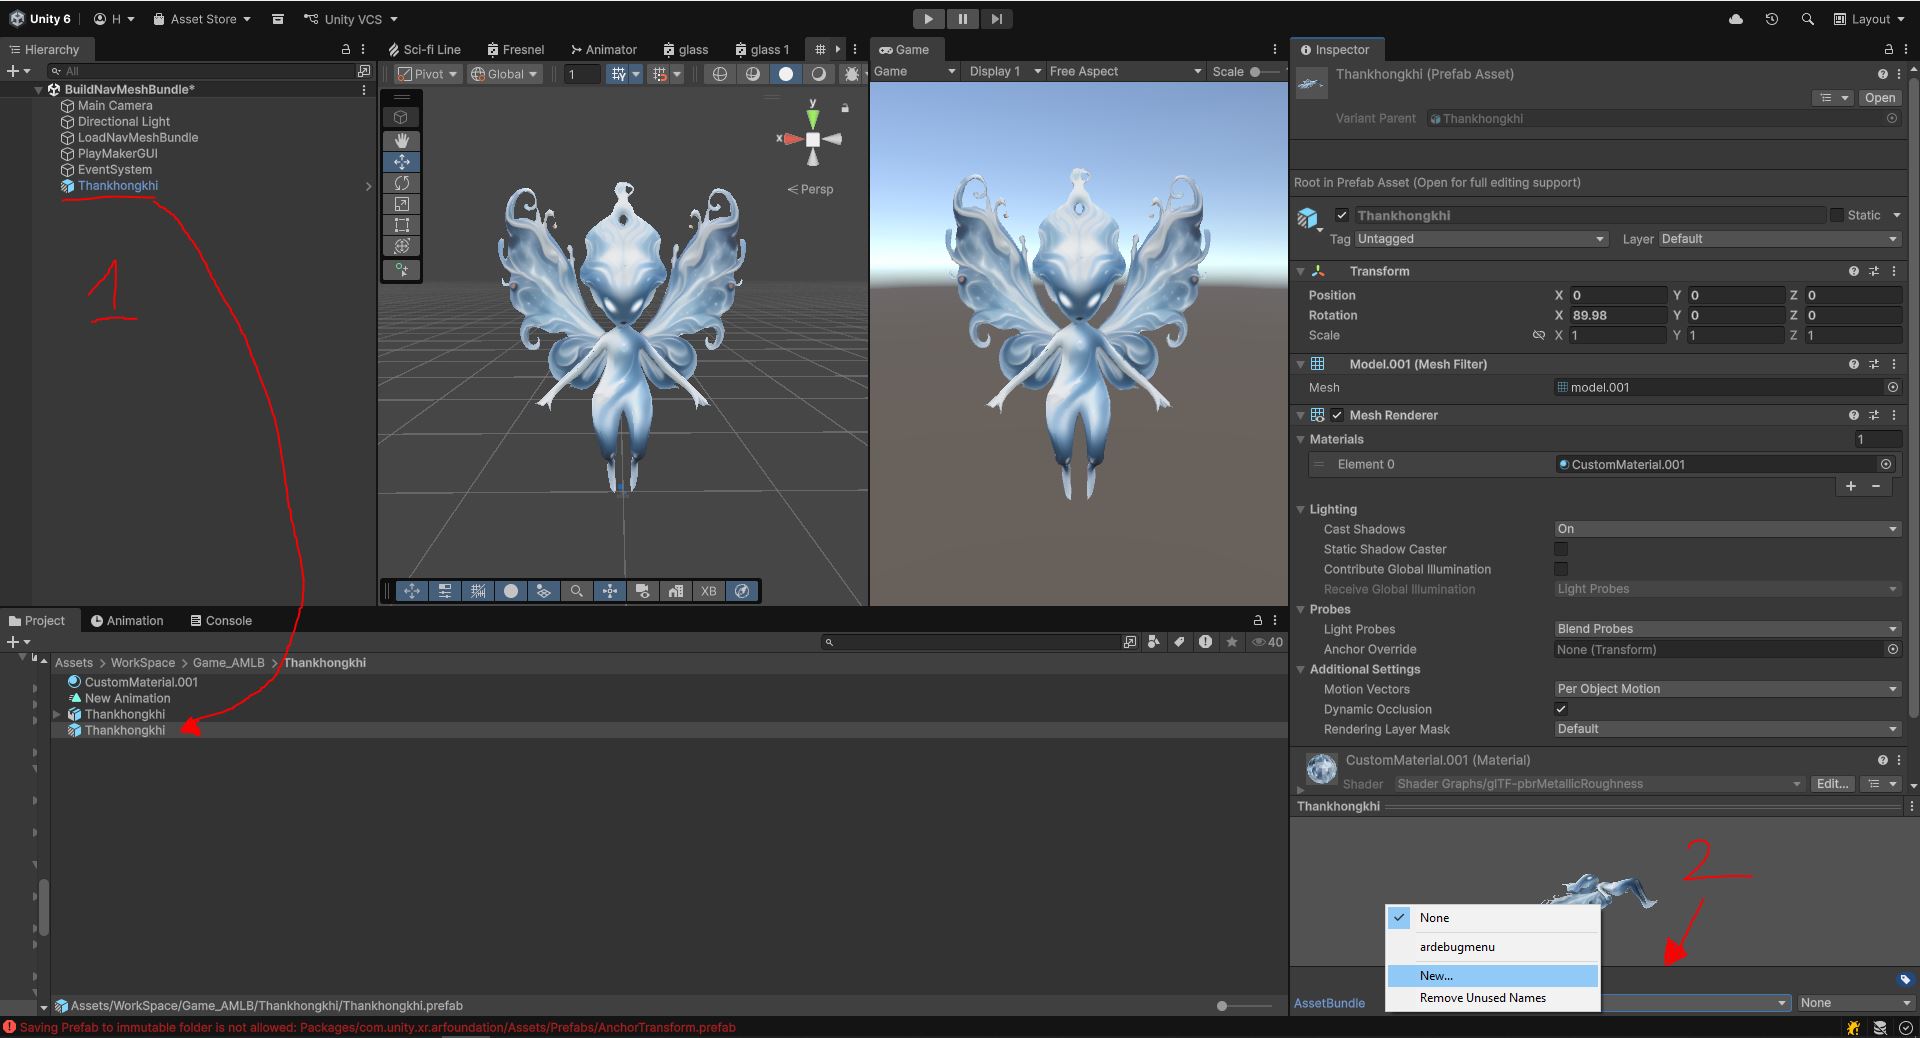
Naming Rules
| Recommended | Avoid |
|---|---|
| building_a | Test |
| building_b | New Bundle |
| factory_01 | Bundle1 |
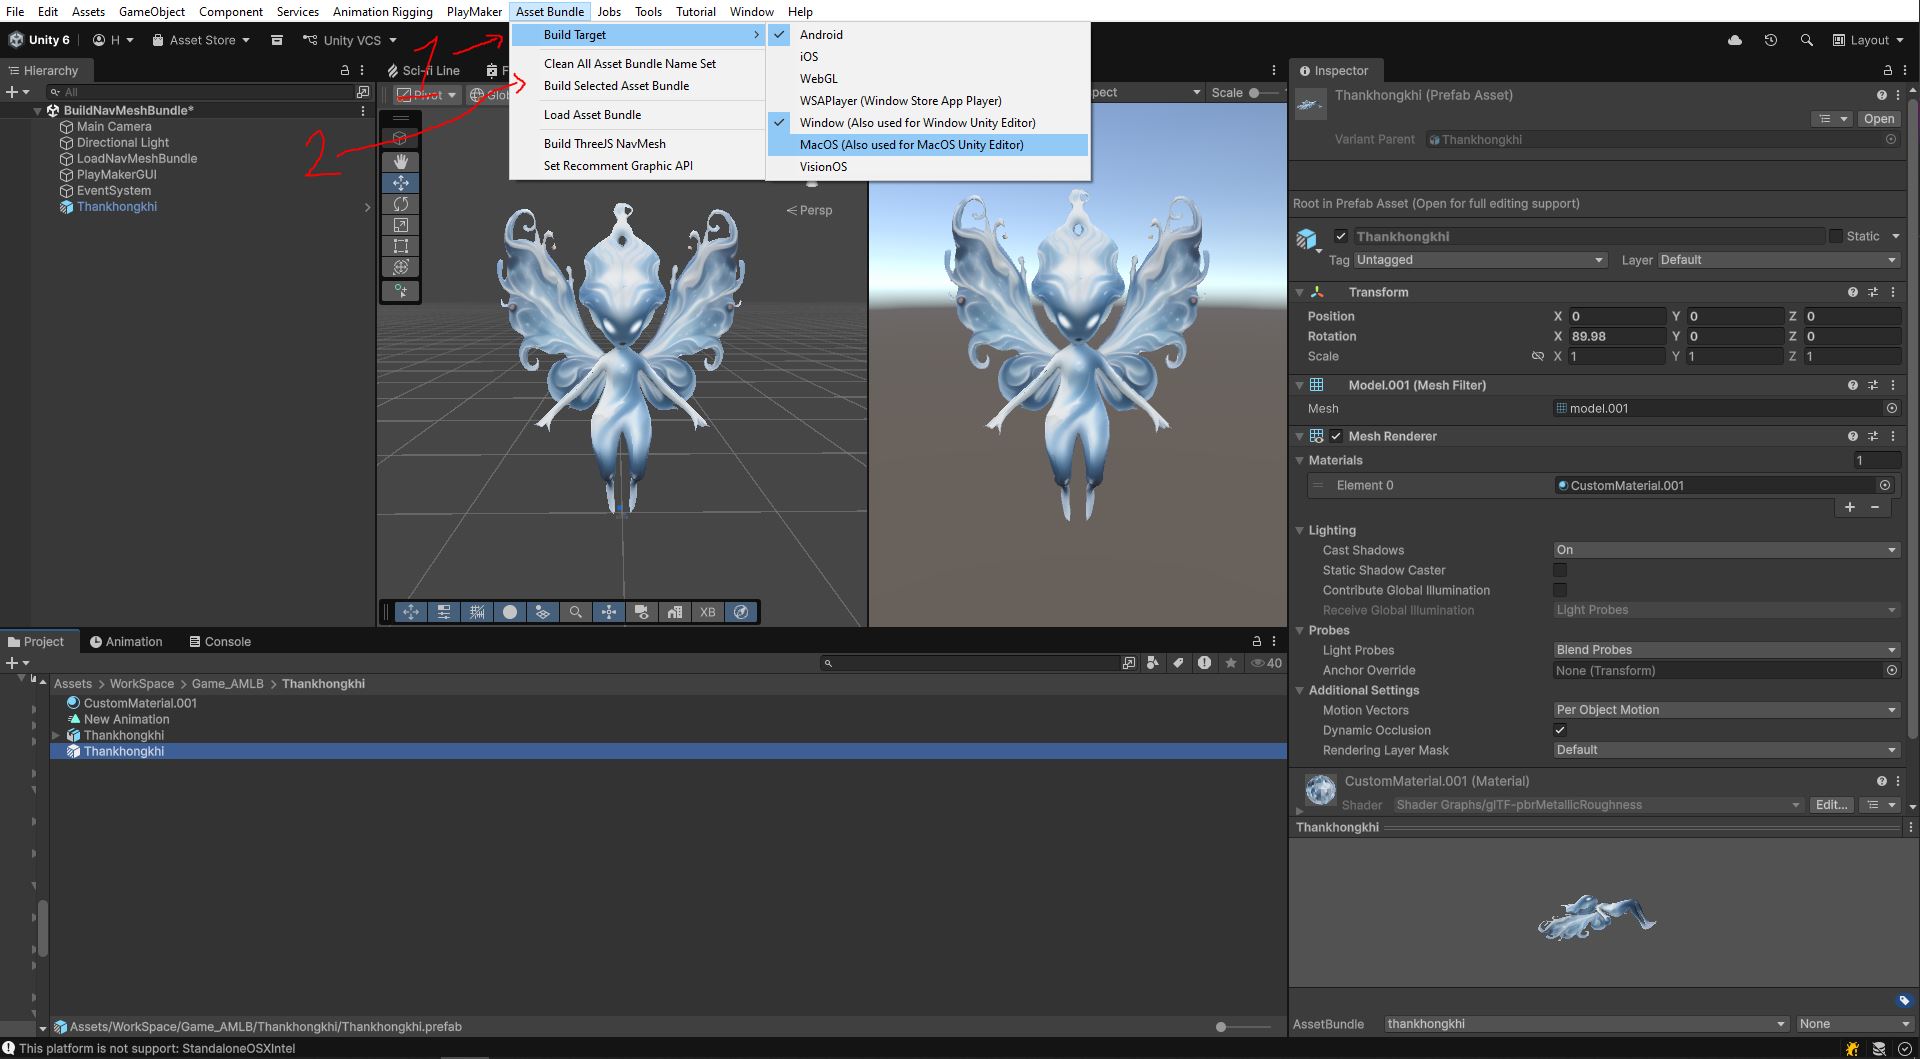
Build the AssetBundle
After assigning the AssetBundle Name, build the AssetBundle as follows:
- Select the target platform.
- Click Build.
Result
After the AssetBundle is built successfully, the system displays the build result window.
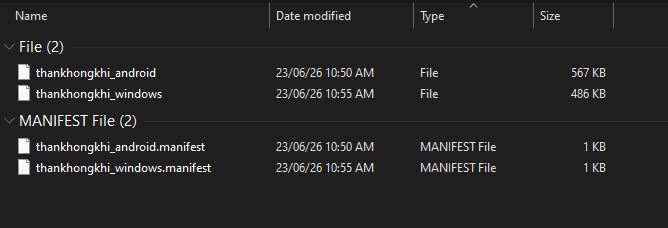
The resulting AssetBundle files will be:
- Uploaded to the server.
- Used to create new content in the AR space.