XENSE AR PLAYBACK
1. Overview
Xense AR Playback is a testing tool for experiences built on the Xense AR platform. The tool allows users to simulate Spatial AR experiences on a Windows computer.
Instead of using the device’s live camera feed, the Simulator uses video recorded in the real environment as input data. The system performs steps similar to those carried out when users experience Xense AR in the field, including:
- Scanning and recognizing the environment.
- Determining the user’s position and orientation.
- Calculating routes to the destination.
- Displaying AR navigation guidance in the environment.
- Displaying the 2.5D map.
- Activating and displaying Spatial AR Content.
- Testing the entire experience flow before deploying it in the real environment.
Objectives
The tool helps identify potential issues related to:
- Navigation.
- 3D Content.
- Content positioning and visibility.
- Spatial AR experiences.
This allows users to test and adjust their content before deploying it in the real environment.
2. Usage Flow
Step 1: Launch Xense AR Playback
After installing the tool on Windows, open the Xense AR application.
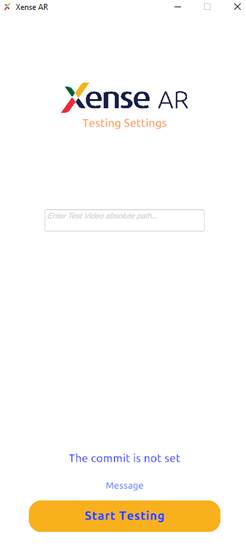
The first screen displayed is Testing Settings.
This screen is used to configure the input data for the simulation session.
3. Set Up the Test Video
On the Testing Settings screen, enter the absolute path to the test video in the corresponding field.
For example:
D:\XenseAR\TestData\test_video.mp4Click Start Testing. Playback will initialize the test environment and open the Xense AR interface.
4. Select an Experience
Follow these steps:
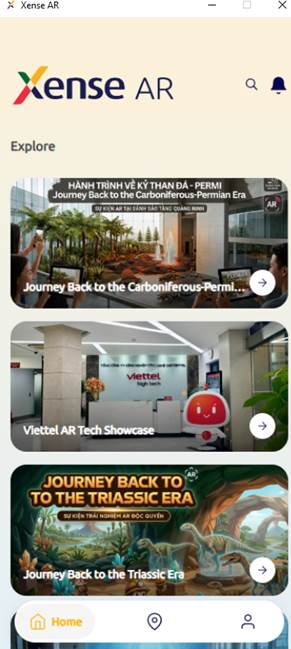
- Find the Experience you want to test.
- Click the Experience image or arrow icon.
- The system opens the Experience details screen.
5. Scan the Space – Scanning Space
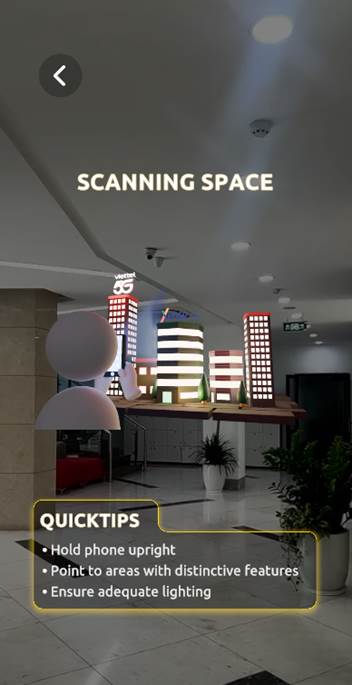
After starting the Experience, the system switches to the:
“Scan Instructions”
screen.
In a real environment, the phone camera is used to recognize the space.
In the Simulator, frames from the test video are used instead of the actual camera feed.
The system performs the following process:
Video Frame → Spatial Map Recognition → Localization → Position Estimation → Orientation Estimation
6. Start AR Navigation
Once the Spatial Map is successfully recognized, the current camera position is determined.
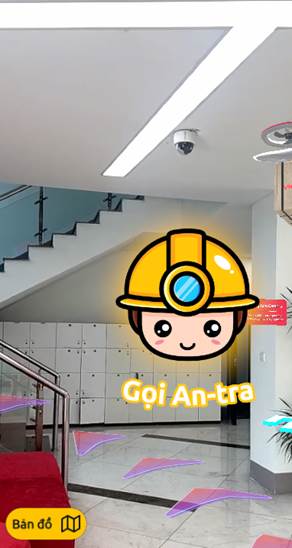
The Simulator updates the current position and displays the navigation route following the path:
Start Point
    ↓
Straight Section
    ↓
Turn Point
    ↓
Corridor
    ↓
Stairs/Elevator (if applicable)
    ↓
Floor Transition (if applicable)
    ↓
Destination
7. Check the 2.5D Map
During Navigation, users can open the 2.5D Map.
The map provides an overview of:
- Current position.
- User orientation.
- Destination.
- Route.
- Spatial structure.
- Turn points.
The “Zoom In” function can be used to enlarge the map for a clearer view.
8. View Content During Navigation
While moving through locations where Content has been placed, users can check:
- Content placement.
- Content size within the environment.
- Shadow effects associated with the Content.
- Occlusion effects associated with the Content.