Guide to Uploading Raw Spatial Data from a Mobile Phone to Xense Portal
This guide provides detailed instructions for preparing and uploading raw spatial data collected using a smartphone to Xense Portal, allowing the system to automatically process the data and create a Spatial Map.
I. OVERVIEW
What is the Mobile method for creating a Spatial Map (VPS Mobile)?
VPS Mobile is a method for building a high-accuracy spatial map by directly using a smartphone camera combined with sensor data collected through a supporting application.
After the data is collected, users upload the raw data to Xense Portal. The cloud computing system automatically processes the data and reconstructs the space into a 3D Mesh / Point Cloud.
II. UPLOAD PROCEDURE ON THE PORTAL
The process of uploading spatial data from a mobile phone consists of 6 main steps:
- Start from the Spatial Map tab.
- Select the Mobile data source.
- Configure spatial information.
- Upload the data files.
- Monitor the upload process and receive the result.
- Monitor processing progress and manage the Spatial Map.
Step 1: Start from the Spatial Map Page
-
Log in to the system at portal.xensear.vn .
-
In the left Sidebar, click Spatial Map.
-
On the map management interface, click the Create button in the upper-left corner, next to the search bar.
-
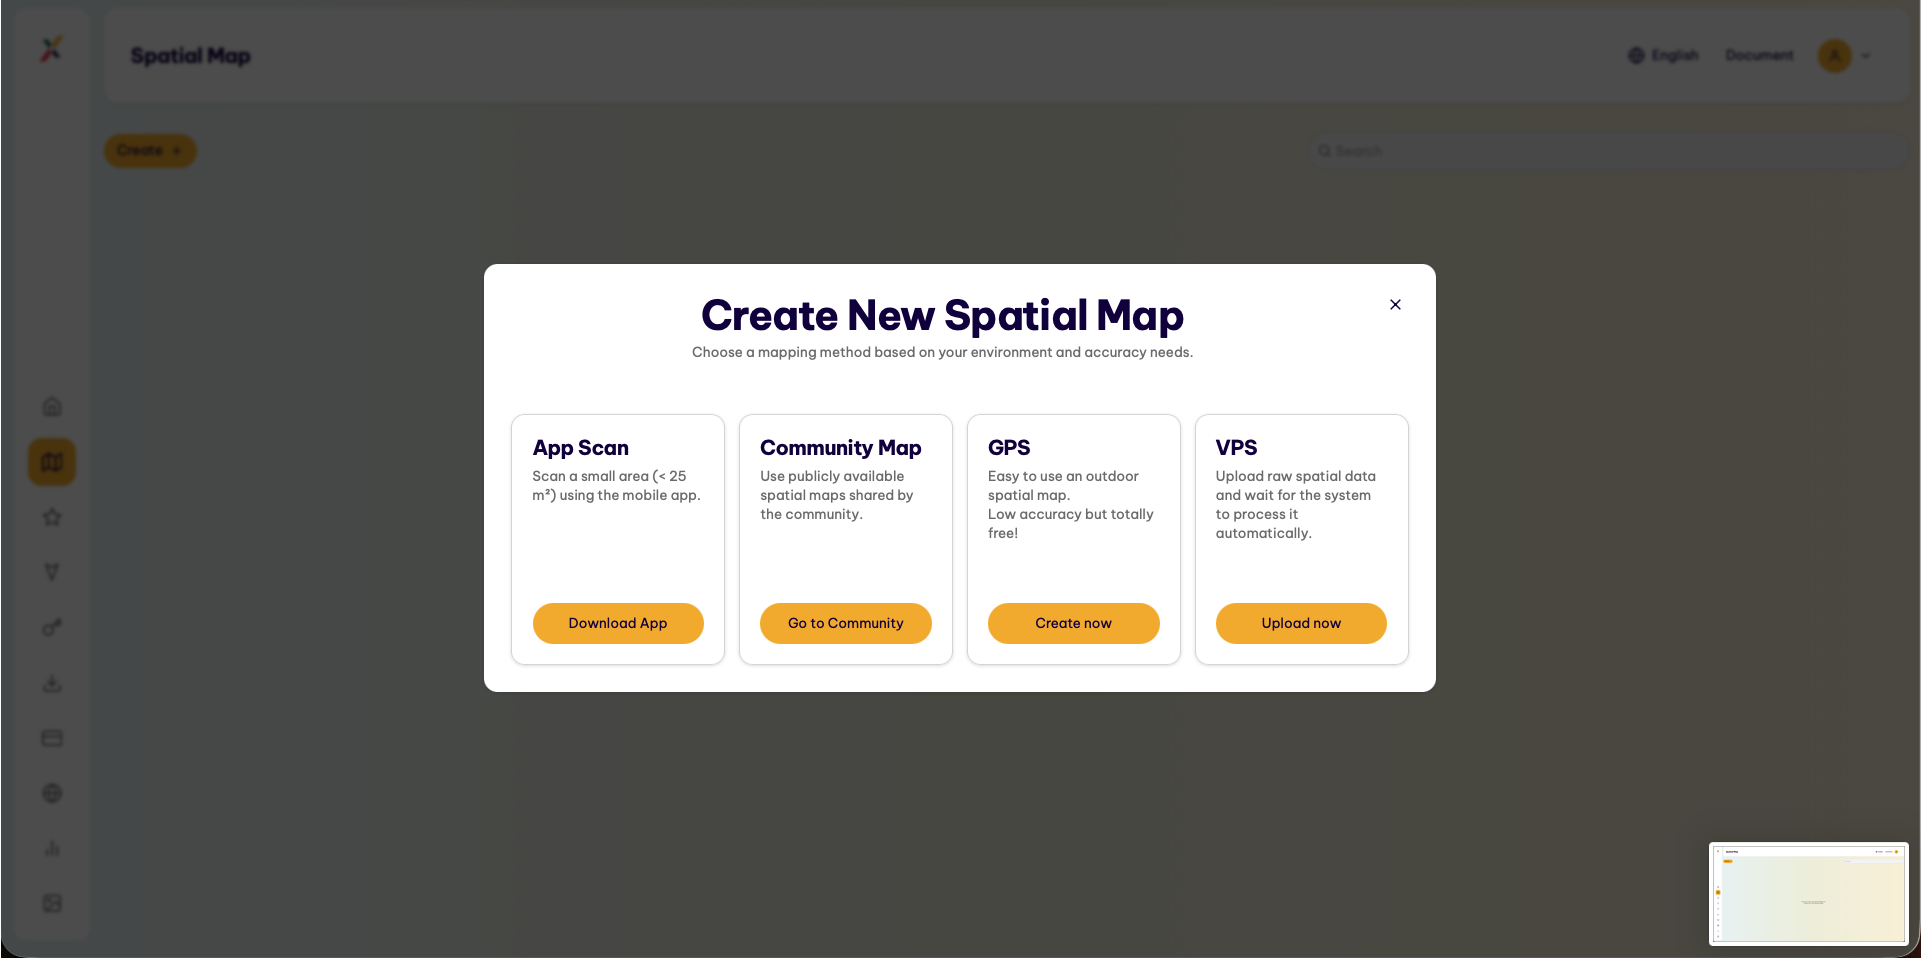
The Create New Spatial Map dialog displays 4 map creation methods:
- App Scan: Scan a small space (
< 25 m²) directly through the mobile application. - Community Map: Use a free spatial map shared by the community.
- GPS: A free outdoor map based on GPS positioning, with lower accuracy.
- VPS: Upload raw spatial data and wait for the system to process it automatically.
- App Scan: Scan a small space (
-
In the VPS tab, click Upload now.
Step 2: Select the Data Source
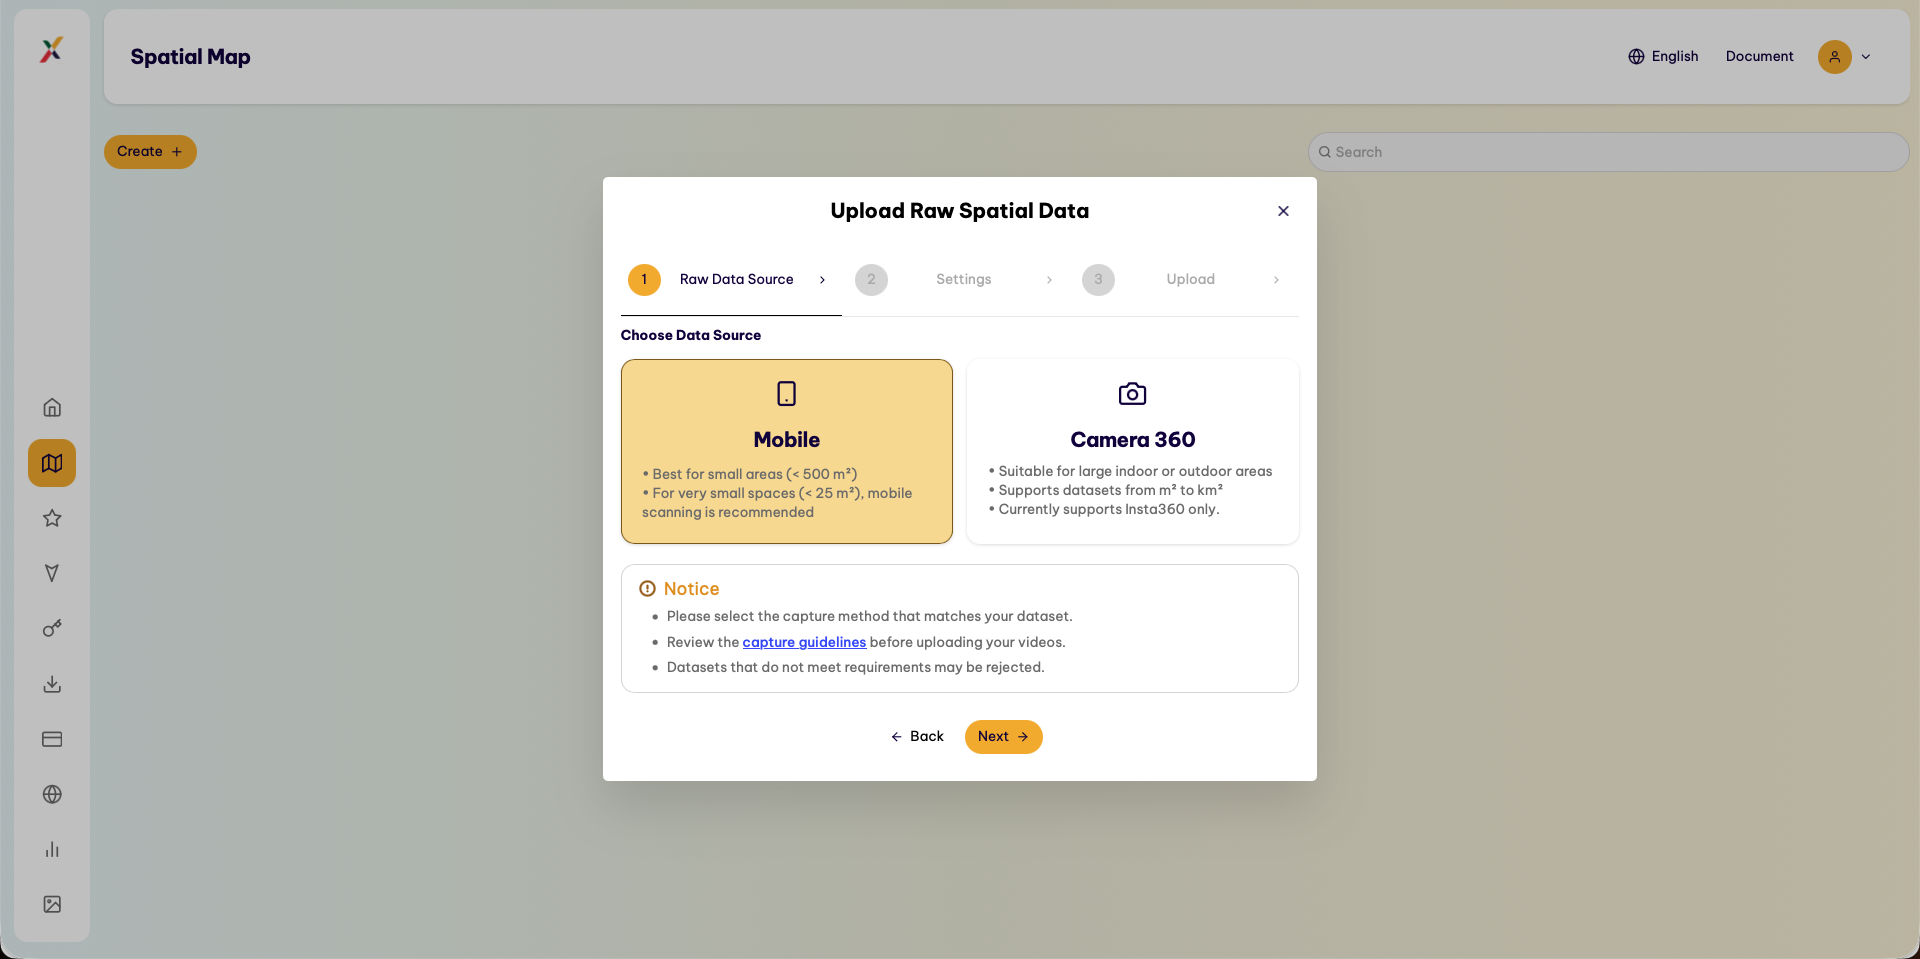
The system opens the Upload Raw Spatial Data dialog.
- On the Select Data Source screen, select the Mobile tab.
- Click Next in the lower-right corner to continue to the configuration step.
Step 3: Configure Spatial Information
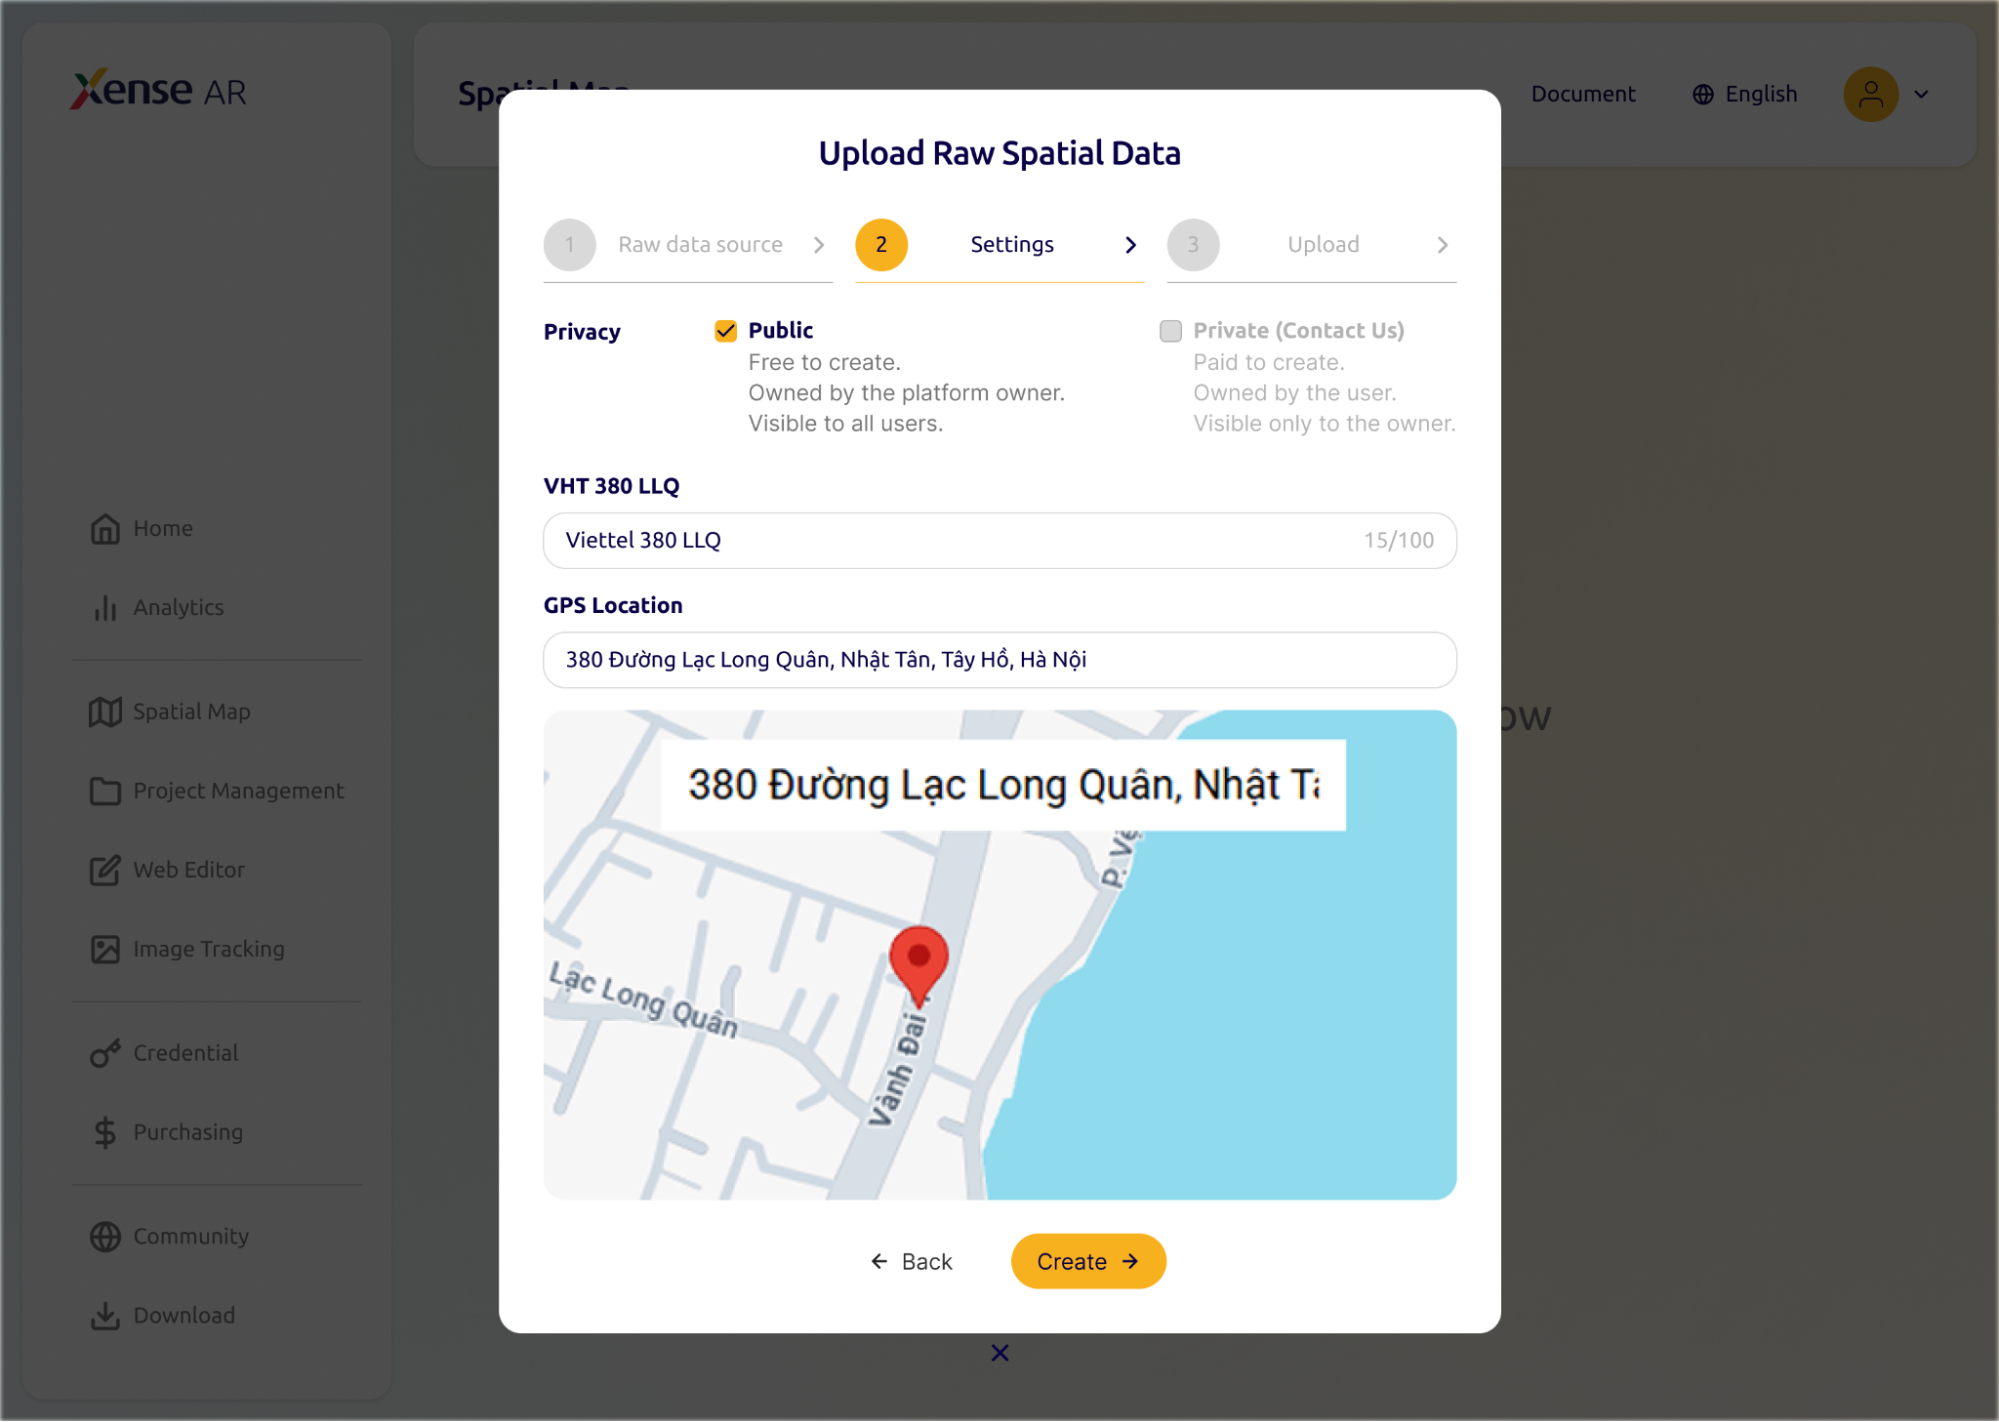
On the configuration screen, enter the identification and management information for the map.
1. Privacy
Select one of the following modes:
-
Public (Recommended):
- Free to create (Free to create).
- Managed by the platform.
- Publicly visible to all users.
-
Private (Contact Us):
- Paid service.
- Privately owned by the user.
- Only the account owner can view it.
2. Map Name (Name)
In the Name your map here field, enter the map name.
Requirements and recommendations:
- Maximum 100 characters.
- Use a clear and descriptive name.
- It is recommended to associate the name with the actual location for easier management.
3. GPS Location
In the Enter address here field, enter the address of the area where the map will be created.
The system automatically suggests addresses through Google Maps.
The Google Maps preview below automatically displays and pins the location corresponding to the selected coordinates.
4. Continue to Data Upload
After completing the configuration, review the entered information and click Next to proceed to the file upload step.
Step 4: Upload the Data Files
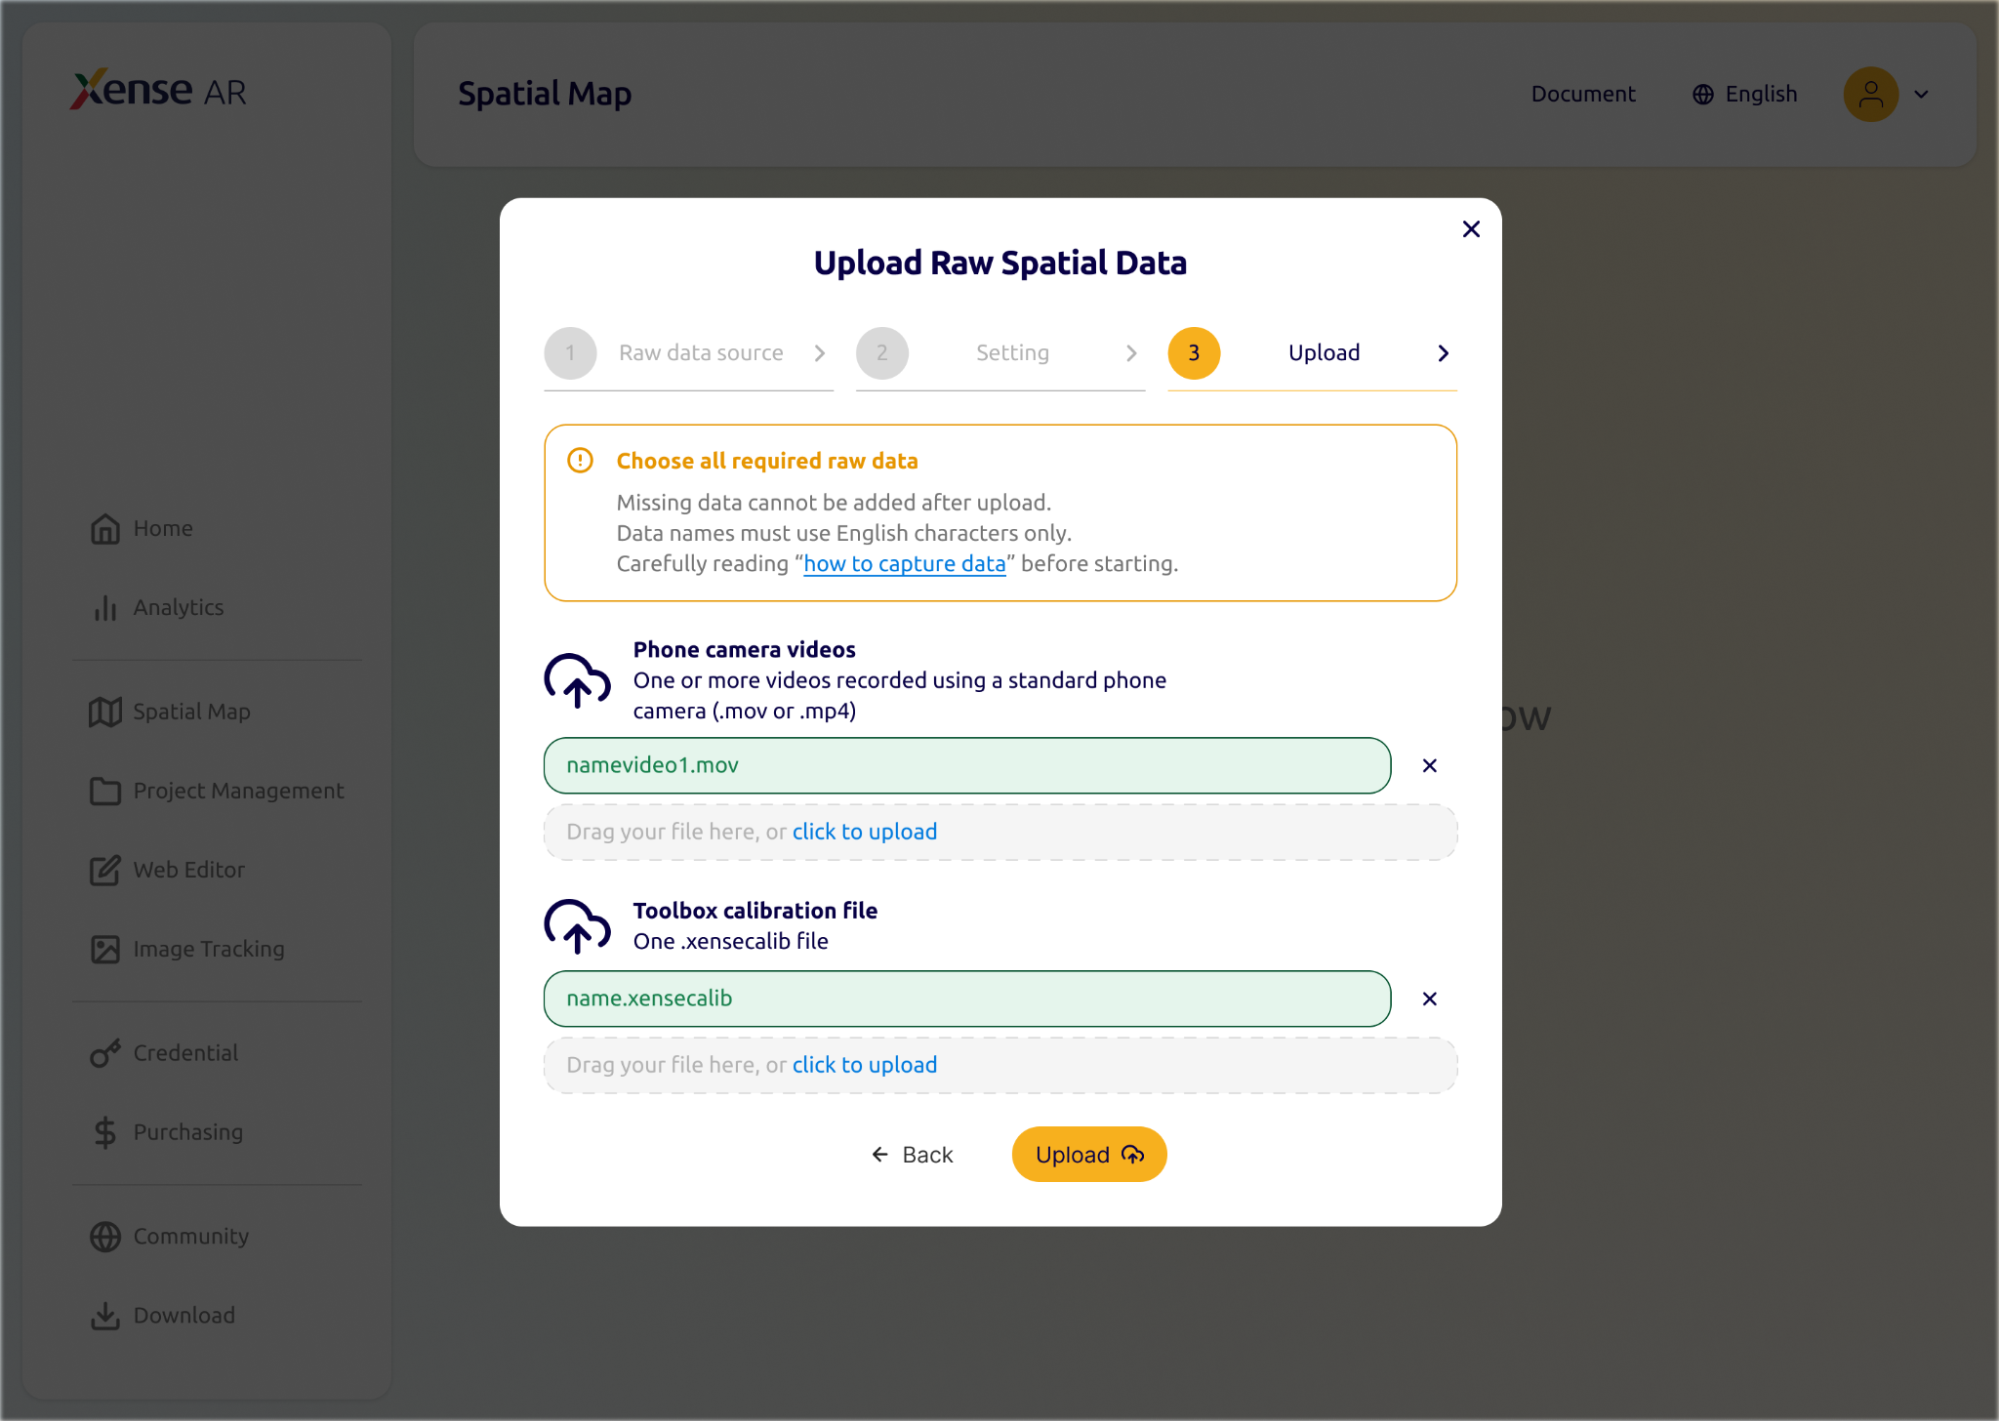
The Choose all required raw data page is displayed.
Users must upload all required data files.
1. Phone Camera Videos
Guide to recording videos using a mobile phone
In the Phone camera videos section, the system requires:
One or more videos recorded using a standard phone camera (.mov or .mp4)
Procedure:
- Drag and drop all video files recorded using the phone’s standard camera into the upload area.
- Or click the upload area to select files from your computer.
- One or more videos can be uploaded.
The names of the selected files are displayed in the list.
Example:
room_cam_01.mov
room_cam_02.mov
room_cam_03.mp4
2. Toolbox Calibration File
In the Toolbox calibration file section, the system requires:
One .xensecalib file
Procedure:
- Drag and drop exactly 1 file with the
.xensecalibextension. - The
.xensecalibfile must be extracted from the XenseAR ToolBox application.
Example:
session_calib.xensecalib3. Upload the Data
After both sections display valid files, click the Upload button in the lower-right corner of the screen.
Step 5: Upload Process and Result Notification
1. Uploading Progress
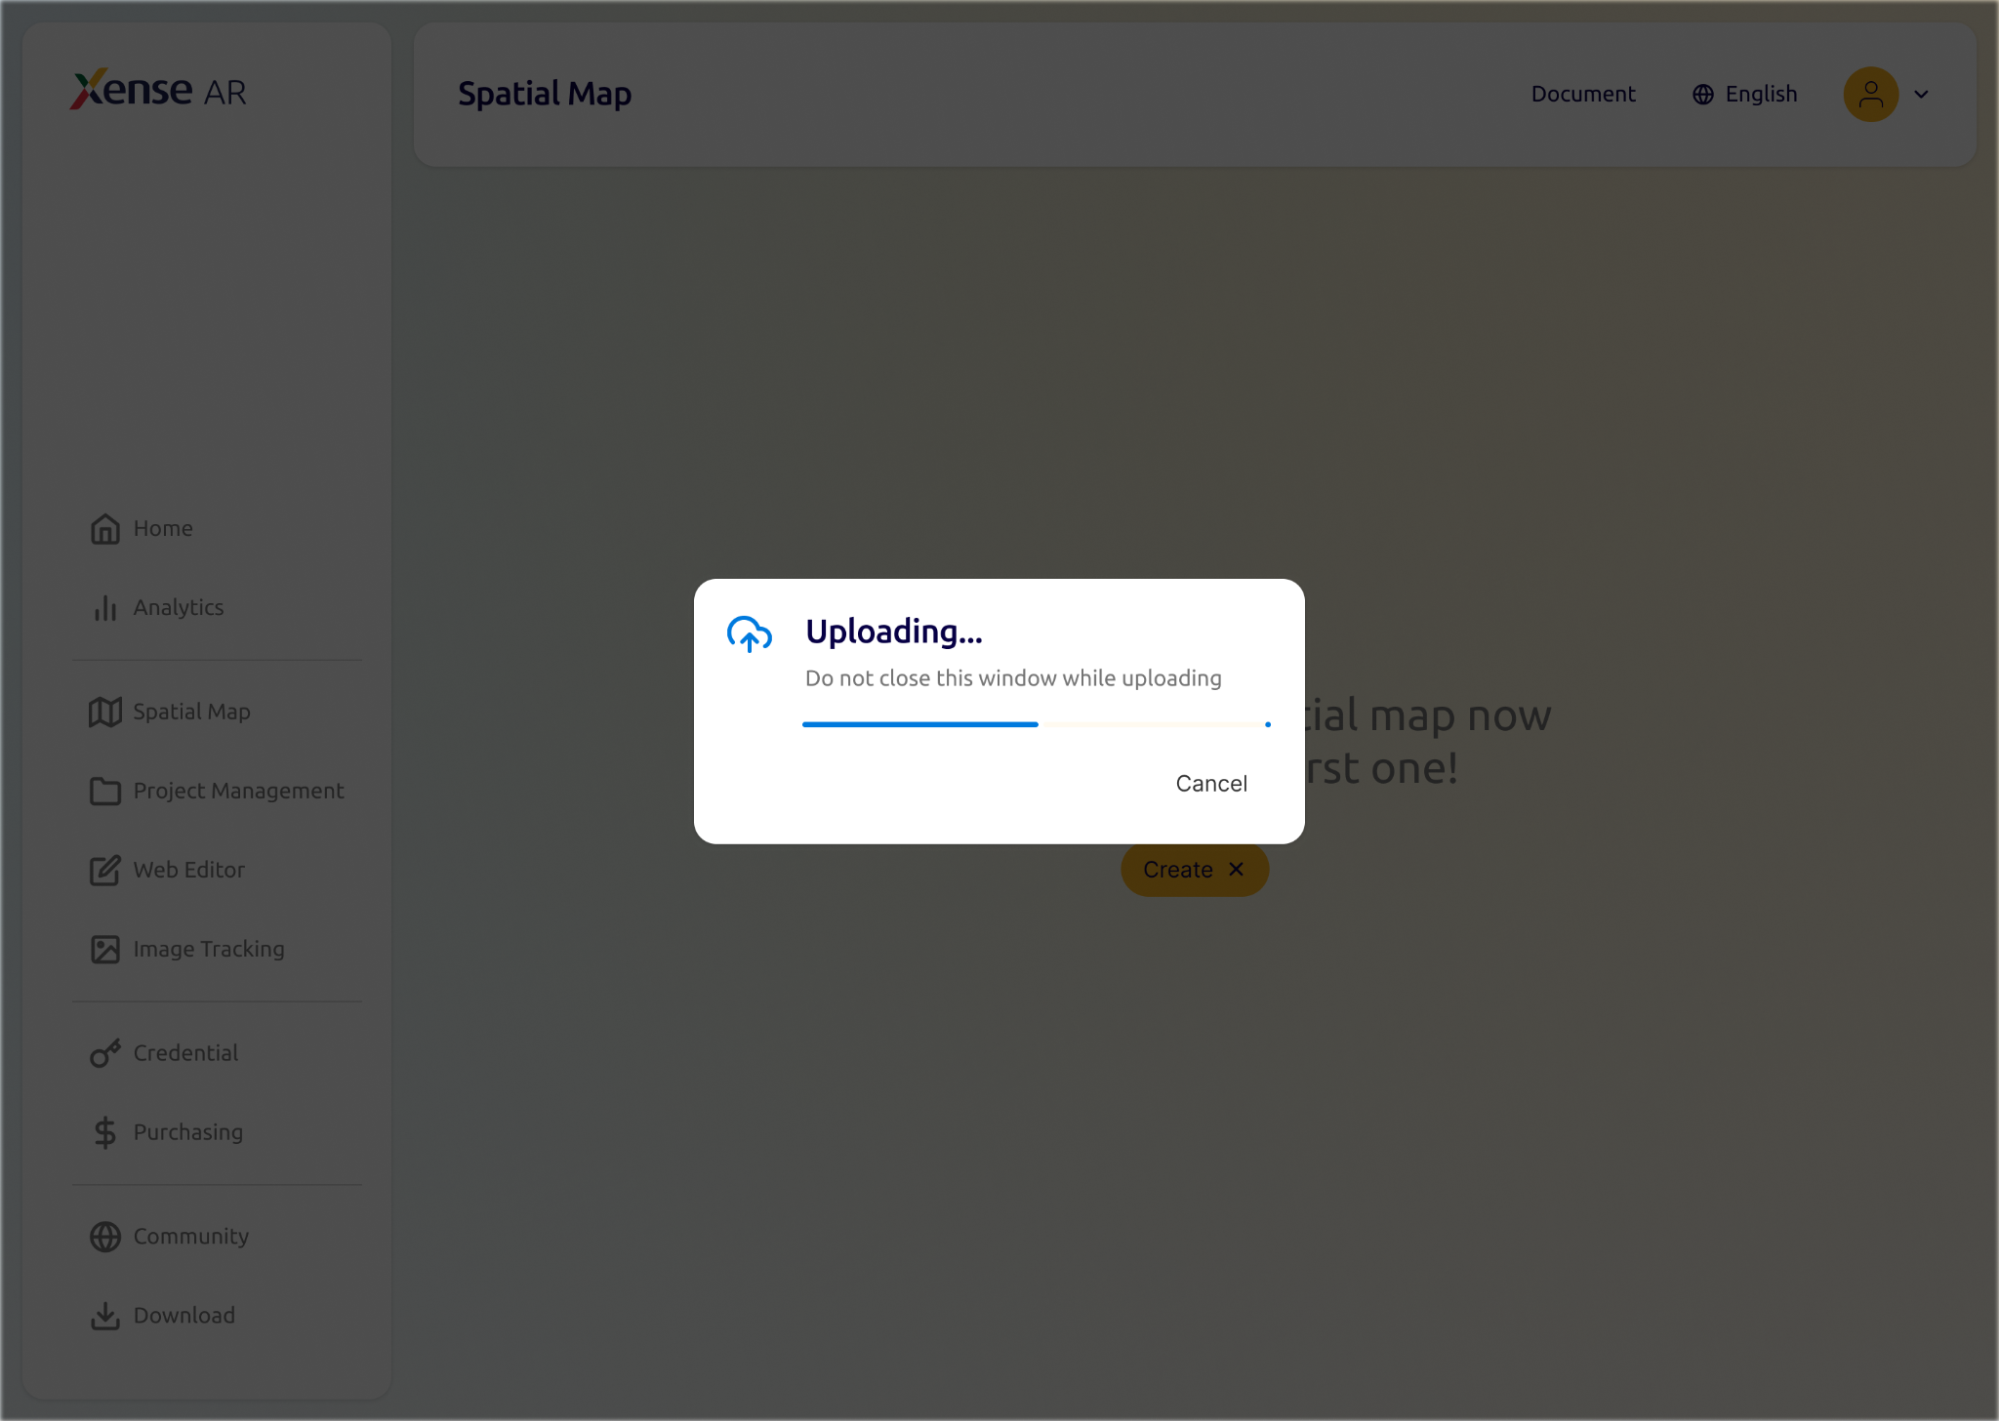
During the data upload process, the Uploading… dialog displays the message:
Do not close this window while uploading
During this process, users should:
- Keep the browser tab open.
- Do not close the window performing the upload.
- Maintain a stable network connection until the upload is complete.
2. Successful Upload
When the upload is successful, the system displays a green checkmark along with the message:
Your spatial map will be processed shortly
This indicates that the data has been successfully uploaded to the system and added to the processing queue.
3. Failed Upload
If a network or server error occurs, the system displays:
Upload Failed - This happen sometimes. Trying again may help fix the problem.
Click Got it to close the notification and upload the data again.
Step 6: Monitor Processing Progress and Manage the Spatial Map
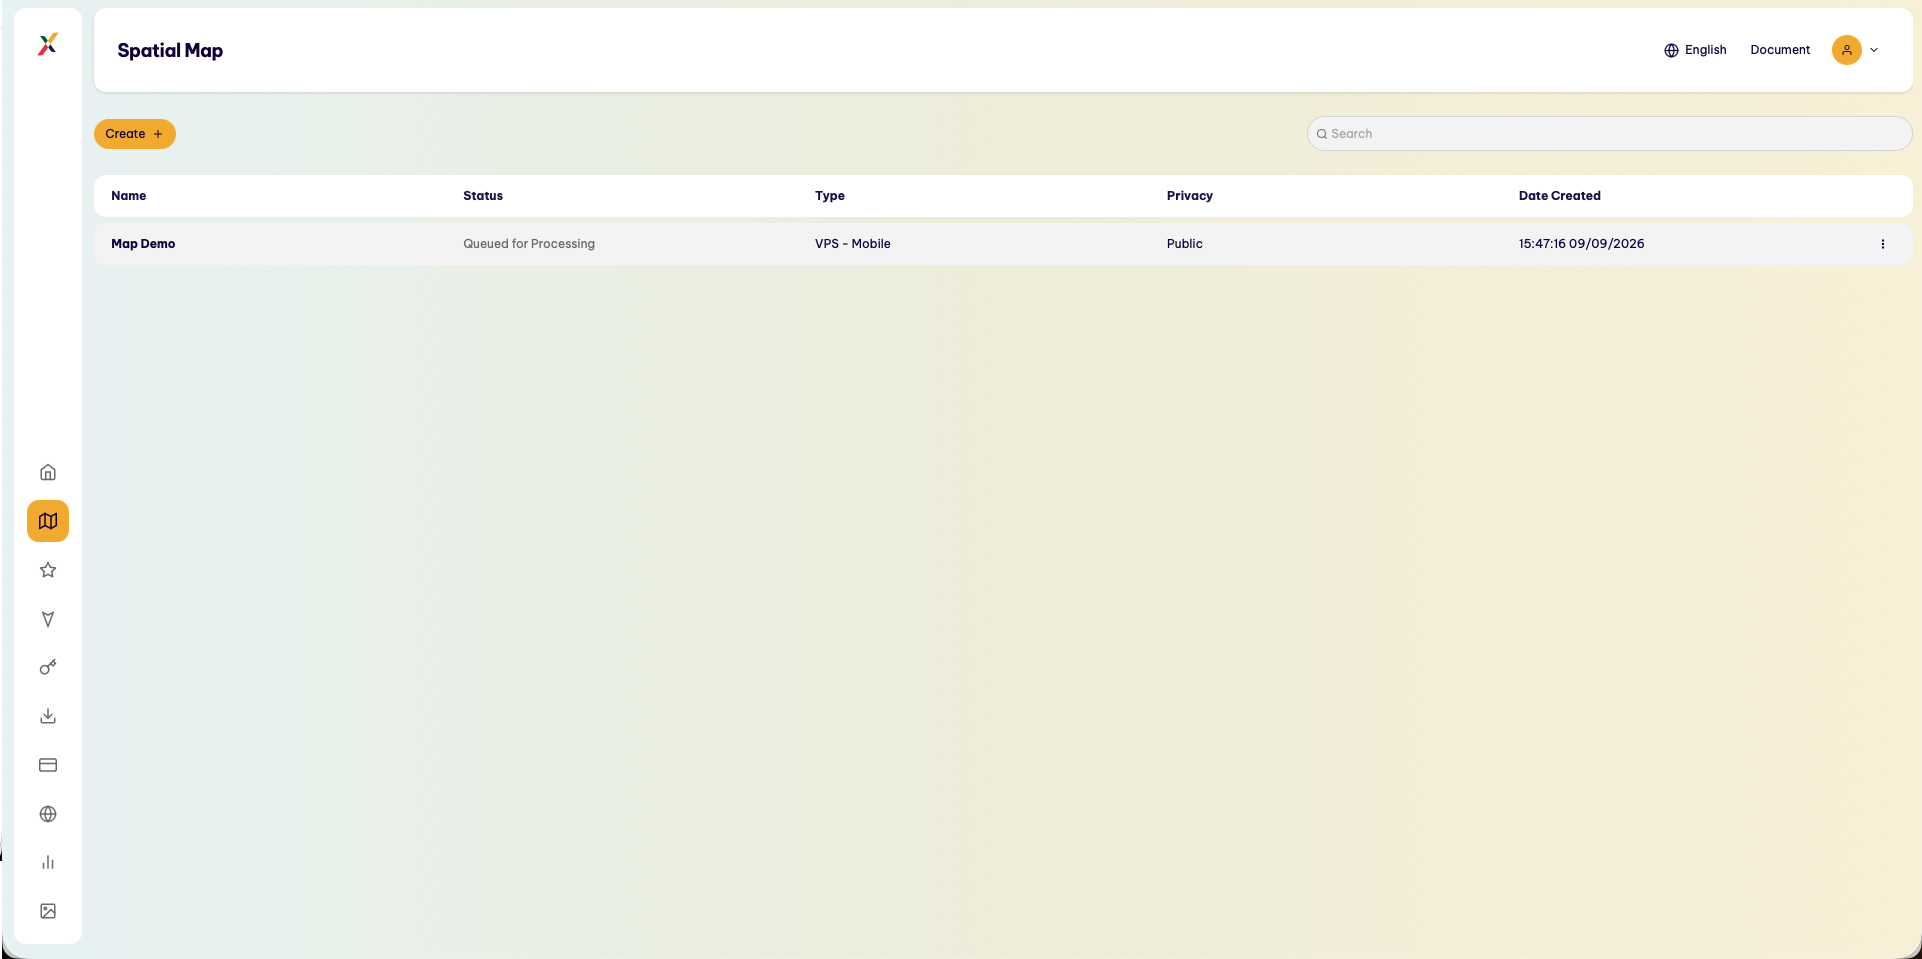
After the upload is complete, the system redirects the user to the Spatial Map list.
The newly uploaded map appears in the list with the following information:
- Name: The assigned map name.
- Type: Displays the map type as
VPS Mobile. - Privacy:
PublicorPrivate. - Date created: The time when the map was created.
Processing Status Lifecycle
| Status | UI Appearance | Technical Meaning |
|---|---|---|
| Queued for Processing | Orange / gray label | The map has been successfully uploaded and is waiting in the cloud computing server queue for processing. |
| Processing | Blue label | The system is decoding video frames, matching feature points, and reconstructing the space into a 3D Mesh. |
| Ready to use | Green label | Processing has completed successfully. The map is ready for creating an AR Project or opening it in Web Editor / Unity Editor. |
| Failed | Red label | Data processing failed, typically because the video was too unstable, the camera moved too quickly, or the captured views did not provide sufficient coverage of the space. |
Note: Processing time may depend on the data size, number of videos, and system status at the time of upload.