Guide to Uploading Raw Spatial Data from a 360 Camera to Xense Portal
This guide provides detailed instructions for preparing and uploading raw spatial data (Raw Spatial Data) collected using a 360 Camera in combination with the XenseAR ToolBox application to the Xense Portal, allowing the cloud computing system to automatically reconstruct a 3D spatial map (Spatial Map).
I. OVERVIEW
1. What is the 360 Camera method for creating a Spatial Map (VPS Camera 360)?
VPS Camera 360 is a large-scale spatial digitization solution that synchronizes:
- 360-degree panoramic video captured using specialized devices such as Insta360.
- Motion data (Trajectory).
- Calibration data (Calibration) collected using the XenseAR ToolBox application on a smartphone.
After the raw data is uploaded to Xense Portal, the Cloud system automatically synchronizes and reconstructs a high-accuracy 3D spatial mesh (3D Mesh / Point Cloud).
Key Features
- Application scope: Optimized for large areas ranging from several hundred
m²to tens of thousands ofm², and even areas spanning severalkm². Examples include shopping malls, office buildings, outdoor tourist areas, factories, and complex street environments. - Superior capture efficiency: The operator only needs to make one pass along each walking path to cover the entire 360° space, instead of making 6 passes corresponding to 6 directions as with conventional smartphone camera scanning methods.
- Supported devices: The Xense Portal interface currently supports and is optimized for Insta360 devices such as Insta360 X3, X4, and ONE RS 1-Inch 360 Edition, as well as equivalent formats.
- Automation: The Xense cloud computing system automatically synchronizes timestamps (sync time), aligns the movement trajectory, and reconstructs the 3D map without requiring manual intervention.
2. Standard Input Data Package Structure
Unlike the Mobile method, which only requires 2 files, the VPS Camera 360 method requires 3 synchronized data components:
| No. | Data Component | File Format | Required Quantity | Technical Requirements & Data Source |
|---|---|---|---|---|
| 1 | Camera 360 videos | .insv or .mp4 | 1 or more videos | Videos recorded using a 360 Camera, preferably an Insta360 device. Recommended quality: 5.6K – 25/30 FPS. The camera should be mounted on a tripod/selfie stick approximately ~30 cm above the person’s head and moved steadily at approximately ~0.5 m/s. For large spaces, the device may automatically split the recording into multiple files, such as _00_... and _10_... file pairs on Insta360. All of these video files must be selected. |
| 2 | Toolbox calibration file | .xensecalib | Exactly 1 file | Recorded using the XenseAR ToolBox application in Calibration mode. Select an easily recognizable point in the environment, hold the phone horizontally, and rotate steadily for approximately 30–60 seconds. |
| 3 | Toolbox trajectory file | .xensetrajectory | Exactly 1 file | Extracted from the XenseAR ToolBox application in Trajectory mode. Capture movement trajectory data in parallel with the 360 Camera recording. Start recording on the phone first, then start recording on the 360 Camera within < 1 second. When stopping, stop the phone recording first, followed by the 360 Camera. |
File Naming Rules
The names of all 360 video files, calibration files, and trajectory files must contain only:
- Unaccented English characters.
- Digits.
- Underscores
_.
Valid examples:
floor1_cam360_part1.insv
calib_floor1.xensecalib
traject_floor1.xensetrajectory
Warning: Do not use spaces, special characters, or Vietnamese characters with diacritics in file names.
Invalid examples:
khu văn phòng.insv
tòa nhà.xensecalib
The system detects invalid file names and prevents the Upload button from being enabled.
II. DETAILED UPLOAD PROCEDURE ON THE PORTAL
The process for uploading spatial data from a 360 Camera consists of 6 steps according to the Portal interface:
- Start from the Spatial Map page.
- Select the Camera 360 data source.
- Configure spatial information.
- Upload the data files.
- Monitor the upload progress and receive the result notification.
- Monitor processing progress and manage the map.
Step 1: Start from the Spatial Map Page
-
Open a browser and log in to portal.xensear.vn .
-
In the left Sidebar, click Spatial Map.
-
On the map list interface, click the Create button in the upper-left corner, next to the search bar.
-
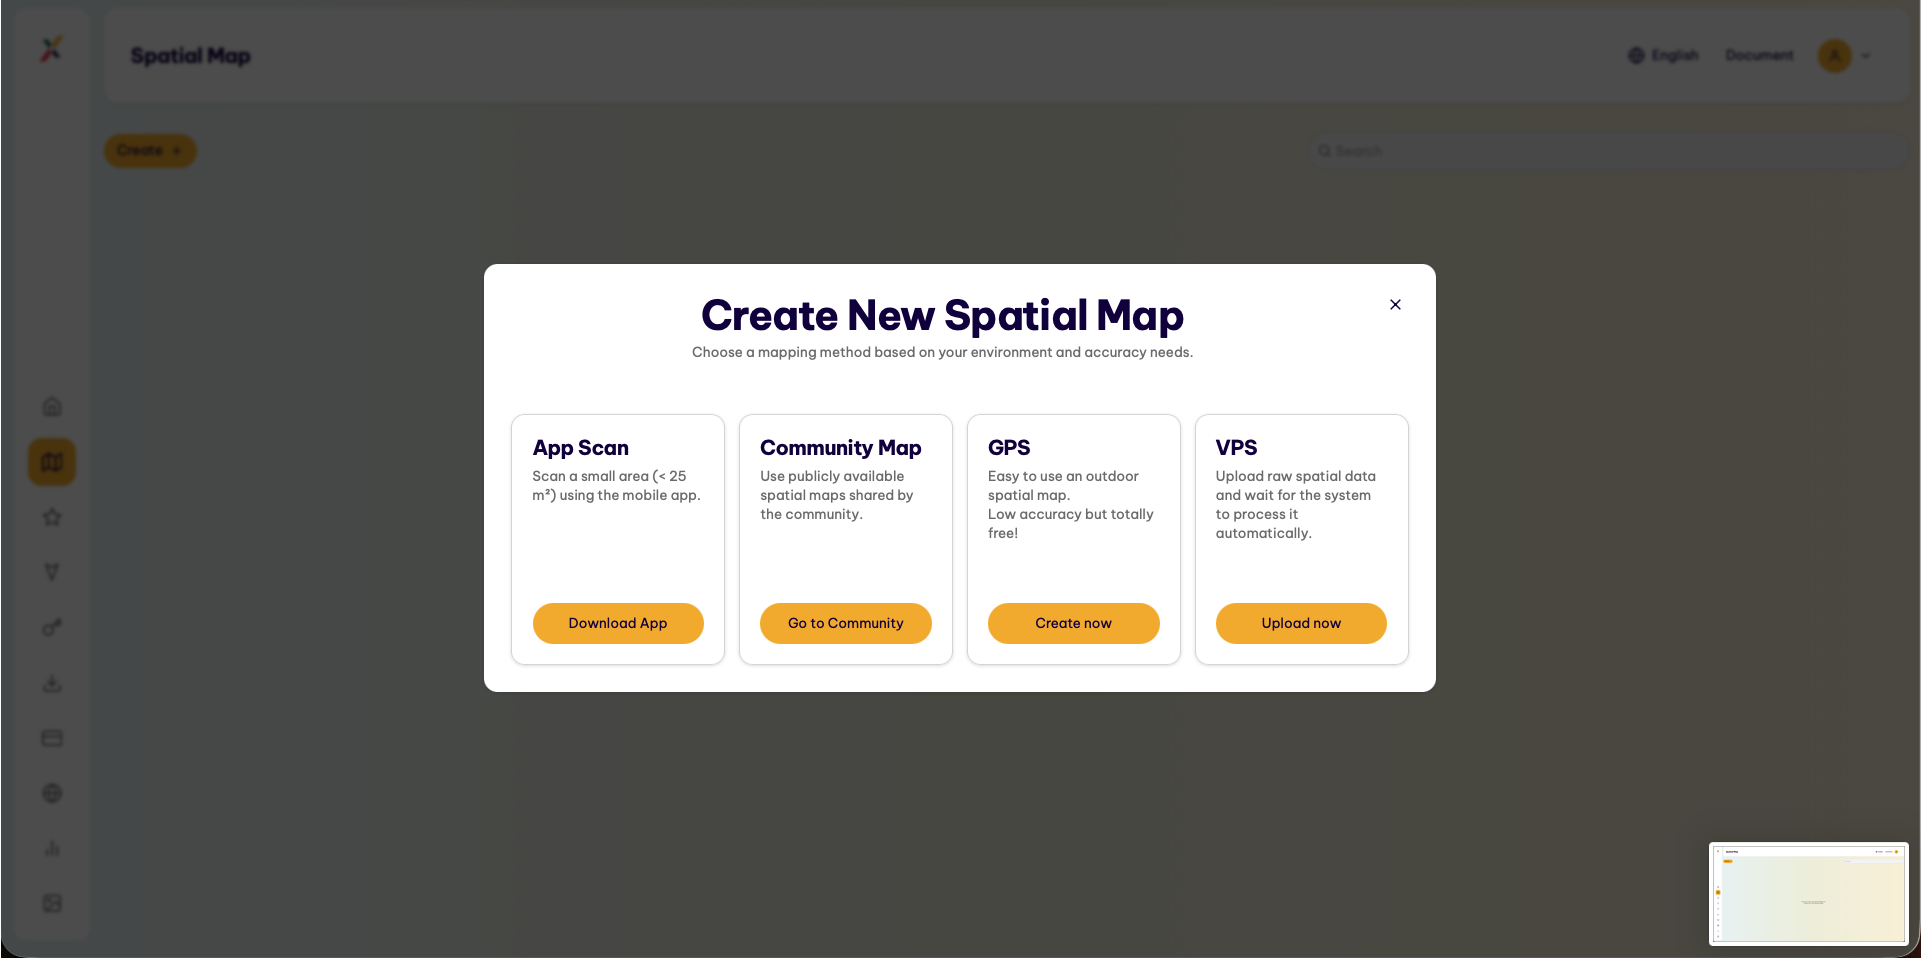
The Create New Spatial Map dialog displays 4 map creation methods:
- App Scan: Scan a small space (
< 25 m²) directly using a mobile application. - Community Map: Use a free spatial map from the community.
- GPS: Create an outdoor positioning map using GPS coordinates.
- VPS: Upload raw spatial data for automatic processing.
- App Scan: Scan a small space (
-
In the VPS tab, click Upload now.
Step 2: Select the Camera 360 Data Source (Raw Data Source)
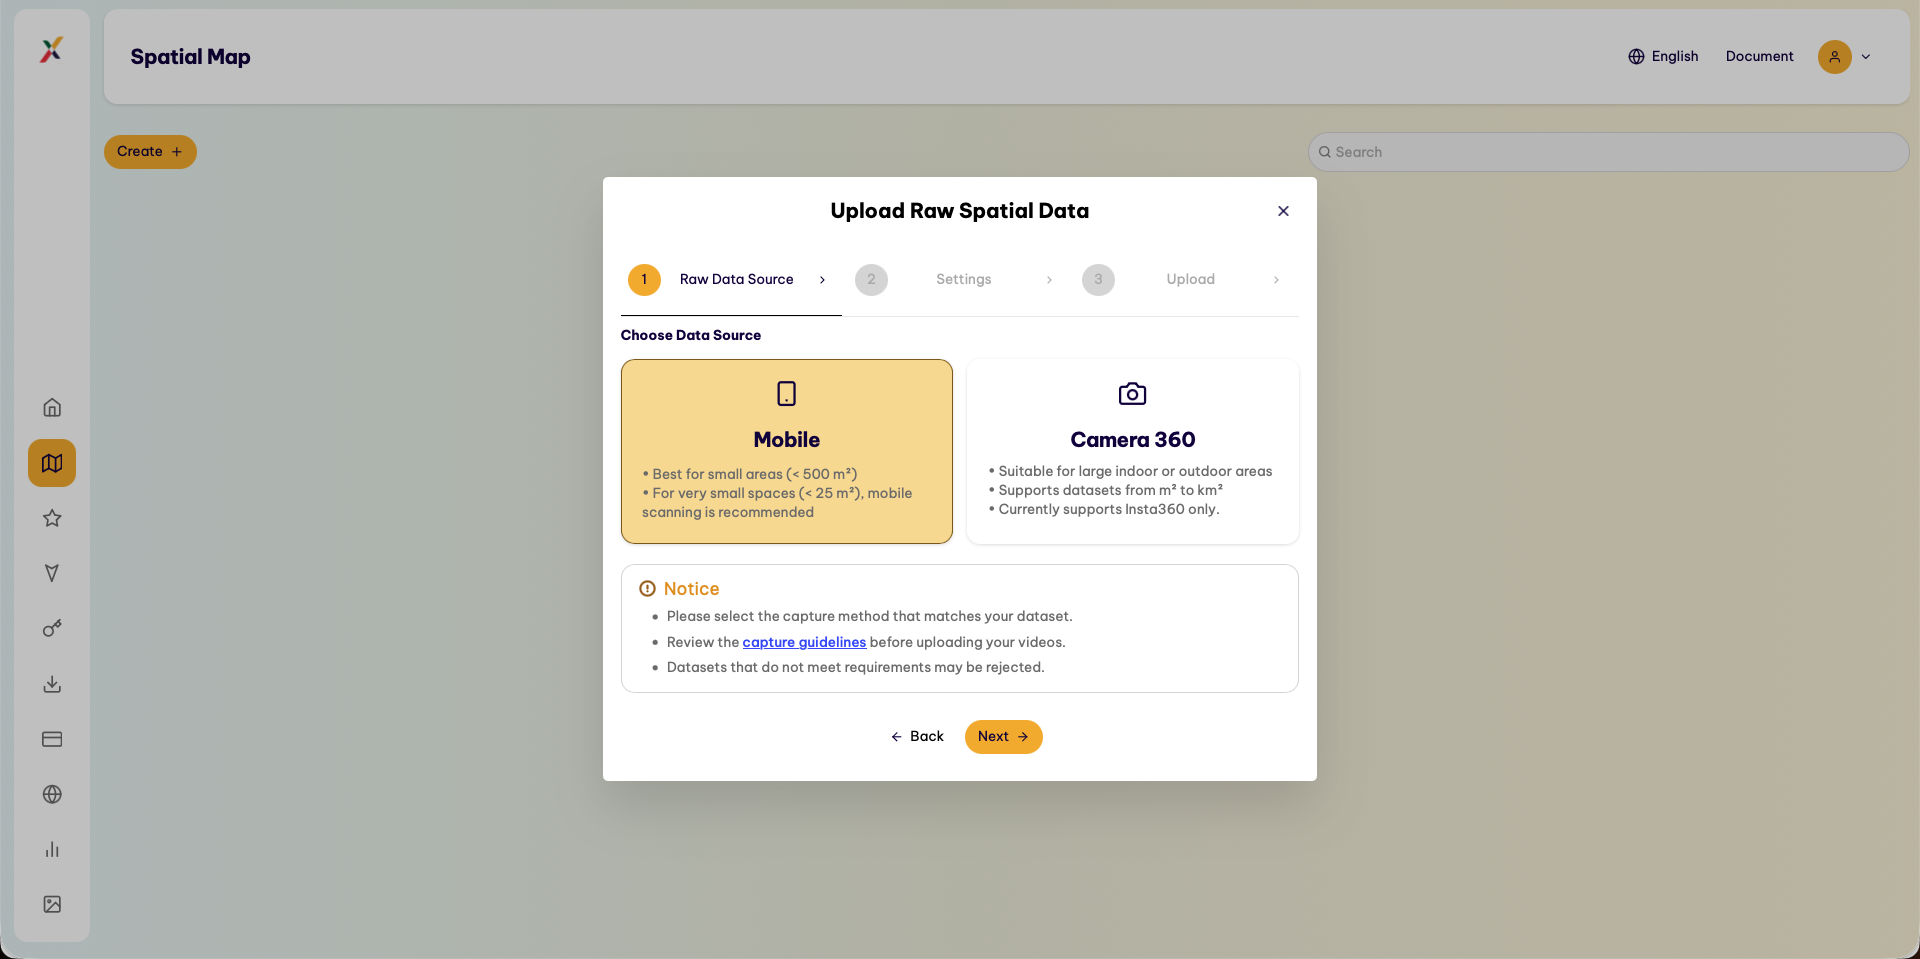
The Upload Raw Spatial Data dialog appears.
-
In the Select Data Source step, select the Camera 360 tab.
-
The Camera 360 tab displays the following characteristics:
- Suitable for large indoor or outdoor areas — Suitable for large indoor or outdoor spaces.
- Supports datasets from m² to km² — Supports datasets ranging from
m²tokm². - Currently supports Insta360 only — Officially supports Insta360 devices at this time.
-
Carefully review the notices in the Notices section:
- Select the method that corresponds to the actual dataset you collected.
- Carefully check the recording requirements before uploading.
- Data that does not meet the technical requirements may be rejected during processing.
-
Click Next in the lower-right corner to continue to the configuration step.
Step 3: Configure Spatial Information
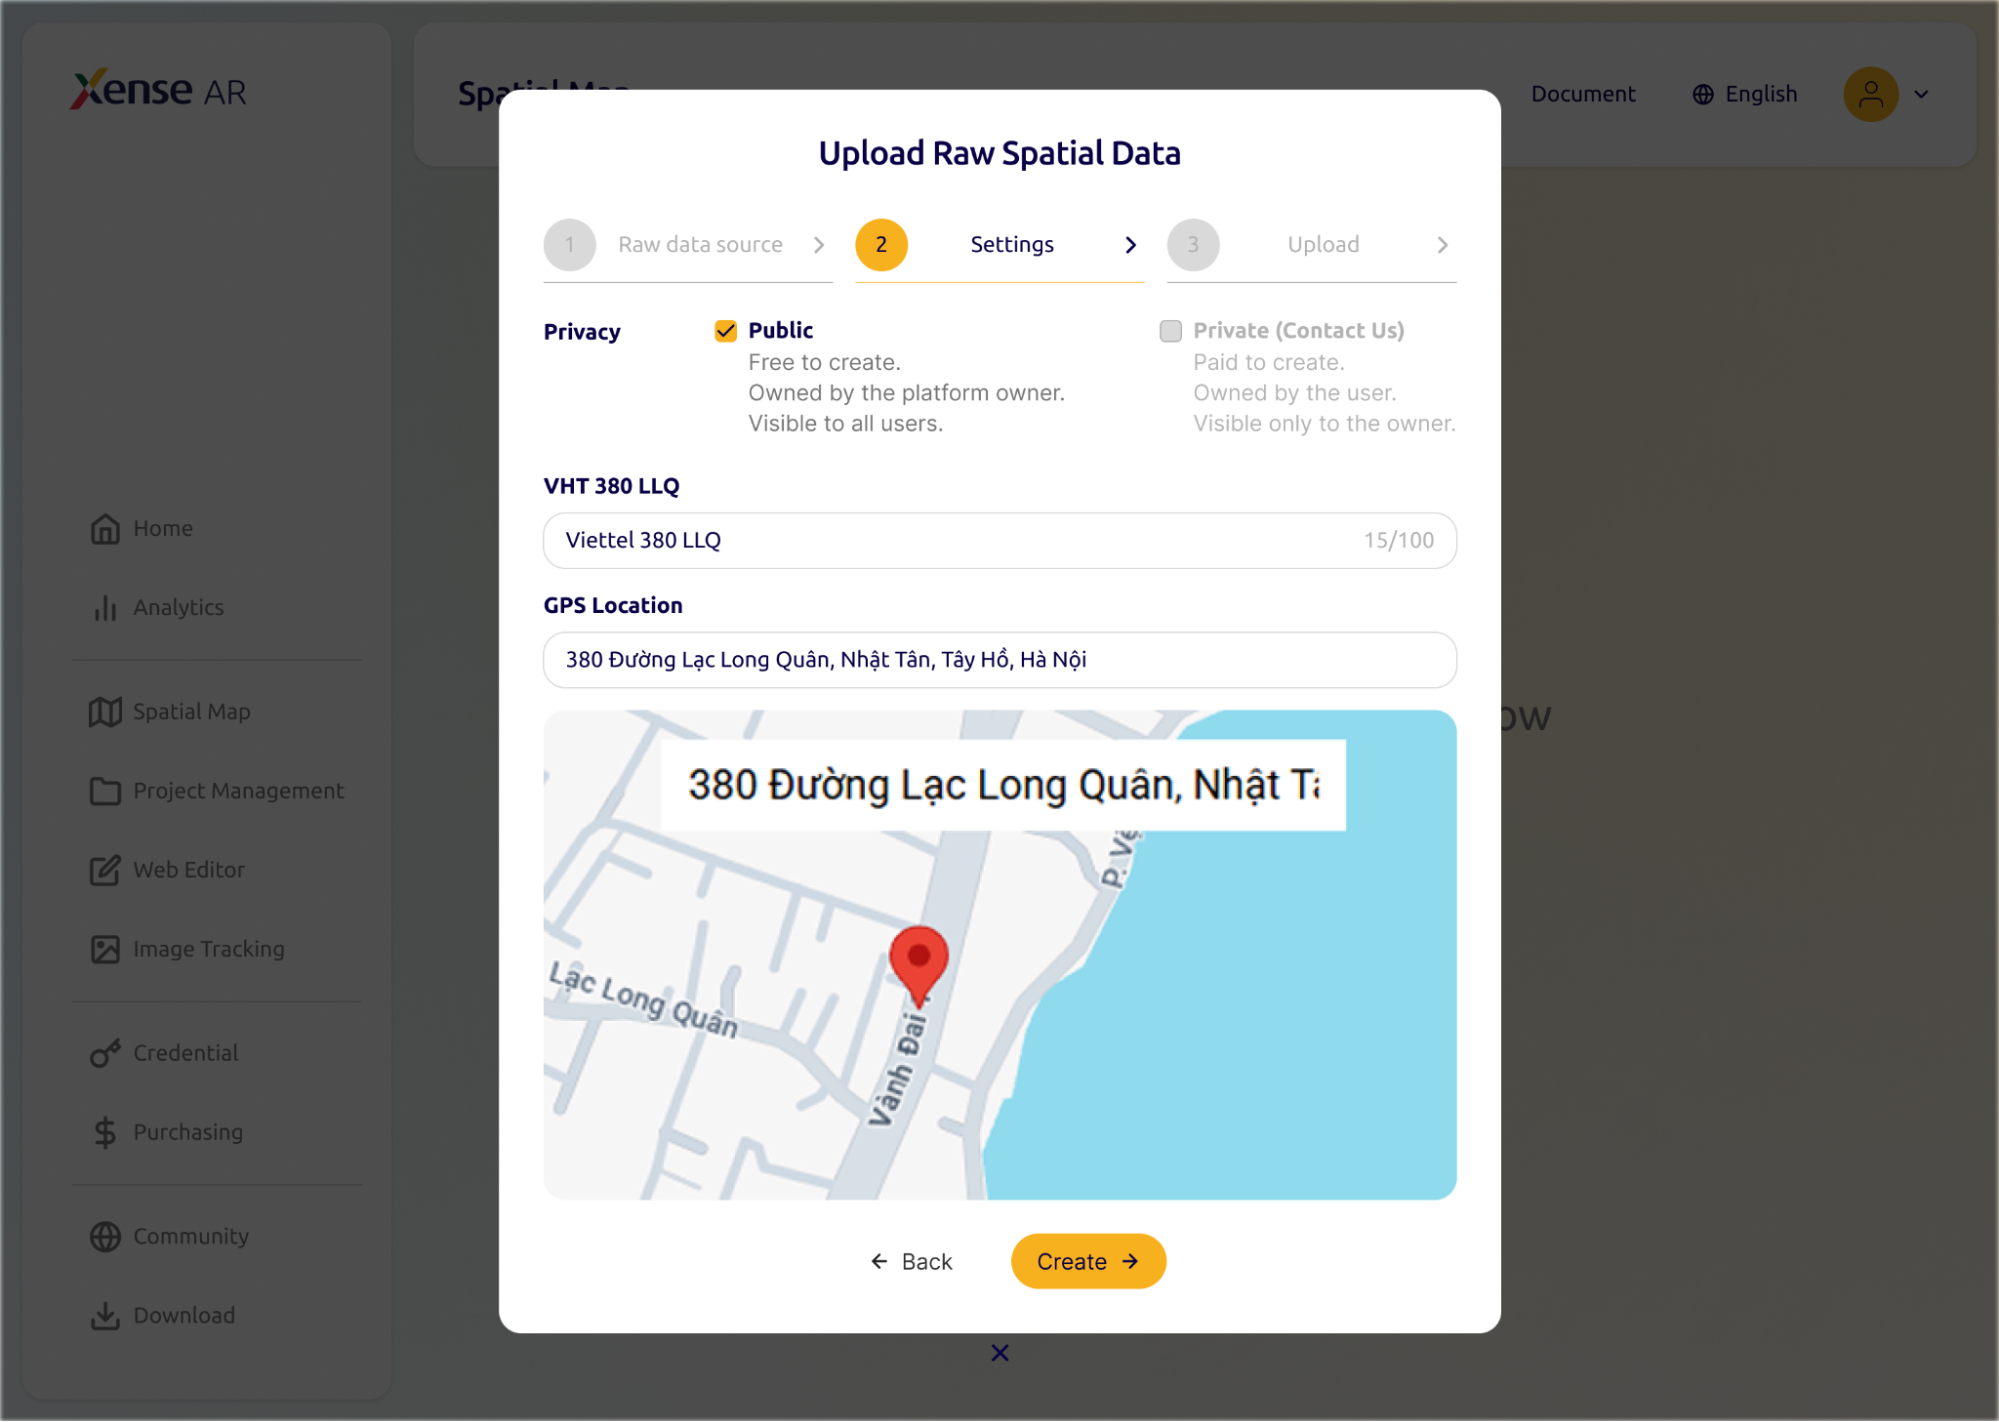
In the Settings step, configure the map management parameters.
1. Privacy
Select one of the following modes:
-
Public (Default & Recommended):
- Free to create.
- Owned by the platform.
- Publicly visible to the user community.
-
Private (Contact Us):
- Paid to create.
- Privately owned by the individual or organization.
- Only the account owner has access.
2. Map Name (Name)
In the Name your map here field, enter the name of the space.
- Maximum 100 characters.
- The interface provides a visual character counter.
Example:
Lotte Mall West Lake Floor 1 28/100It is recommended to use a clear name associated with the building, floor, or actual area to make searching and management easier.
3. GPS Location
In the Enter address here field, enter the address of the area.
The system automatically suggests locations using the Google Maps service.
Select the correct address from the suggestion list.
Example:
380 Lac Long Quan Street, Nhat Tan, Tay Ho, HanoiThe map preview below automatically displays the location and places a marker at the corresponding coordinates.
4. Continue to File Upload
After completing the configuration, click Next or Create in the lower-right corner to proceed to the file upload step.
Step 4: Upload the Data Files
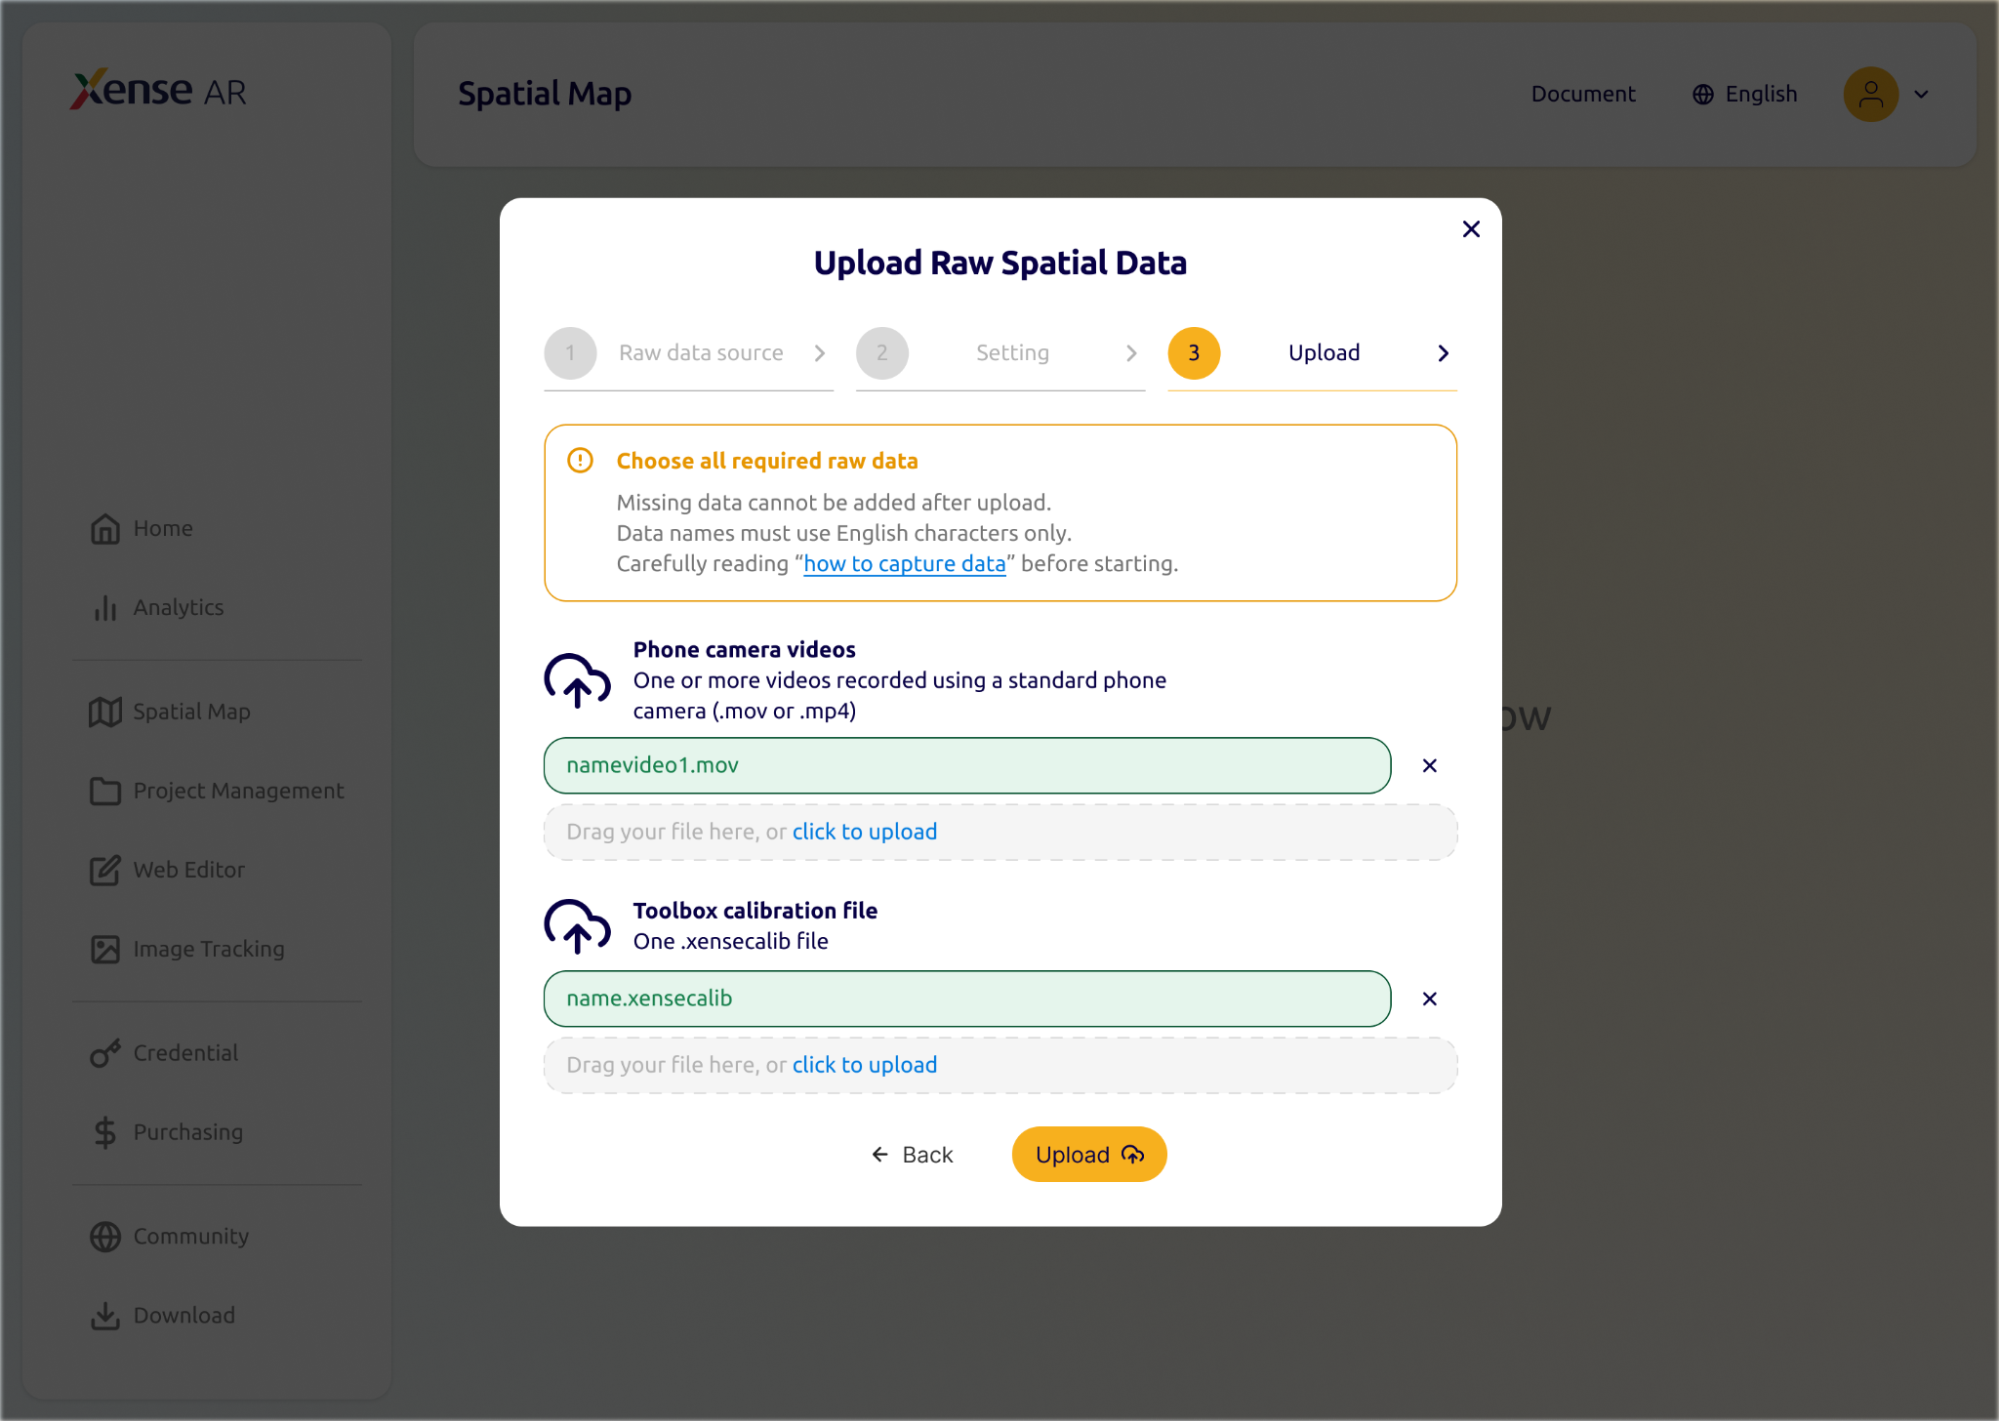
The Choose all required raw data interface is displayed.
Drag and drop or select files in the 3 separate upload areas.
1. Camera 360 Videos
Recording guide: View recording guide
Requirement:
One or more videos recorded using a 360 camera (.insv or .mp4)
Procedure:
- Drag all videos recorded using the 360 Camera into the upload area.
- Or click the upload area to select files from your computer.
- Make sure all video files belonging to the same recording session are selected.
Example:
hall_360_01.insv
hall_360_02.insv
2. Toolbox Calibration File
Toolbox guide: View Toolbox guide
Requirement:
One .xensecalib file
Procedure:
- Drag and drop exactly 1 file with the
.xensecalibextension. - The file must be extracted from the XenseAR ToolBox application.
Example:
calib_data.xensecalib3. Toolbox Trajectory File
Requirement:
One .xensetrajectory file
Procedure:
- Drag and drop exactly 1 file with the
.xensetrajectoryextension. - The file must be extracted from the XenseAR ToolBox application.
Example:
traject_data.xensetrajectory4. Start Upload
When all 3 data areas contain the required valid files and no error warnings are displayed, the Upload button in the lower-right corner becomes enabled.
Click Upload to begin sending the data to the system.
Step 5: Upload Progress and Result Notification
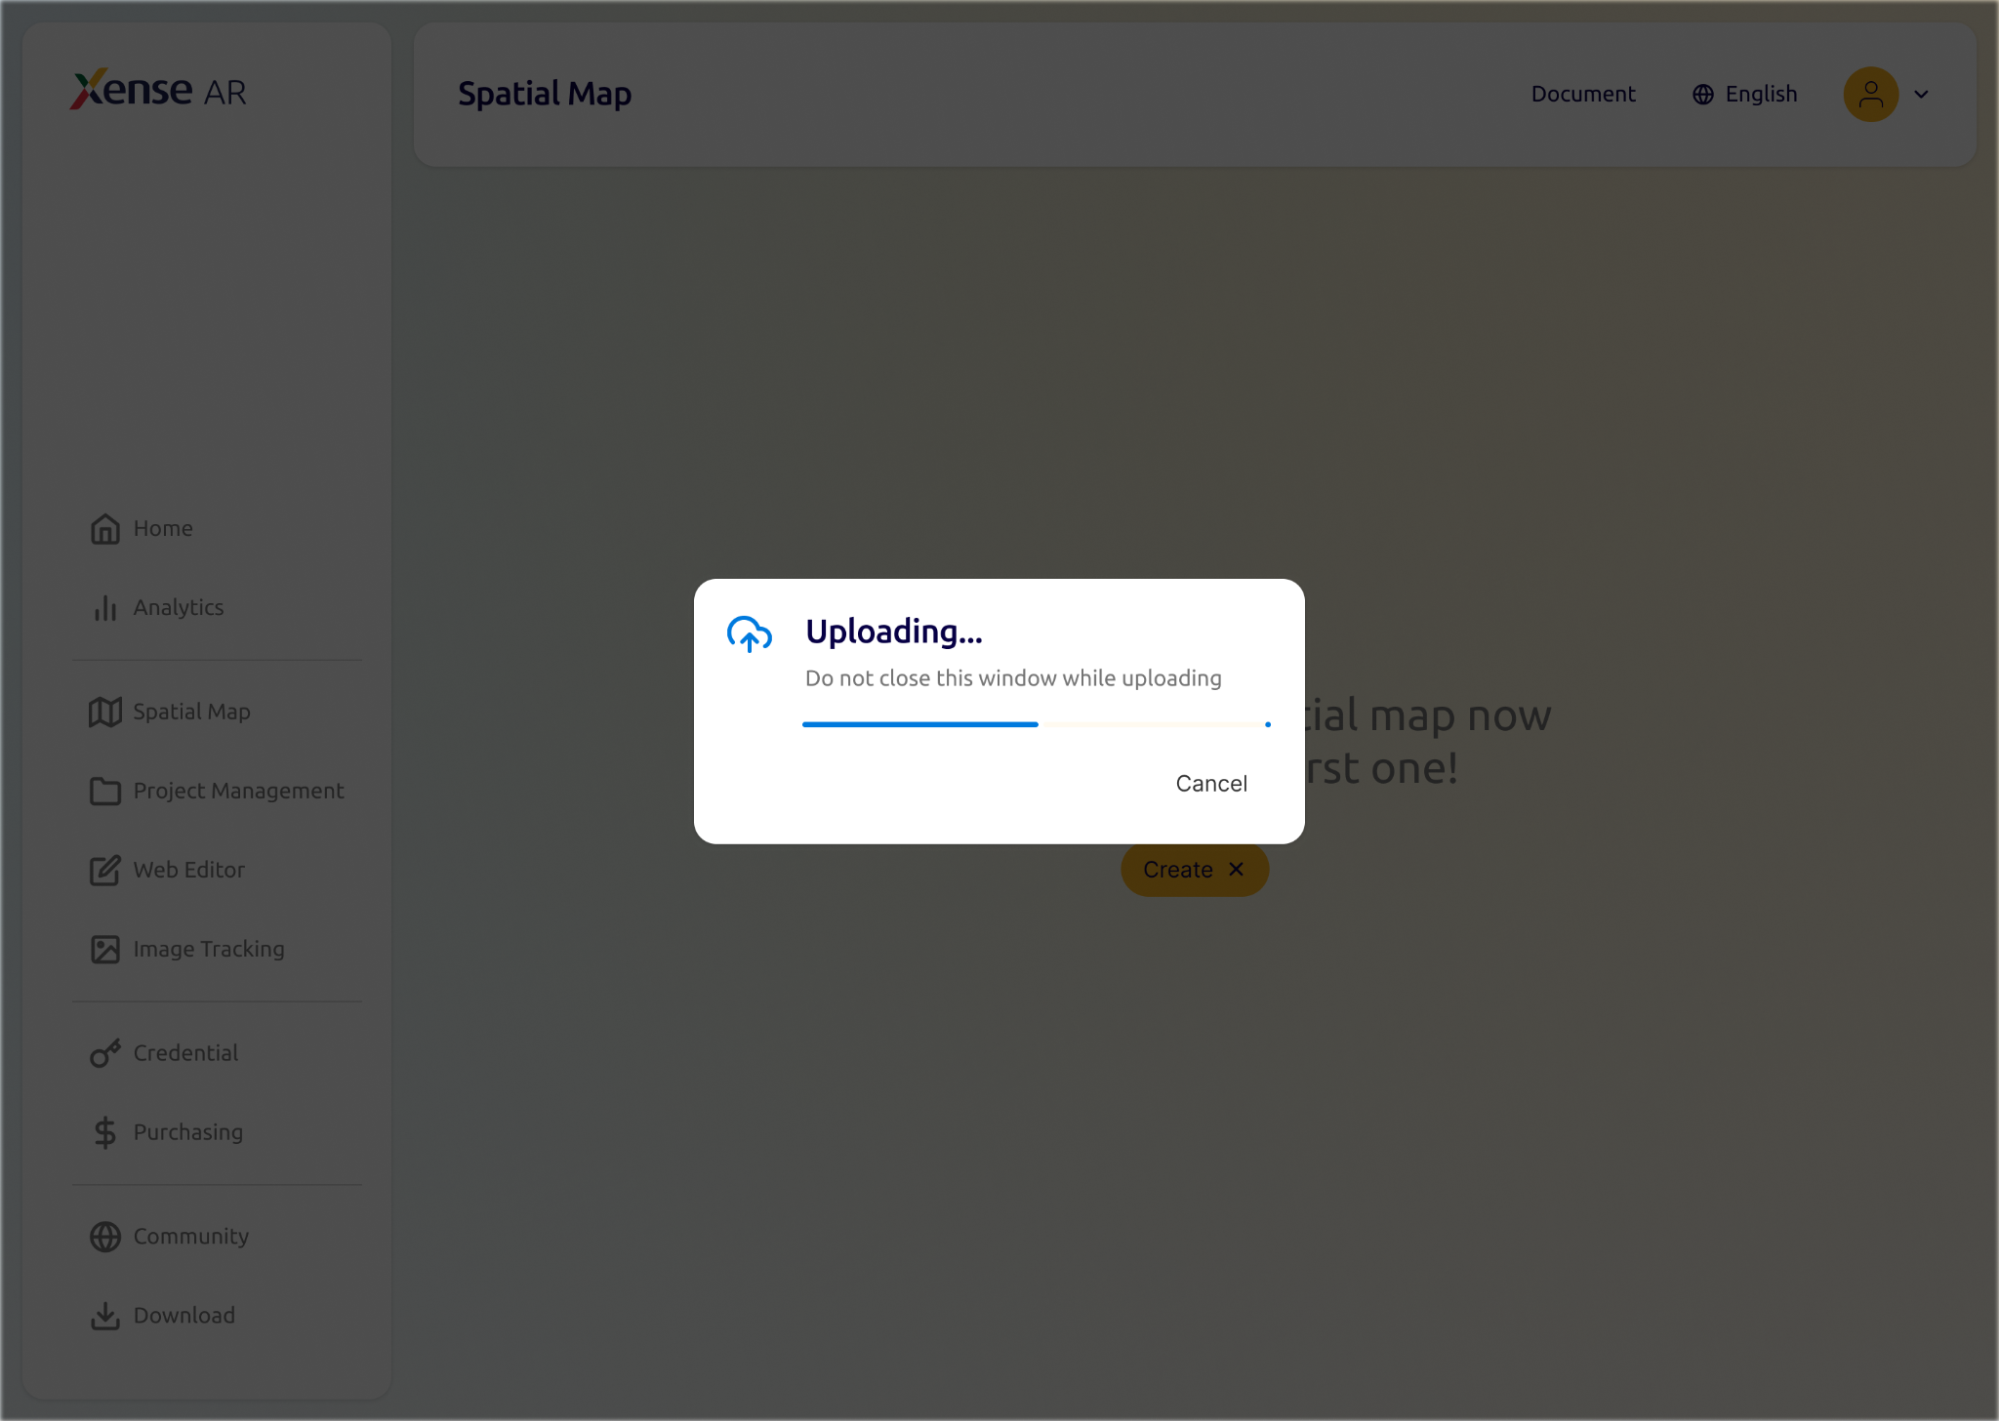
The system displays an Uploading… popup with the message:
Do not close this window while uploading
During the upload process, users should:
- Keep the browser tab open.
- Do not close the window performing the upload.
- Maintain a stable Internet connection.
- Wait until all large data files have finished uploading.
Step 6: Monitor Processing Progress and Manage the Map
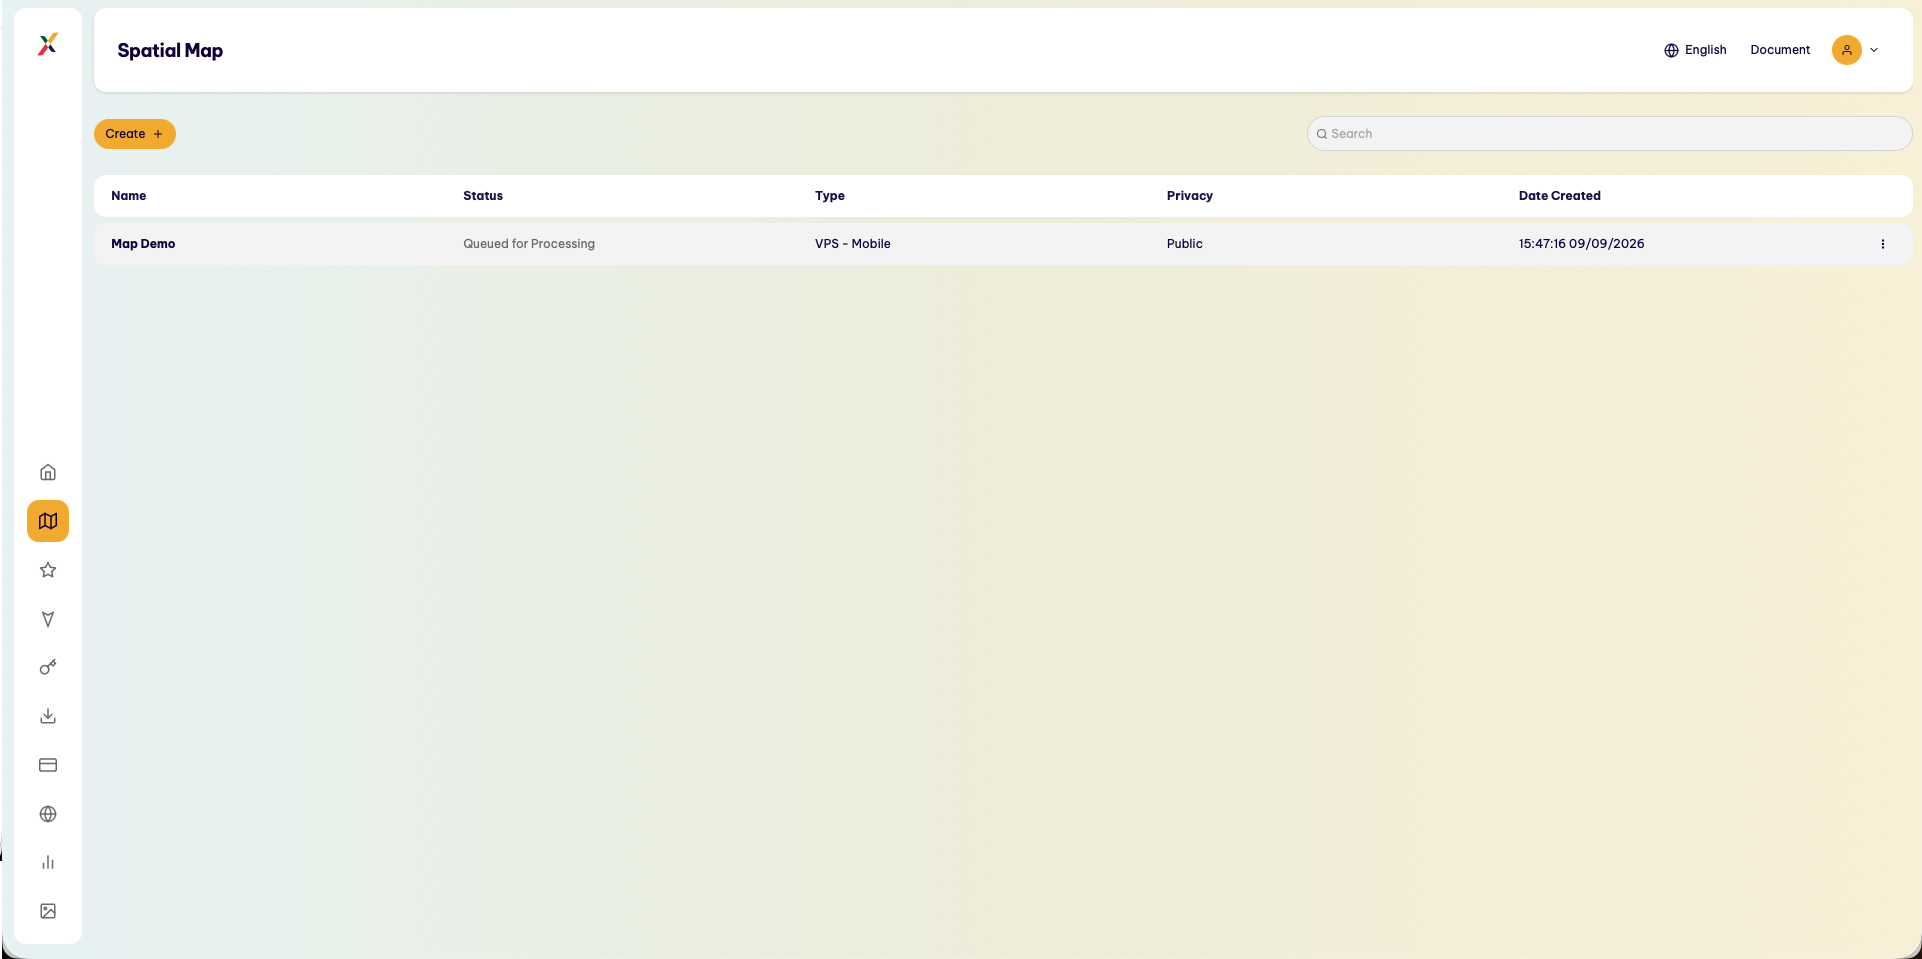
After the upload is complete, the system automatically redirects to the Spatial Map list.
The newly uploaded map appears in the dashboard with the following information:
- Name: The assigned map name.
- Type: Displays
VPS Camera 360, distinguishing it fromVPS MobileandGPS. - Privacy:
PublicorPrivate. - Date created: The date and time when the map was created.
Processing Status Lifecycle
| Status | UI Appearance | Technical Meaning & System Behavior |
|---|---|---|
| Queued for Processing | Orange/gray label | The map has been successfully uploaded and is waiting for the Cloud server cluster to allocate GPU/CPU processing resources. |
| Processing | Blue label | The server cluster is extracting 360 frames, matching Trajectory data from the IMU, matching image features, and reconstructing the 3D Mesh. |
| Ready to use | Green label | The map has been successfully reconstructed and is ready to be used to create an AR Project, opened in Web Editor, or imported into Unity Editor through the SDK. |
| Failed | Red label | Processing was unsuccessful, typically due to excessive camera shake, lens obstruction, or time synchronization issues with the Trajectory file. |
| Awaiting Payment | Orange/yellow label | Applies to maps created in Private mode that are waiting for service payment before processing is activated. A Pay now button appears in the action column. |