Edit Information
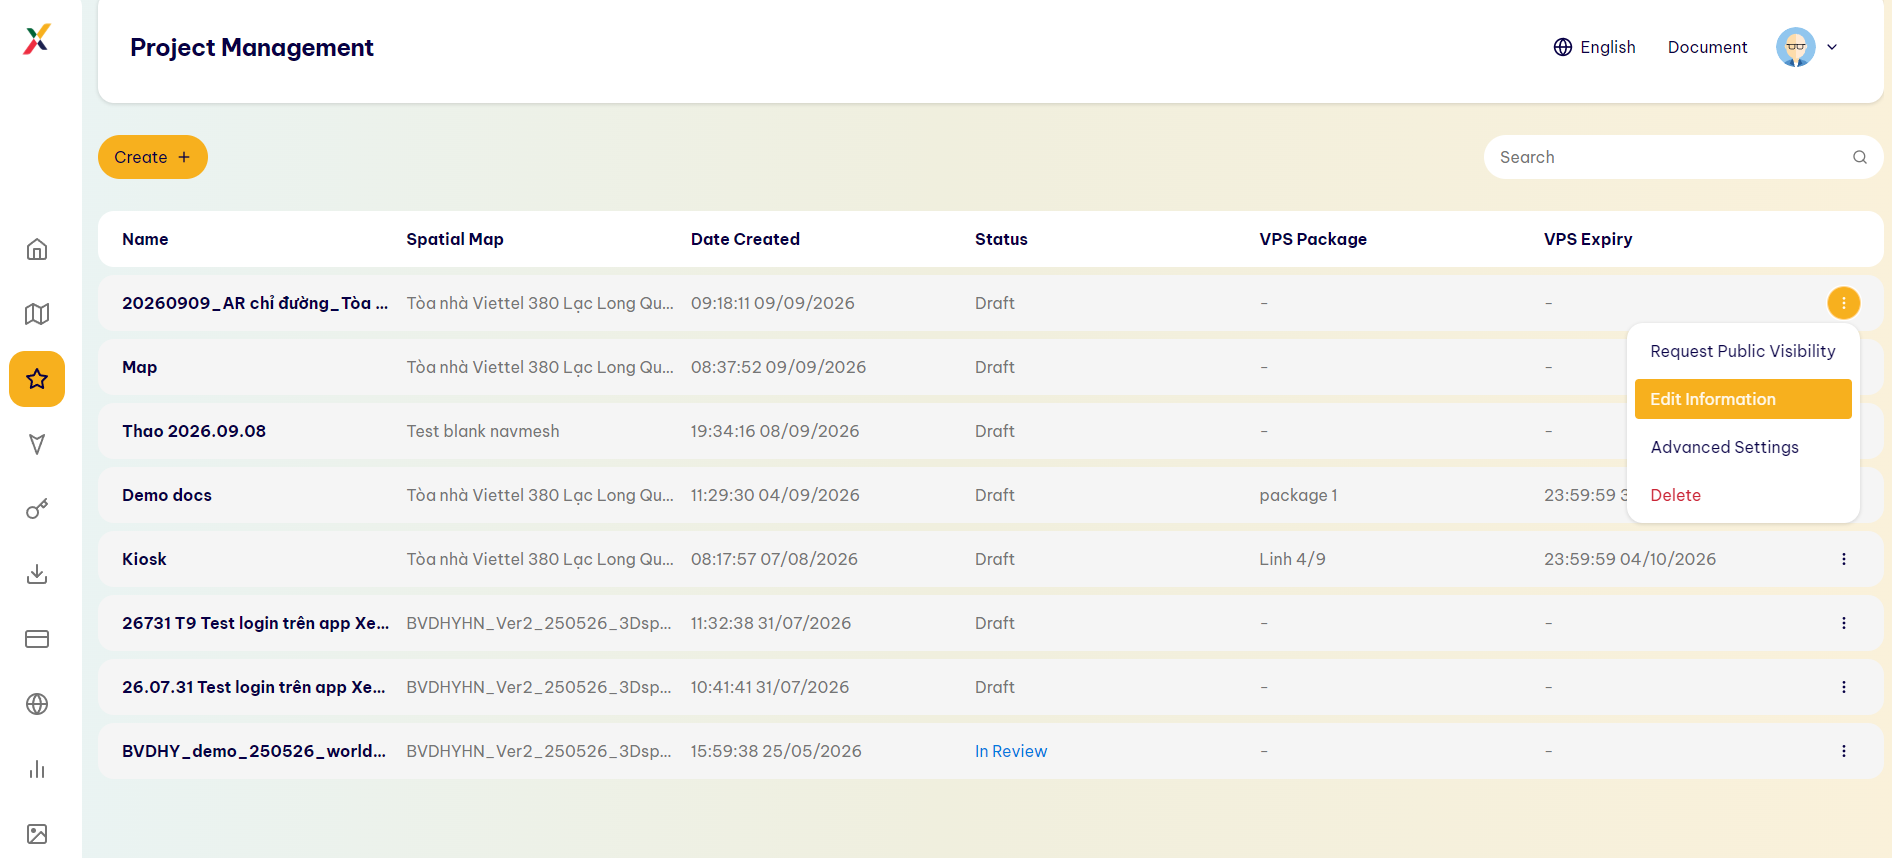
After creating a Project, the Creator can update the Project’s displayed information.
-
Find the Project you want to edit.
-
Click [:] on the right side of the Project → select [Edit Information].
The system opens the Information Settings window. Here, the Creator can update the Project’s displayed information.
Update Information
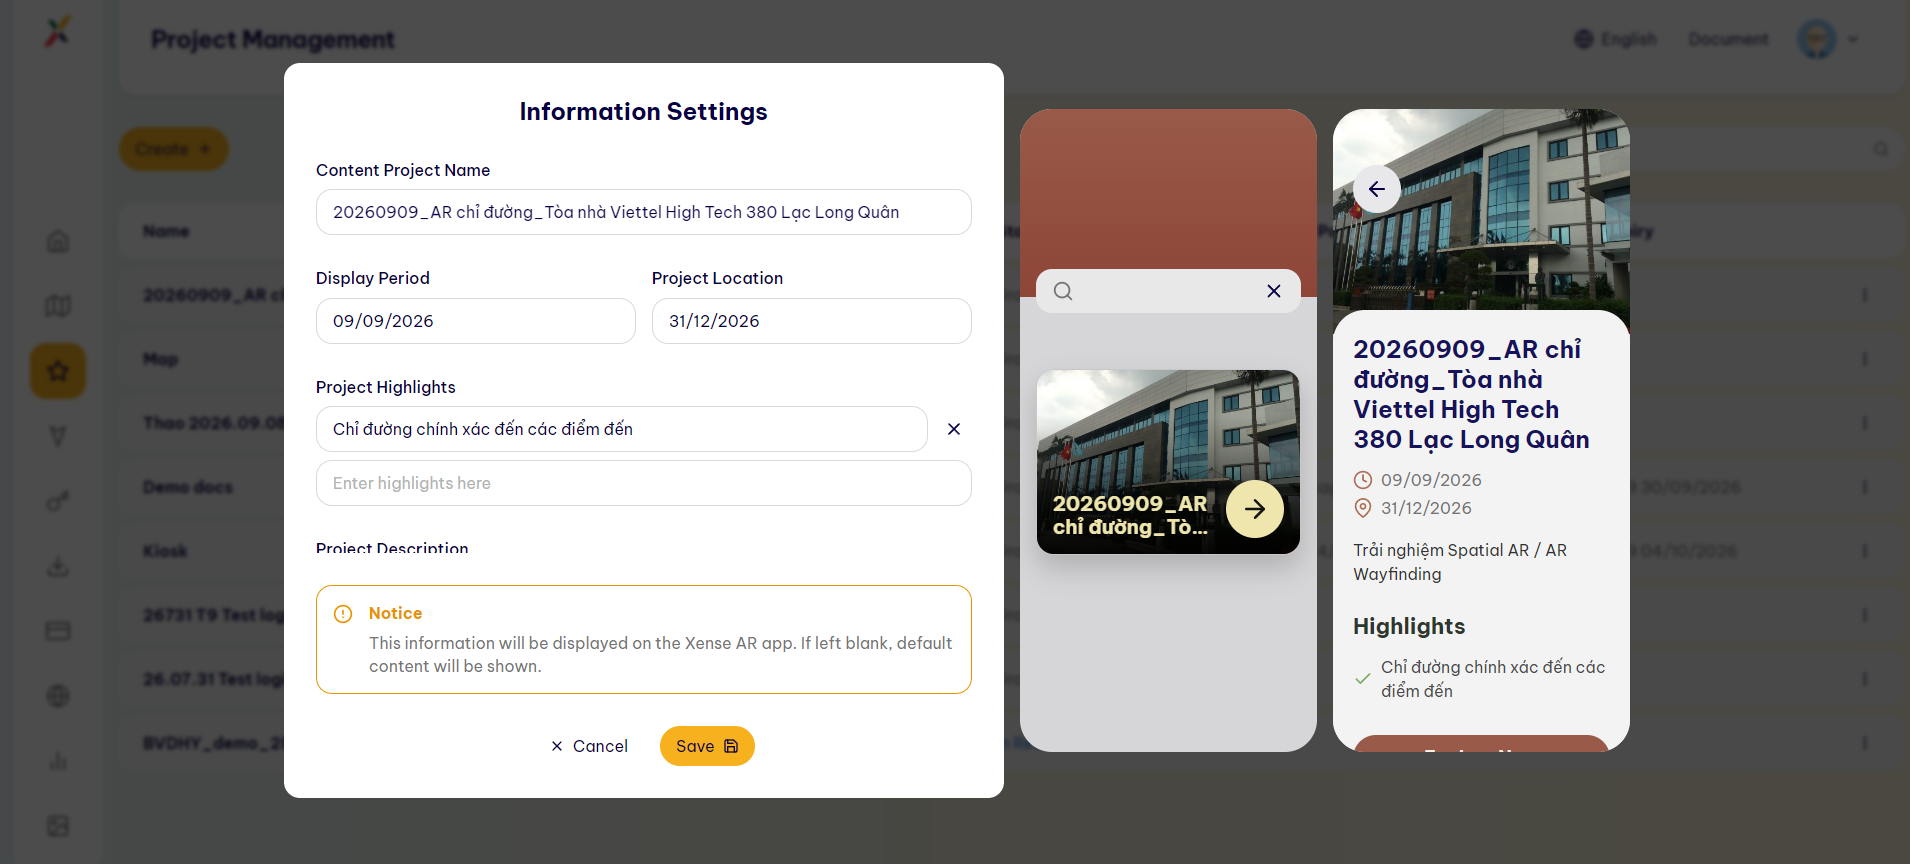
1. Content Project Name
Check and update the Project name in this field.
2. Display Period
Set the period during which the Project is displayed. Enter:
- Start Date
- End Date
3. Project Location
Enter information about the location where the Project will be deployed.
4. Project Highlights
Enter the highlights of the Project.
Previously entered highlights can be removed by clicking the [×] icon next to the corresponding content.
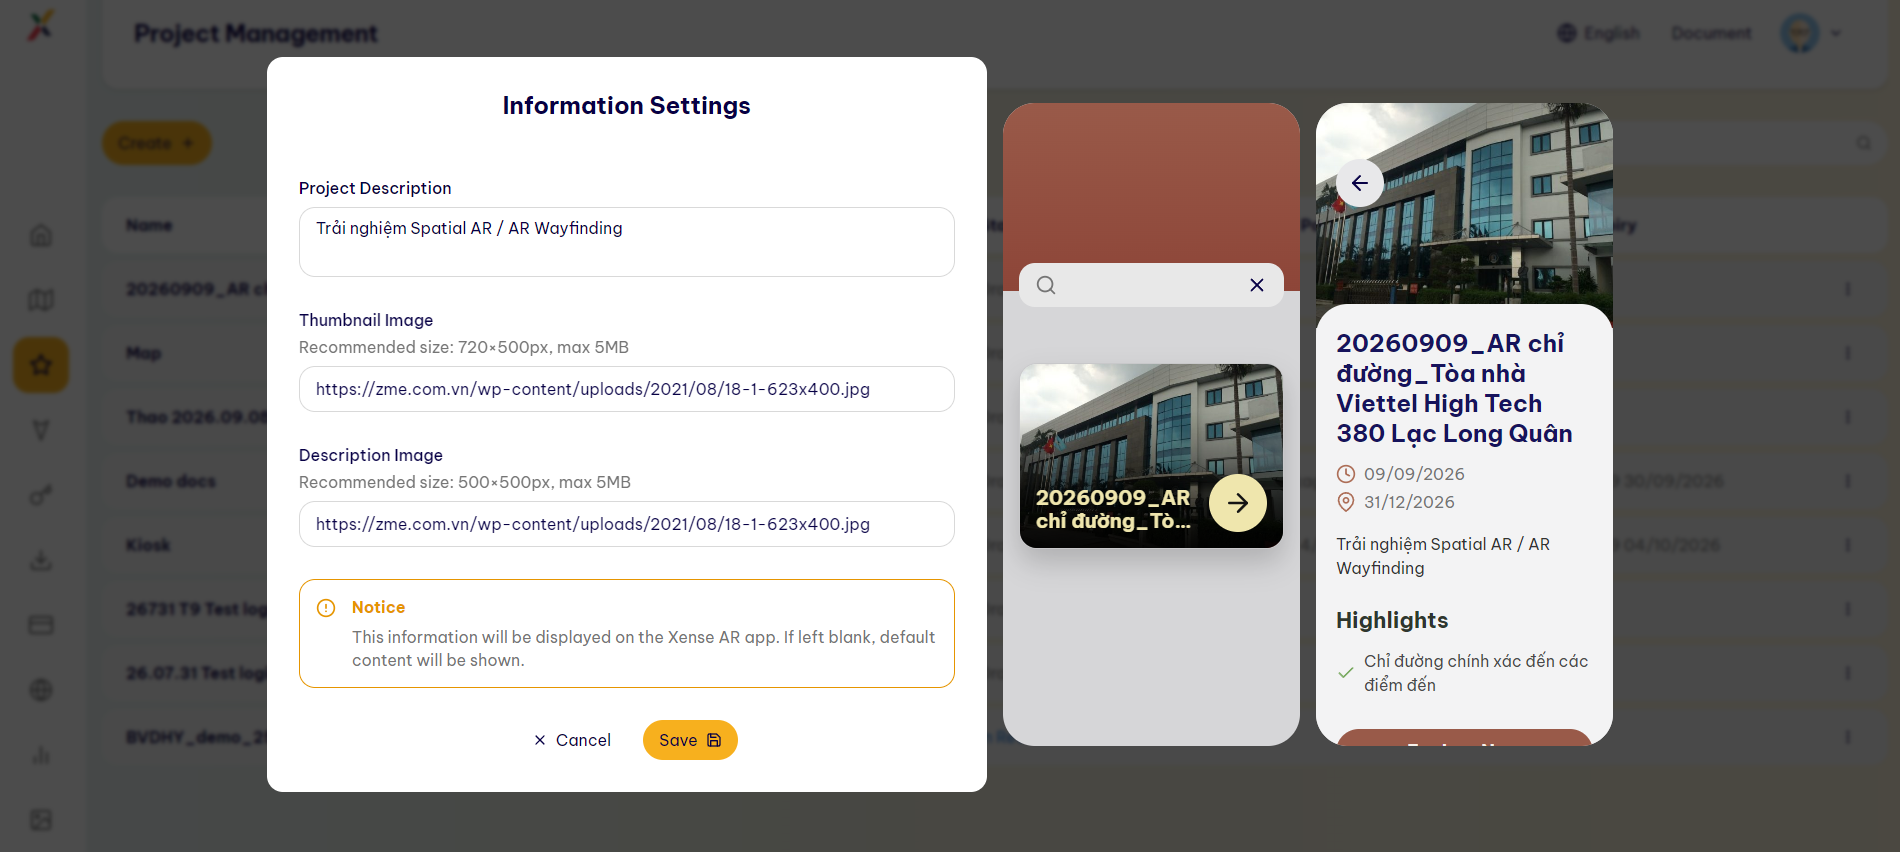
5. Project Description
Enter a brief description of the experience/Project.
6. Thumbnail Image
Set the thumbnail image for the Project.
The system supports directly entering the image URL.
- Recommended size: 990 × 550 px
- Maximum file size: 5 MB
7. Banner Image
The banner image displayed in the Project section.
The system supports directly entering the image URL.
- Recommended size: 500 × 500 px
- Maximum file size: 5 MB
8. Save Information
Click [Save] to save the changes.
If you do not want to save the changes, click [Cancel] to cancel the operation.