NAVIGATION EDITOR USER GUIDE
1. Overview
Navigation Editor is a feature in XenseAR Web Editor that allows users to configure and test navigation routes in 3D space.
Through Navigation Editor, users can define a Start Point, a Destination, select a navigation option, and check the route calculated by the system directly in the 3D space.
XenseAR Navigation combines spatial data with VPS (Visual Positioning System) technology to determine the device’s position and orientation in the real-world environment, allowing the system to display an AR route aligned with the physical space. The system supports visual navigation routes, destinations, and navigation options suitable for different deployment environments.
2. Purpose
Navigation Editor is used to:
- Set up routes between different locations.
- Define the Start Point and Destination.
- Select an appropriate navigation option.
- Configure routes that prioritize stairs or elevators.
- Visualize routes in 3D space.
- Check and evaluate routes before deployment.
- Delete the current route to create a new one.
XenseAR supports creating navigation routes, configuring destinations, and customizing how paths are displayed in AR experiences without requiring programming for standard navigation configurations.
3. Prerequisites
Before configuring Navigation, make sure that:
- The Project is linked to the appropriate Spatial Map.
- The Spatial Map has a NavMesh configured according to the guide: Spatial Map / Manage Spatial Map / Add Navmesh.
- The NavMesh has been created previously using NavMesh Editor.
- The required Location Info items have been created and are displayed in the list.
Note: If the NavMesh has not been created or does not cover the area where navigation is required, Navigation may not be able to calculate a route.
4. Configure Location Info – Destination
Location Info (Destination) is the location that the end user wants to navigate to.
Access Navigation Editor through:
XenseAR Creator Portal → Web Editor → Project → Location
Step 1: Open Navigation Editor
Navigate to:
Web Editor → Map Editor → Open Project → Location
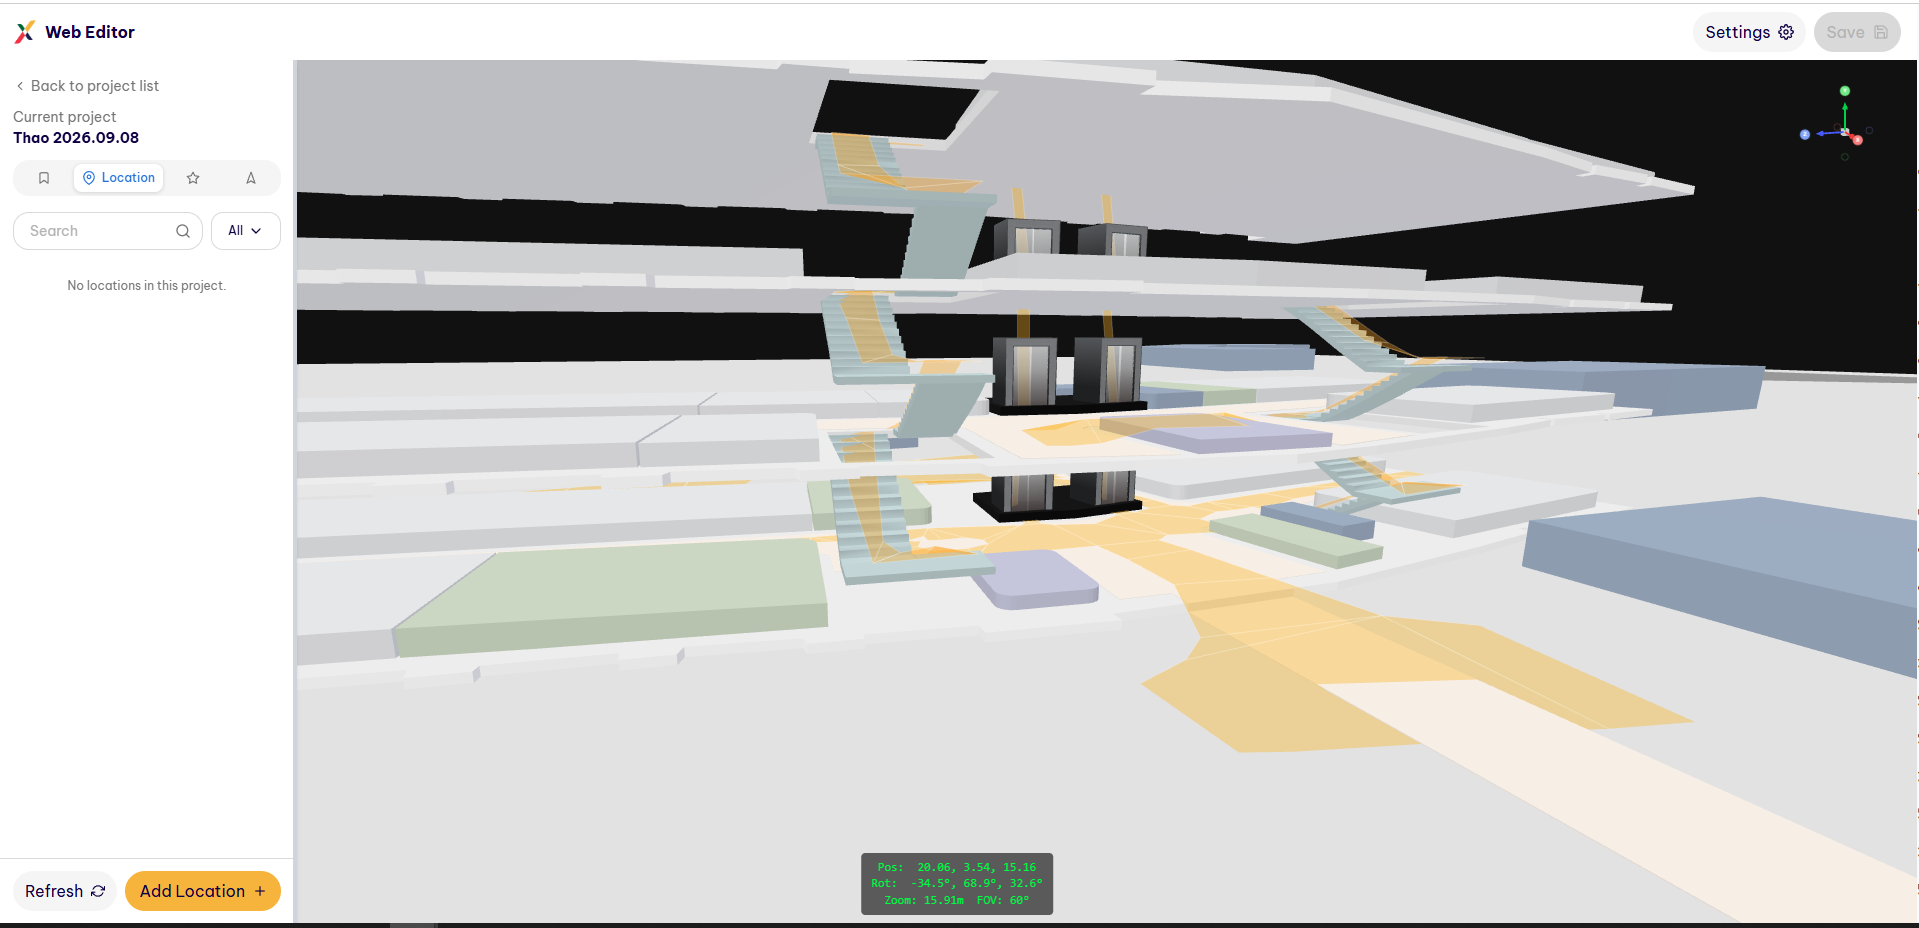
Step 2: Create Location Info
Select Add Location.
The system displays the fields required to configure the Location Info.
The basic information includes:
- Name: Name of the destination.
- Logo link: Logo URL for the destination (optional).
- Floor: Floor where the destination is located (for example, Floor 1).
- Category: Category of the destination (for example, an exploration navigation point for an exhibit or a navigation point for a game).
- Description: Detailed description of the destination.
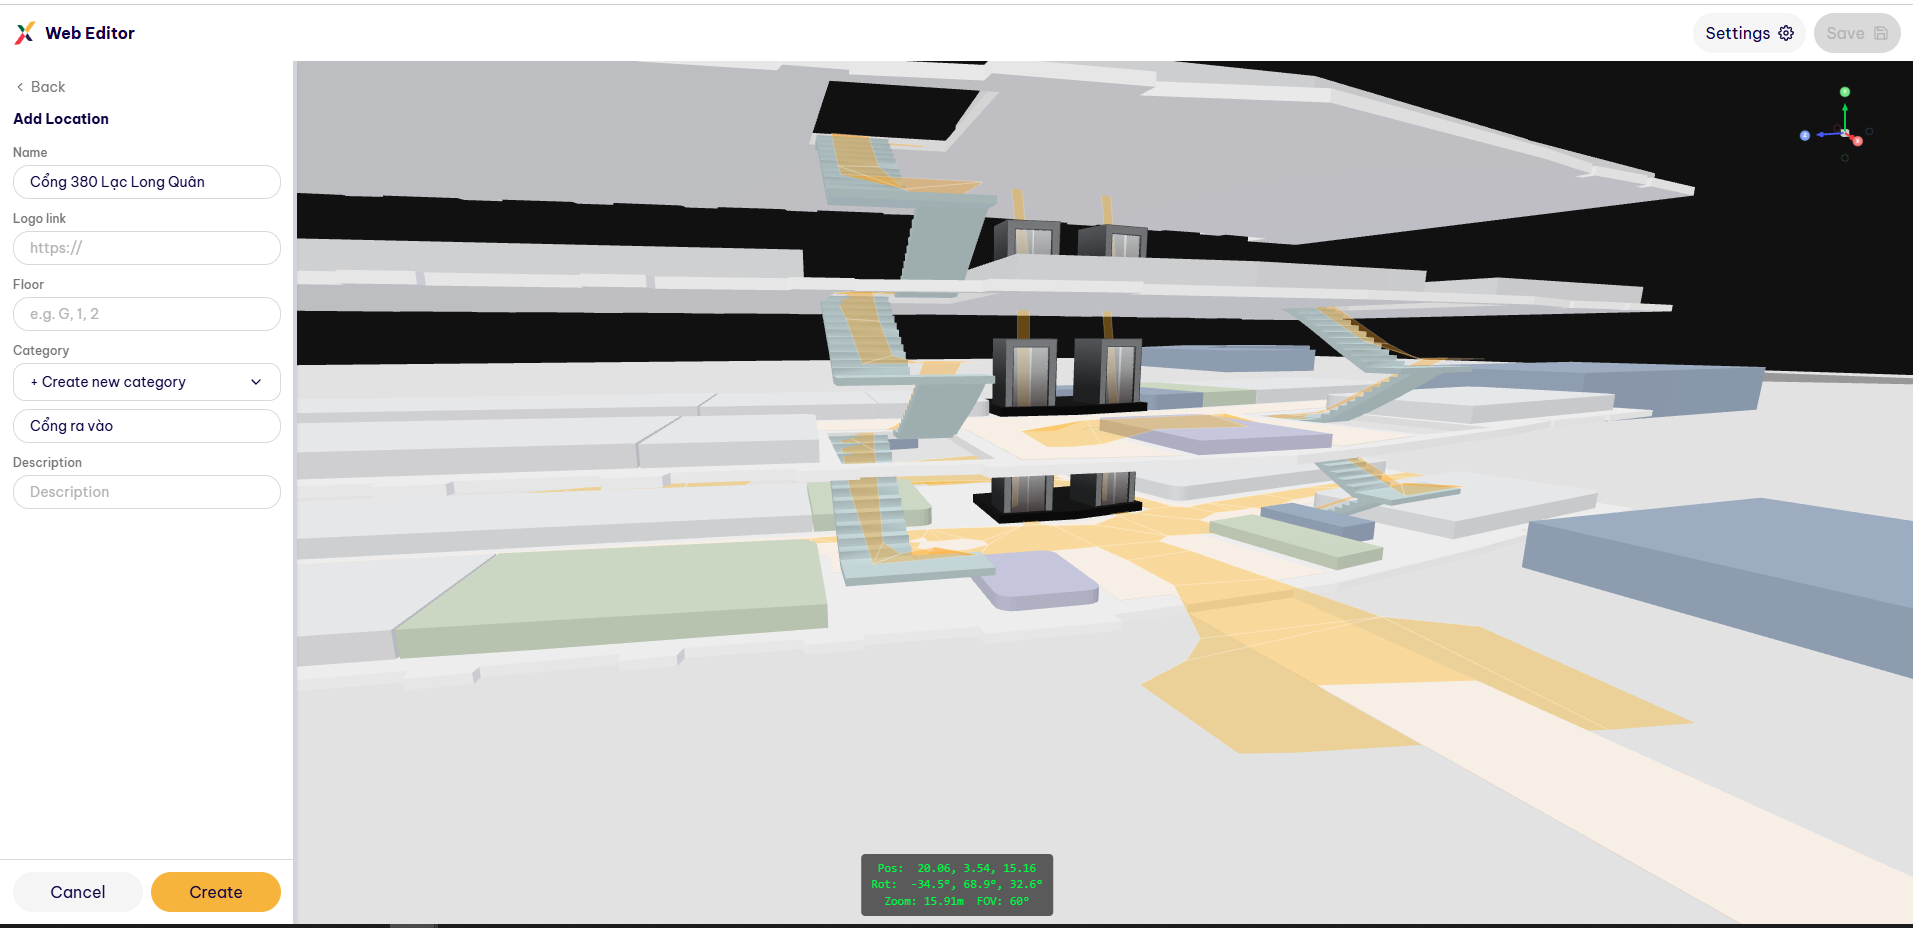
After configuring the information, click Create at the bottom of the Panel.
Step 3: Place Location Info in the Space
After clicking Create, the system returns to the initial Location tab interface.
The newly created Location Info is now displayed in the Location Tab list.
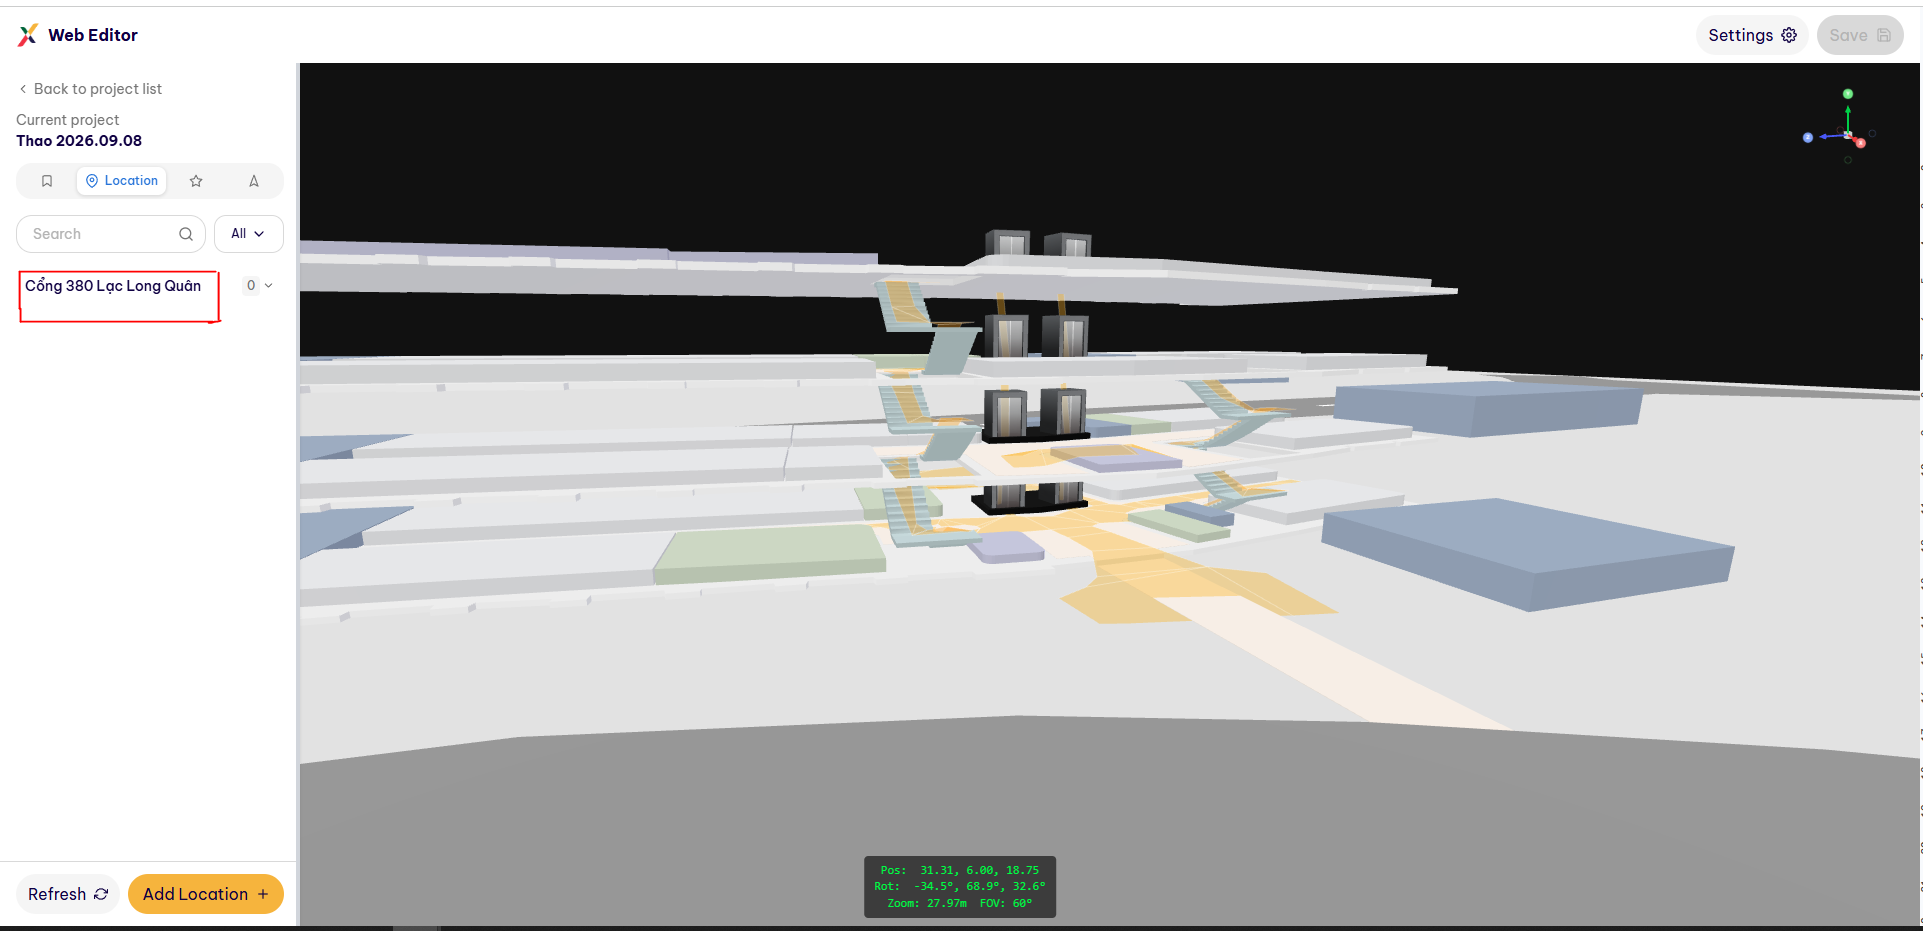
To place the Location in the 3D Map space:
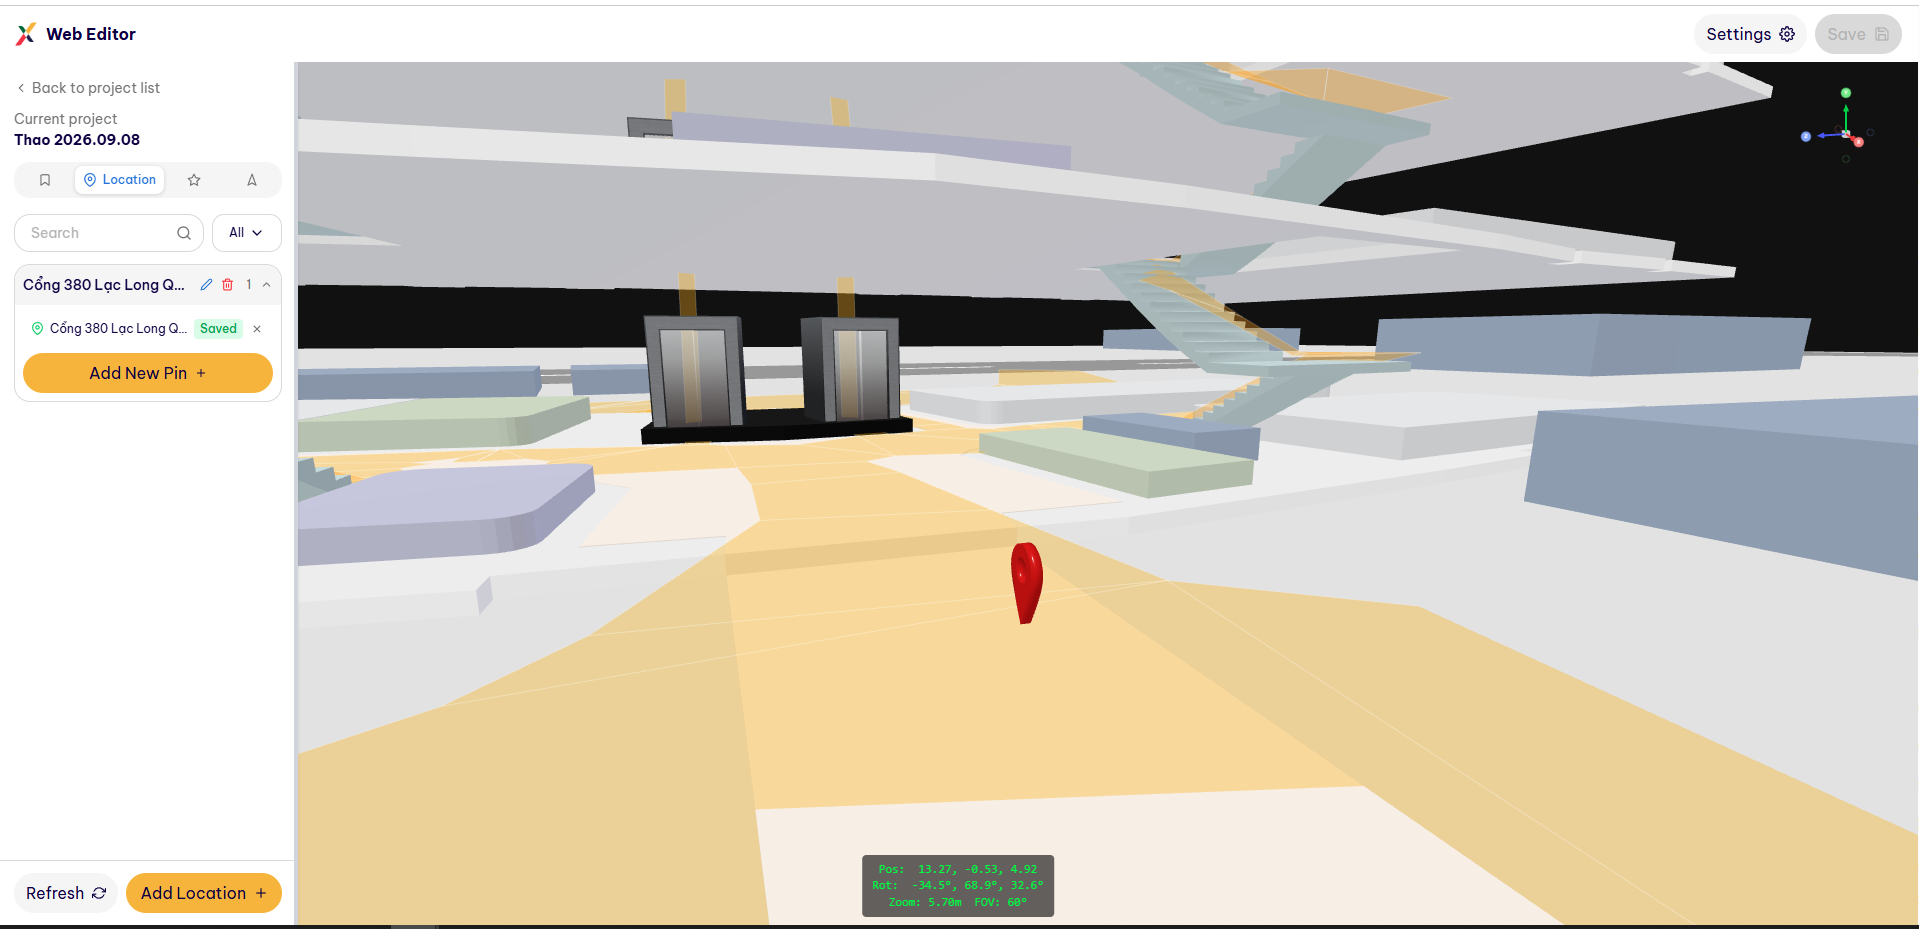
Select Location Info → Add New Pin → Select the position and place the Pin Location.
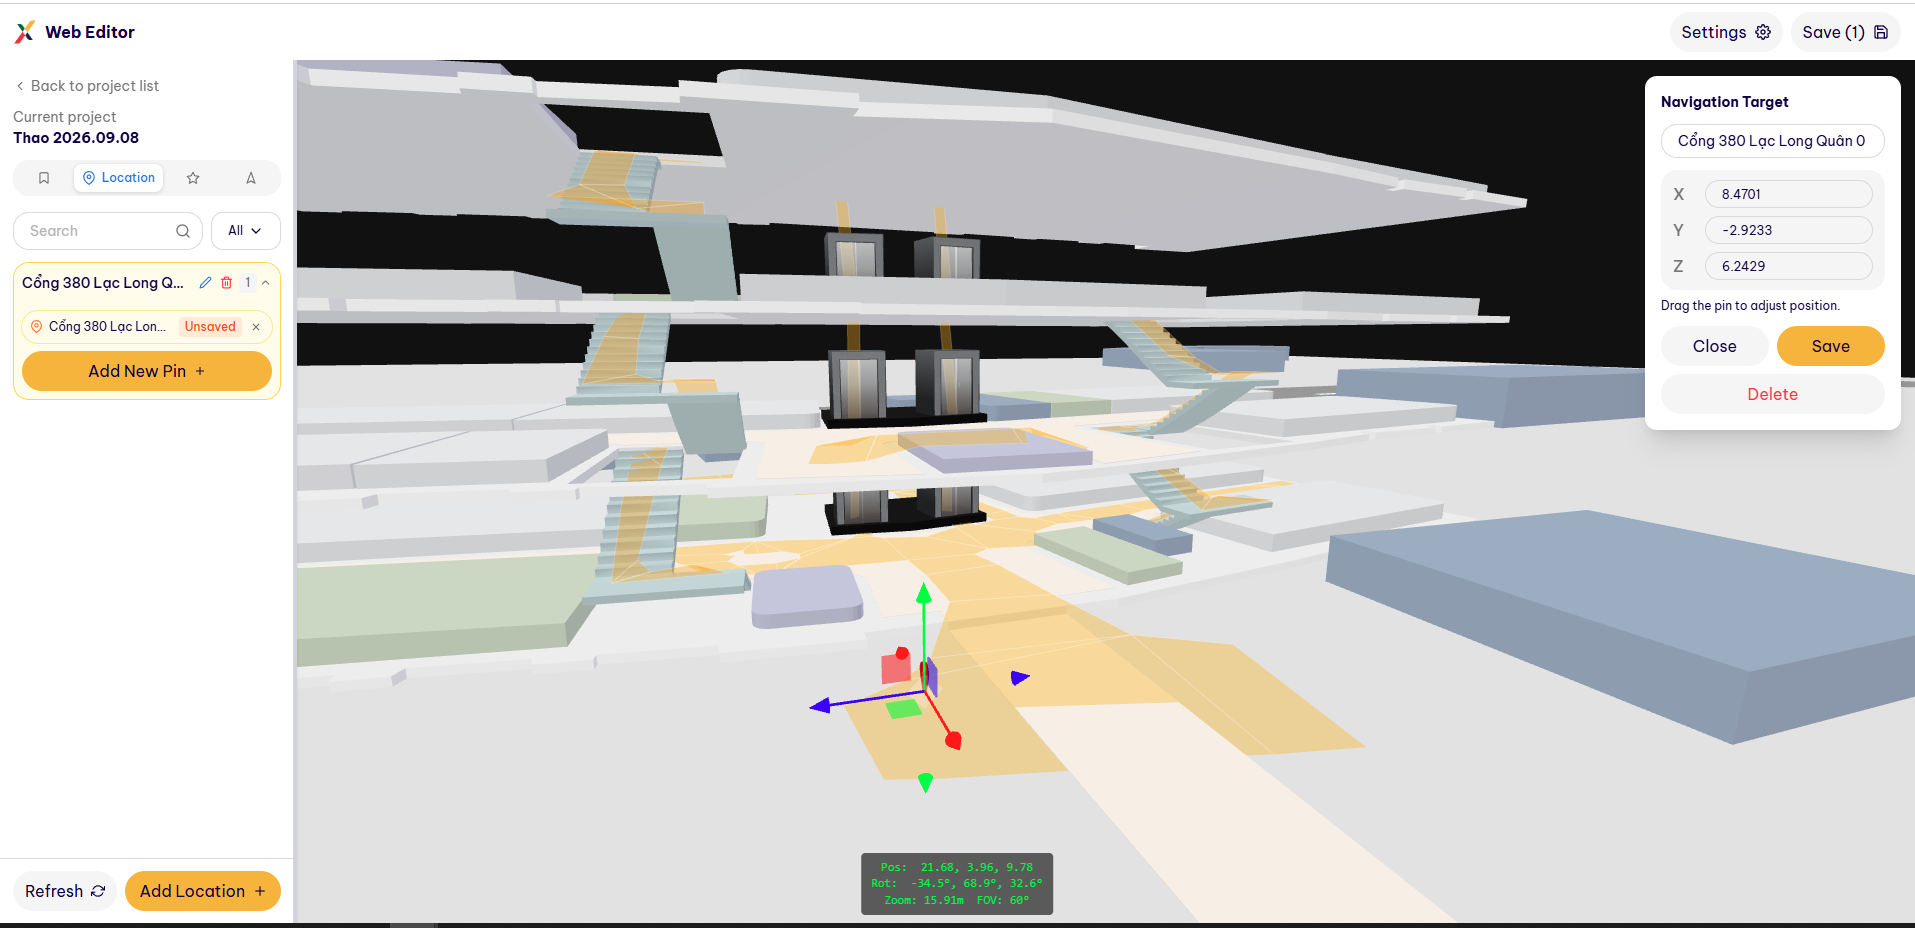
Step 4: Adjust the Position and Save the Location Info
After adding the Location Info to the 3D space, move the Pin to the correct position.
The following parameters can be adjusted for the Pin Location:
- Position X
- Position Y
- Position Z
Pins must be placed within an area covered by the NavMesh and at an appropriate height.
Finally, click Save to complete the creation of the Location Info.
5. Edit Location Info
To change a Location Info:
- Select the Location Info.
- Change the name if necessary.
- Adjust the Position.
- Check the Scale if necessary.
- Click Save.
6. Delete Location Info
When a destination is no longer used:
- Select the Location Info.
- Select Delete.
- Confirm the operation if prompted by the system.
- Check the Location Info List.