NAVIGATION TESTING GUIDE
After configuring the Navigation Targets, users can use the Test Navigation feature to verify navigation functionality.
The purpose of Test Navigation is to verify that:
- The calculated route is accurate.
- The Start Point and Destination are correct.
- The route is suitable for the actual space.
- Turn points are correctly identified.
- The stairs/elevator routing option works according to the configuration.
- The route can be used in the Navigation experience.
XenseAR allows users to test routes and verify NavMesh coverage before deploying a Navigation experience. The quality of Spatial Data, NavMesh configuration, Location Info positions, and environmental conditions can affect Navigation results.
1. Navigation Setup and Test Navigation Workflow
Route Option → Choose Start Point → Choose Destination → Select Navigation Option → Create Route → Check in 3D → Test Navigation → Clear Route → Set Up a New Route
The workflow is as follows:
Step 1: Open Test Navigation
Navigate to:
Web Editor → Map Editor → Open Project → Test
The Web Editor Project contains 4 category tabs:
- Label: Manage Labels.
- Location: Manage the list of Location Info.
- Content: Manage AR experience content.
- Test: Test navigation between Location Info.
In the Project, select the Test tab.
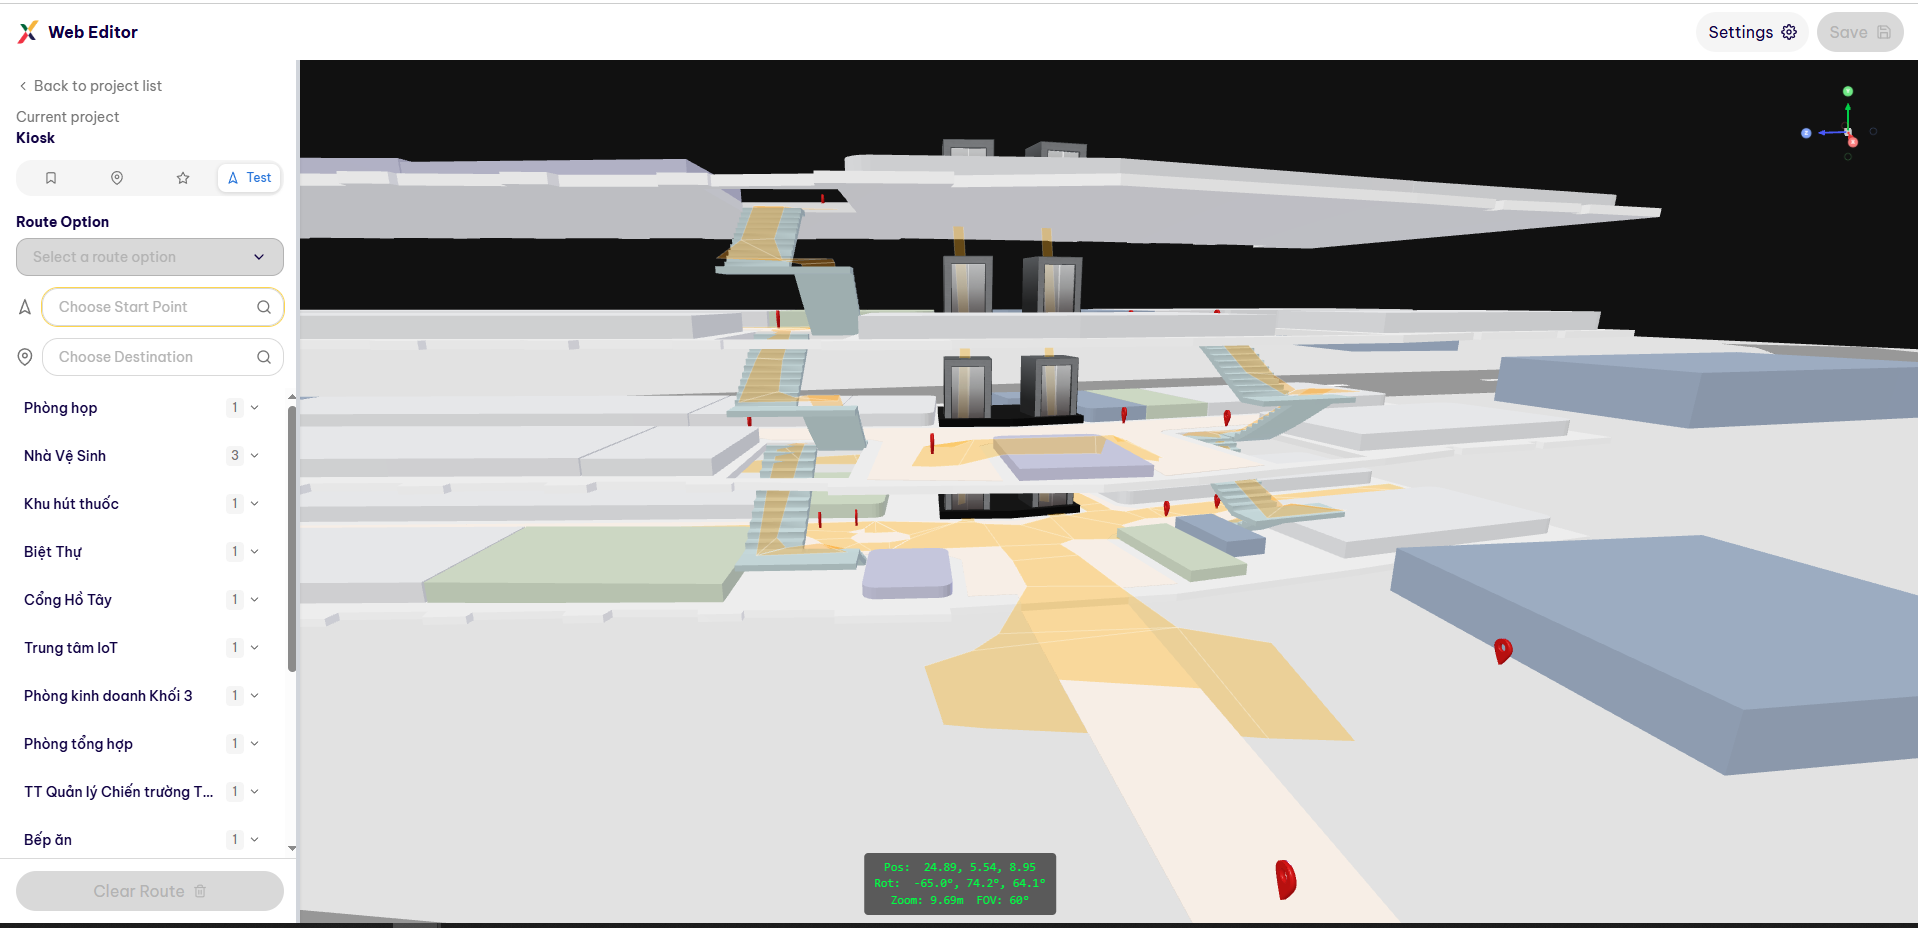
In the Test tab, the system displays all previously created Location Info items from the Location tab.
Step 2: Configure Route Option
Route Option is the area where users configure the input information used by the system to determine the navigation route.
To configure a route, users need to define:
- Start Point: The starting point.
- Destination: The destination.
- Navigation Option: Choose whether to prioritize stairs or elevators.
Step 3: Define the Start Point and Destination
In Route Option, define the Start Point and Destination for the route.
1. Select Start Point
- In Route Option, click Choose Start Point.
- The system displays the list of Location Info.
- Select the location to be used as the Start Point of the route.
- After selection, the chosen location is set as the Start Point.
2. Select Destination
- Click Choose Destination.
- From the Location Info list, select the destination.
- After selection, the chosen location is set as the Destination of the route.
Note: Make sure the Start Point and Destination are selected correctly before calculating the route.
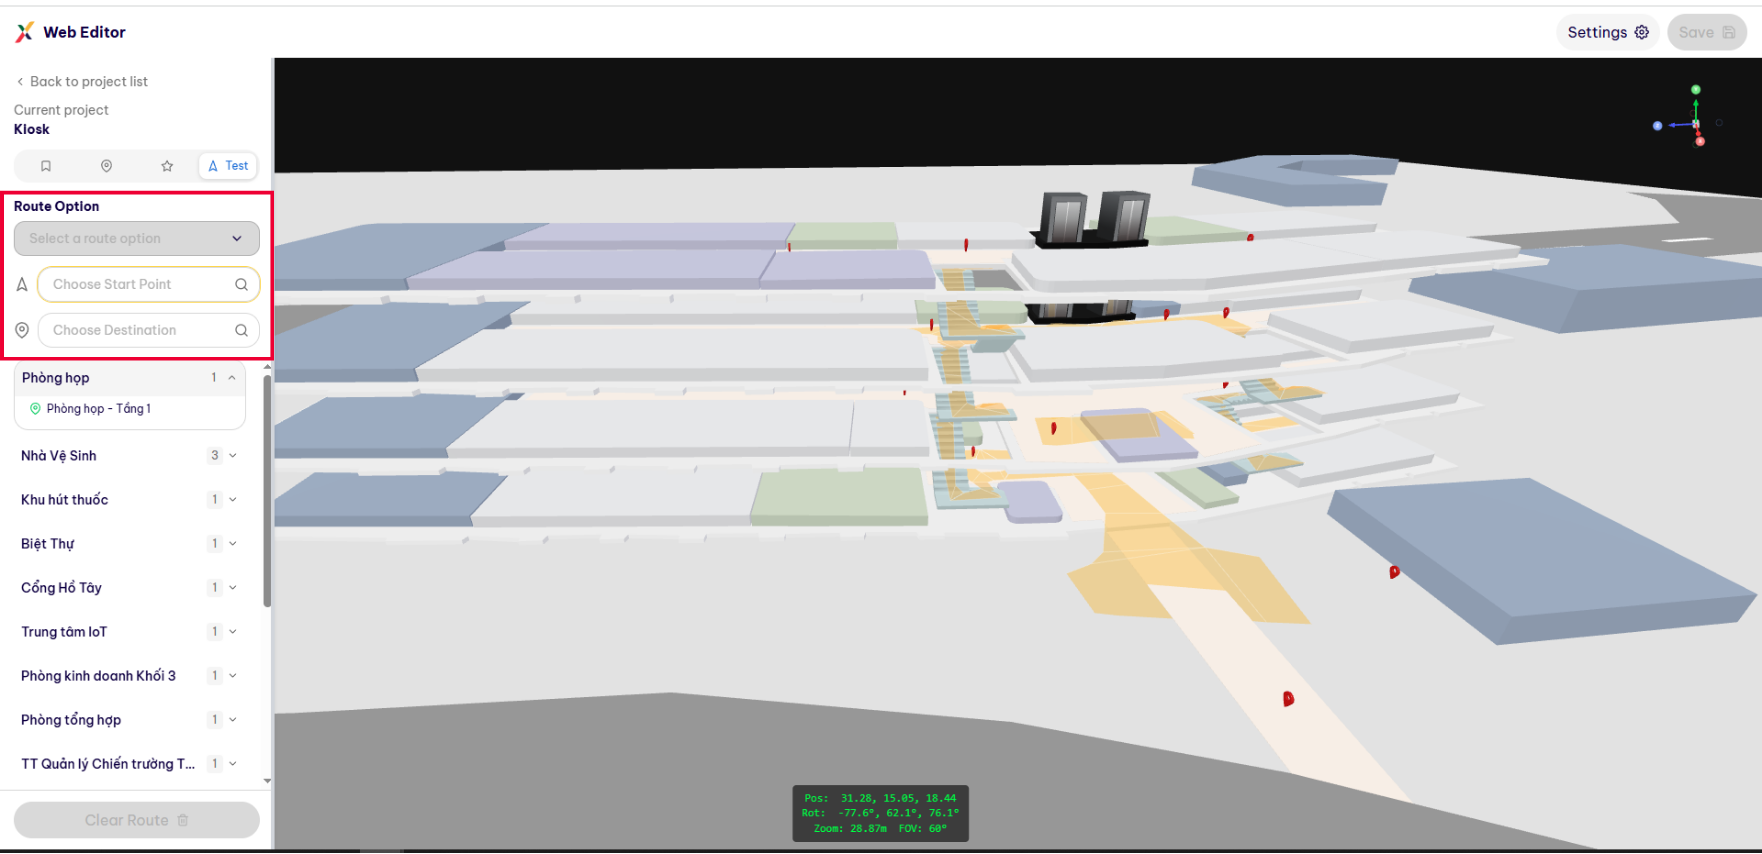
Step 4: Select the Navigation Option
Users can select a navigation option according to their movement requirements:
- Prioritize Stairs
- Prioritize Elevator
After an option is selected, the system automatically determines and displays a route based on the selected preference.
Prioritize Stairs
The system determines and displays a route that prioritizes the use of stairs.
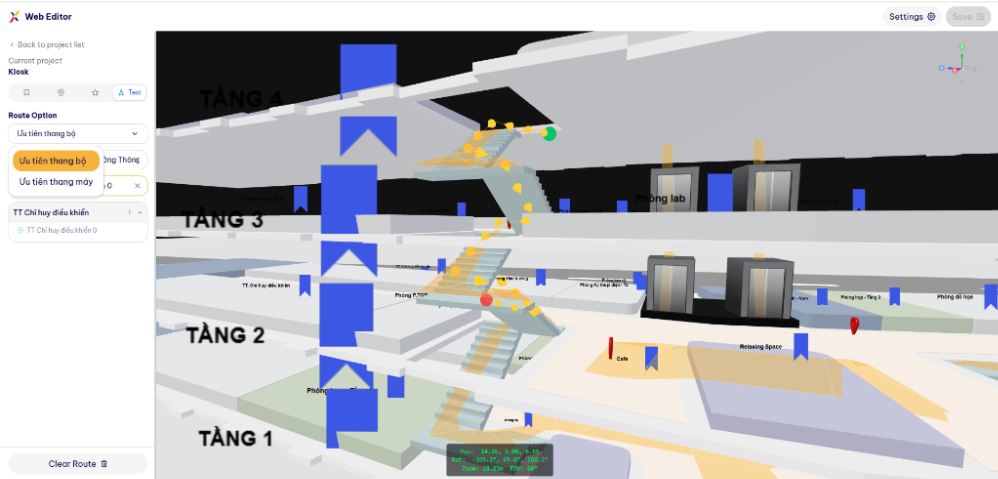
Prioritize Elevator
The system determines and displays a route that prioritizes the use of elevators.
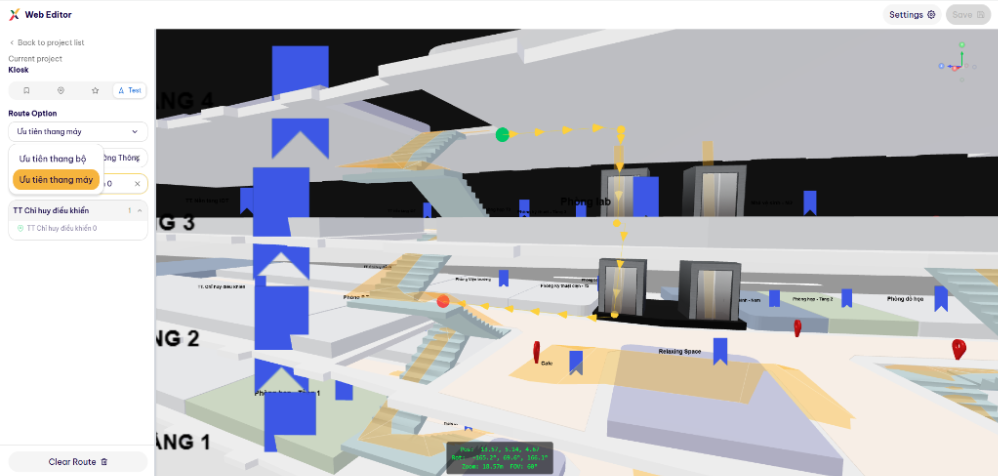
Step 5: Complete the Configuration and Display the Route
After completing the Route Option configuration, the system automatically determines the route based on:
- The Start Point.
- The Destination.
- The selected navigation option.
- Spatial data and movement accessibility within the area.
The generated route is displayed directly in the 3D space, connecting the Start Point to the Destination.
Users can inspect the route to verify the movement direction and determine whether the route is suitable for the actual space.
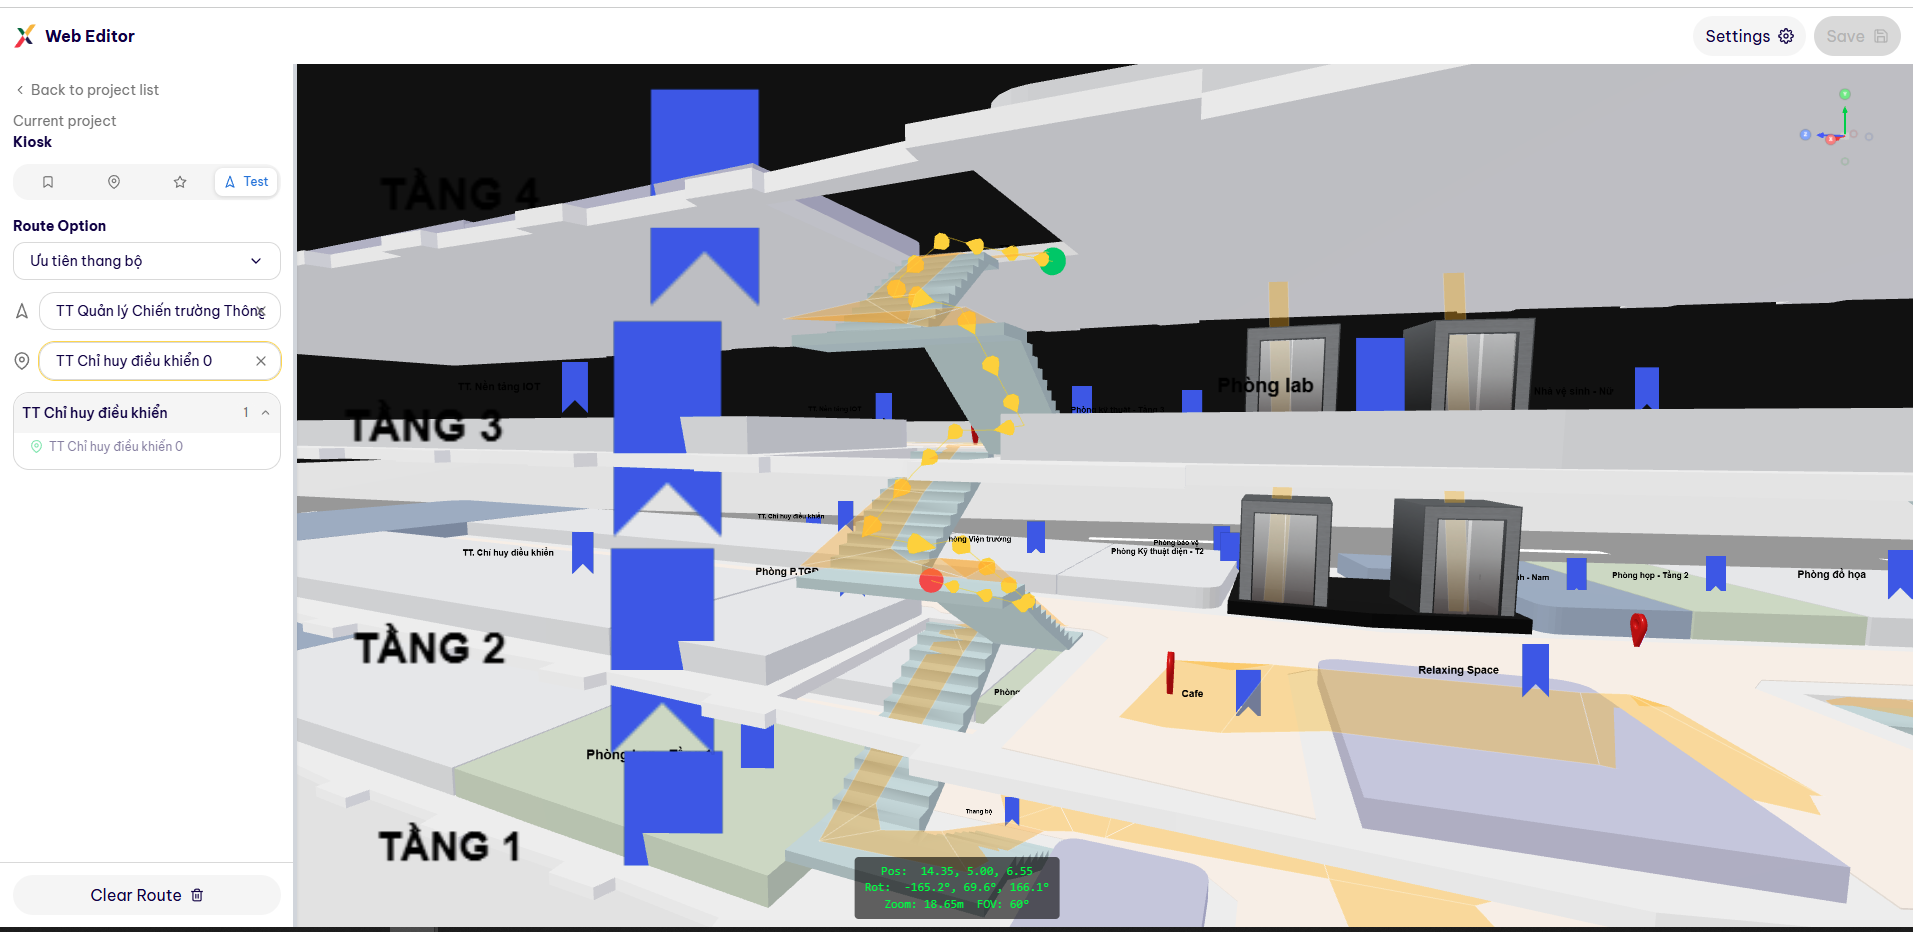
Step 6: Test Navigation in the 3D Space
After the route has been generated, perform the following checks:
- Confirm that the Start Point is correct.
- Confirm that the Destination is correct.
- Check that the route connects continuously from the Start Point to the Destination.
- Check that the route passes through the appropriate movement areas.
- Check that the stairs/elevator option matches the selected preference.
- Check floor transitions or intersection points, if applicable.
If the route is not suitable, adjust the Start Point, Destination, or Route Option, then perform the test again.
Step 7: Clear the Route Using Clear Route
After completing the Navigation testing process, use Clear Route to remove the current route.
Perform the following steps:
- Click Clear Route.
- The system removes the currently displayed route.
- Check the 3D space after clearing the route.
- Set a new Start Point and Destination to create the next route.
Note: The Clear Route function only removes the route currently configured for testing or creating a new route.
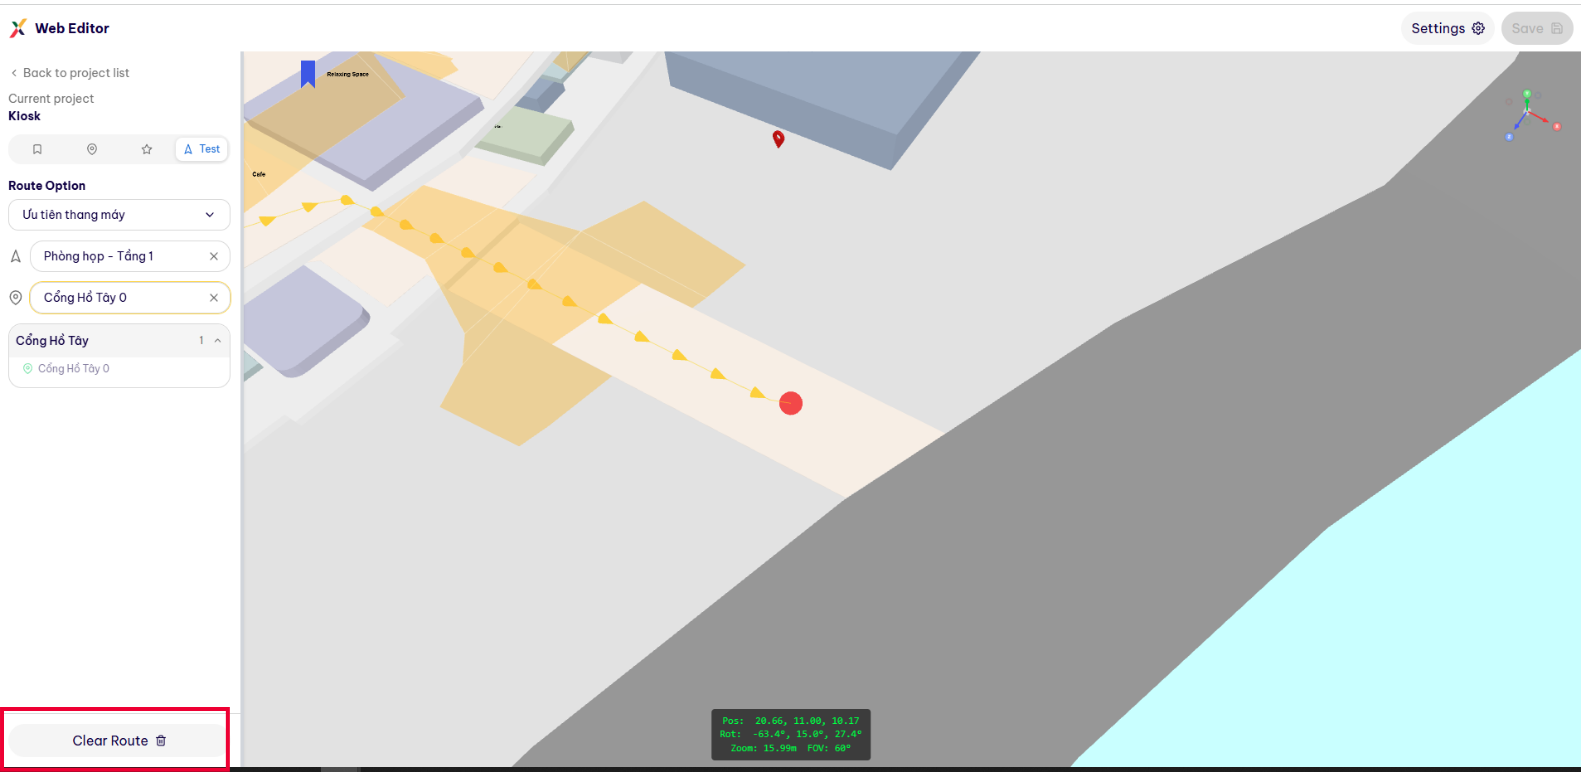
Step 8: Set Up a New Route
After using Clear Route, users can configure a new route:
- Click Choose Start Point.
- Select a new Start Point from the Location Info list.
- Click Choose Destination.
- Select a new Destination from the Location Info list.
- Select Prioritize Stairs or Prioritize Elevator.
- Check the generated route in the 3D space.
- Perform Test Navigation.
2. Pre-Completion Checklist
- ☐ The required Location Info items are available in the system.
- ☐ The Start Point has been defined.
- ☐ The Destination has been defined.
- ☐ Prioritize Stairs / Prioritize Elevator has been selected.
- ☐ The route has been generated and is displayed correctly in the 3D space.
- ☐ Test Navigation has been performed.
- ☐ The route has been checked at the actual deployment location.
- ☐ Clear Route has been used when a new route needs to be configured.