2. Creating a VPS Package
Step 1 – Open the Package Creation Function
In the Developer Portal, navigate to:
Credentials → VPS Package → [Create +]
The system opens the Create VPS Package window.
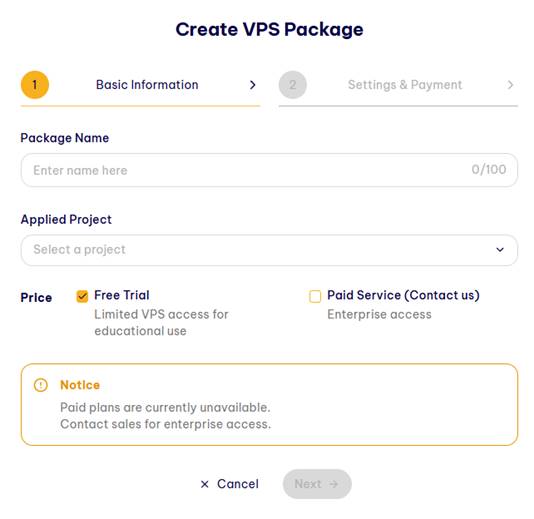
Step 2 – Basic Information
In the Basic Information step, enter the following information:
2.1. Package Name
Enter the package name.
2.2. Applied Project
- Select the Project that will use the VPS Package.
- Each package is associated with a specific Project to control the use of services by that Project.
2.3. Price
Select the package type:
- Free Trial: for users who want to try the service.
- Paid Service (Contact us): for Enterprise services; users need to contact the service provider to confirm the service package.
After entering all required information, select [Next] to proceed to Settings & Payment.
3. Settings & Payment
Depending on the selected package type, the settings available in Settings & Payment will vary.
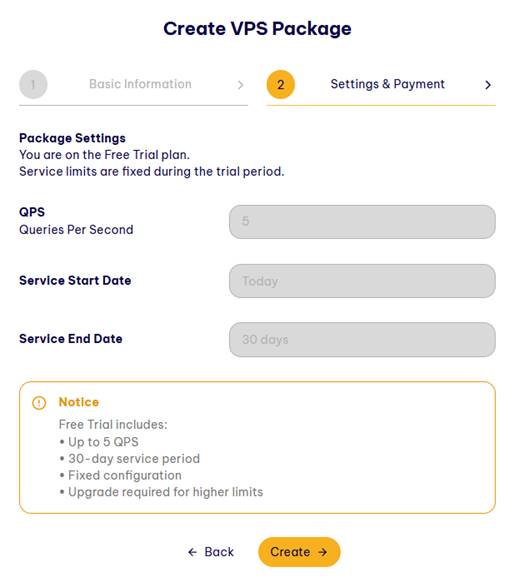
3.1. Free Trial
For the Free Trial package, the service configuration is fixed by the system:
- QPS: default value is 5.
- Service Start Date: Today.
- Service End Date: 30 days from the service start date.
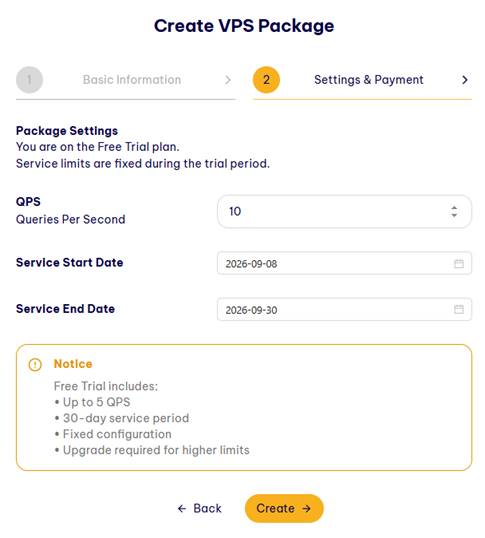
3.2. Paid Service
For the Paid Service package, users can configure the service according to their usage requirements:
- QPS: must be greater than 5.
- Service Start Date: must be ≥ the current date.
- Service End Date: must be > Service Start Date.
4. Completing Package Creation
After the package is successfully created, the system displays the following notification:
Created Successfully Your credential package has been created successfully.
The new package is added to the VPS Package list.
Free Trial Status
A newly created Free Trial package can have the following statuses:
- Active: the package is still within its validity period and can access the service.
- Expired: the package has expired and can no longer access the service.
Paid Service Status
After creation, a Paid Service package has the following status:
- Awaiting Payment: the package is awaiting completion of the payment/service confirmation process.
5. Activating Paid Service
The Paid Service process can be described as follows:
Create Package → Awaiting Payment → Service/Payment Confirmation → Active
Specifically:
- The user creates a Paid Service request.
- The system records the VPS Package.
- The package is assigned the Awaiting Payment status.
- The user contacts the service provider to complete the service procedures.
- The system confirms the payment/contract.
- The package is activated.
- The status changes to Active.
- The Application Key associated with the package can use the allocated service quota.
When the service period expires, the package status changes:
Active → Expired