1. Before You Begin
- Install the Xense AR application on your phone.
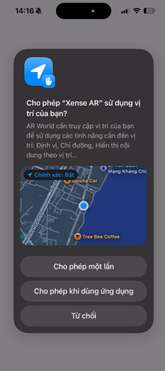
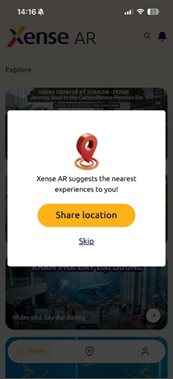
- Grant the permissions requested by the application to use the corresponding features.
- To experience location-based AR, go to the correct location where AR is supported.
- It is recommended to use the application in a well-lit environment to facilitate spatial recognition.
- You do not need to log in to view and experience AR content provided for non-logged-in users.
2. Required Permissions
The application requires the following permissions to operate fully. Permissions marked with (*) are required to use AR experiences.
| Permission | Required | Purpose |
|---|---|---|
| Camera (*) | Required | Scans and recognizes the real-world environment to display AR content. Without this permission, users cannot enter an AR experience. |
| GPS / Location | Optional | Determines the current location to recommend nearby AR experiences. Without this permission, some location-based AR experiences may not be accessible. |
| Microphone | Optional | Records audio when recording video during an AR experience. |
| Add to Photo | Optional | Saves photos/videos captured during an AR experience to the phone’s Photos library. |
3. App Features
3.1. Features for Non-Logged-In Users
3.1.1. Experience List and Search (Home Tab)
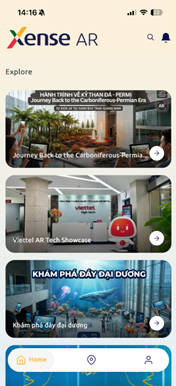
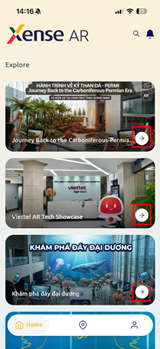
- The Home tab displays a list of AR experiences (Projects) available in the application.
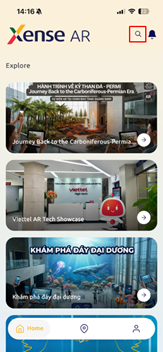
- Users can search for an experience by name using the magnifying glass icon at the top of the screen.
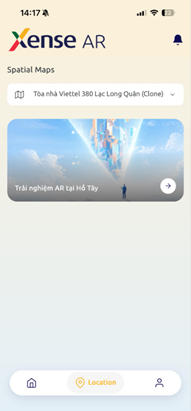
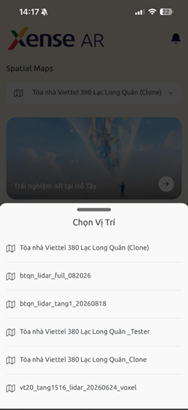
3.1.2. Location List and Search (Location Tab)
Each AR experience location can have multiple experiences (Projects).
- Select the location list to view locations that currently support AR.
- Select a location to view the AR experiences available at that location.
- Users can search for locations by name.
3.1.3. Additional Features for Non-Logged-In Users
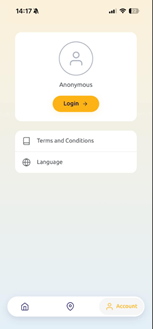
- Change Language: Select Tiếng Việt or English to change the application interface language.
- View Terms and Conditions.
3.2. Features for Logged-In Users
This section describes features available specifically to users who are logged in to the Xense AR application.
Other AR experience features (Home, Location, AR Experience, Navigation, Camera, and Change Language) work in the same way as for non-logged-in users.
3.2.1. Account Login
- Open the Account tab and select Login.
- Enter the account credentials and log in.
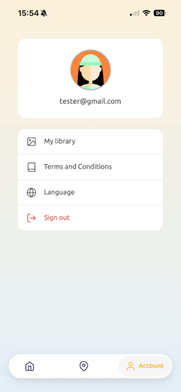
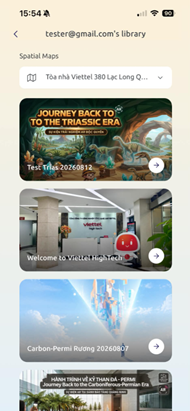
- After a successful login, account information and My Library are displayed in the Account tab.
3.2.2. My Library
- In the Account tab, select My Library.
- My Library displays AR projects created by users on Xense AR Portal that are awaiting admin approval before being made public. These are data synchronized from the user’s account and work performed on the Portal and Editor.
- Select an AR project to open its details, including the location, content, and AR activities of the project.
- Select Explore now to preview the project. Features within the experience work similarly to those of a publicly available AR project.
3.2.3. Other Features
In addition to My Library, logged-in users can access the remaining features in the same way as non-logged-in users:
- Home: Search for and select locations/experiences that provide AR experiences.
- Location: Find AR experiences by location/map.
- AR Experience: Select Explore now, scan the space, and explore AR content.
- Navigation: Select a destination and use AR arrows for navigation.
- Camera: Capture the AR experience.
- Account: View Terms and Conditions and change the language.
See the corresponding sections for details about each feature.
4. Features During an AR Experience Session
This section describes the features available after selecting Explore now for an AR experience, regardless of whether the experience is opened from the Home or Location tab.
4.1. Starting an Experience
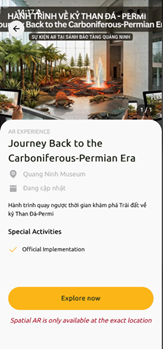
- At the location/experience you are interested in, tap the arrow button to open the details page.
- View the location name, opening hours, brief introduction, and featured AR activities/content.
- Select Explore now to begin.
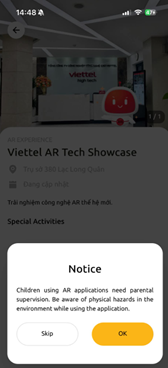
- The first time you start an experience, the application displays a notice stating that children should be supervised by their parents when using AR. Select OK to continue or Skip to dismiss the notice.
Check your location before starting: If you are not at the correct location or have not granted location permission, the Explore now button may be disabled (for example, you are in Hanoi while selecting an AR location in Ho Chi Minh City).
4.2. Scanning and Recognizing the Space
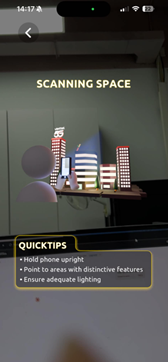
- Hold the phone upright and point the camera toward the surrounding area.
- Move the phone slowly so the application can scan and recognize the space.
- Point the camera toward areas with recognizable visual features.
- Make sure the area has sufficient lighting.
Tips for better recognition: Keep the phone steady, avoid moving it too quickly, and avoid areas that are too dark or have too few recognizable features.
4.3. Displaying AR Content
-
After the space is successfully recognized, AR content appears on the screen and is positioned within the real-world environment.
-
Depending on the experience, the content may consist of static images/models, animated content, or interactive content.
-
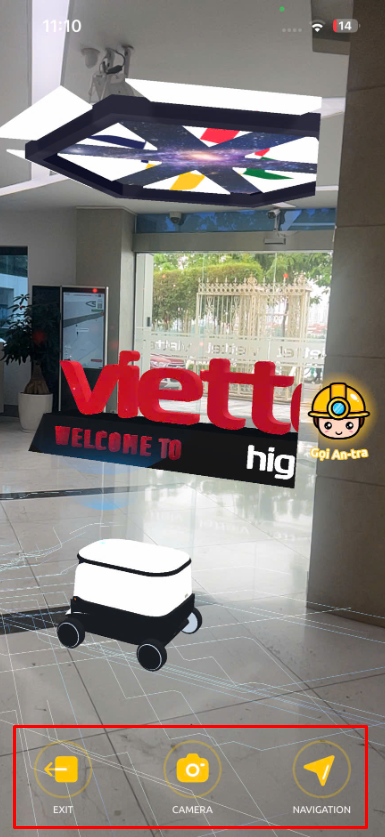
During the experience, the screen provides the following controls:
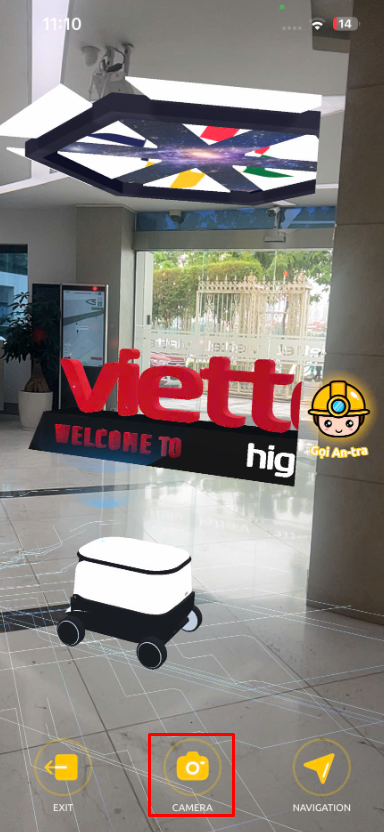
- Exit: Exit the AR experience.
- Camera: Capture the current scene.
- Navigation: Open the navigation feature.
4.4. Navigation
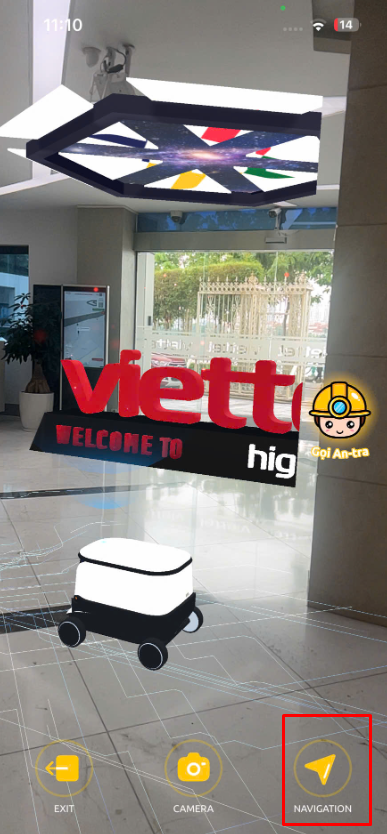
- Tap the Navigation button (arrow icon) on the AR experience screen.
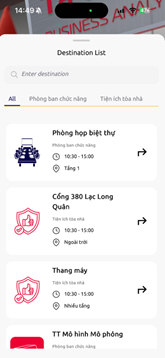
- The application displays a list of destinations, rooms, or locations available in the area.
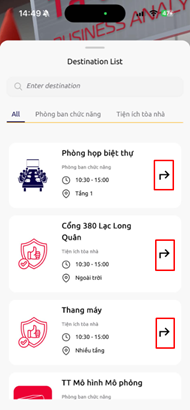
- Find the destination you want to go to and tap the arrow button next to it.
- A series of 3D arrows appears in the real-world environment on the screen. Follow the direction of the arrows to reach the selected destination, while continuing to observe the screen as you move.
- Tap the Map button to open the 2.5D map. You can zoom in/out or close the map to return to the AR navigation screen.
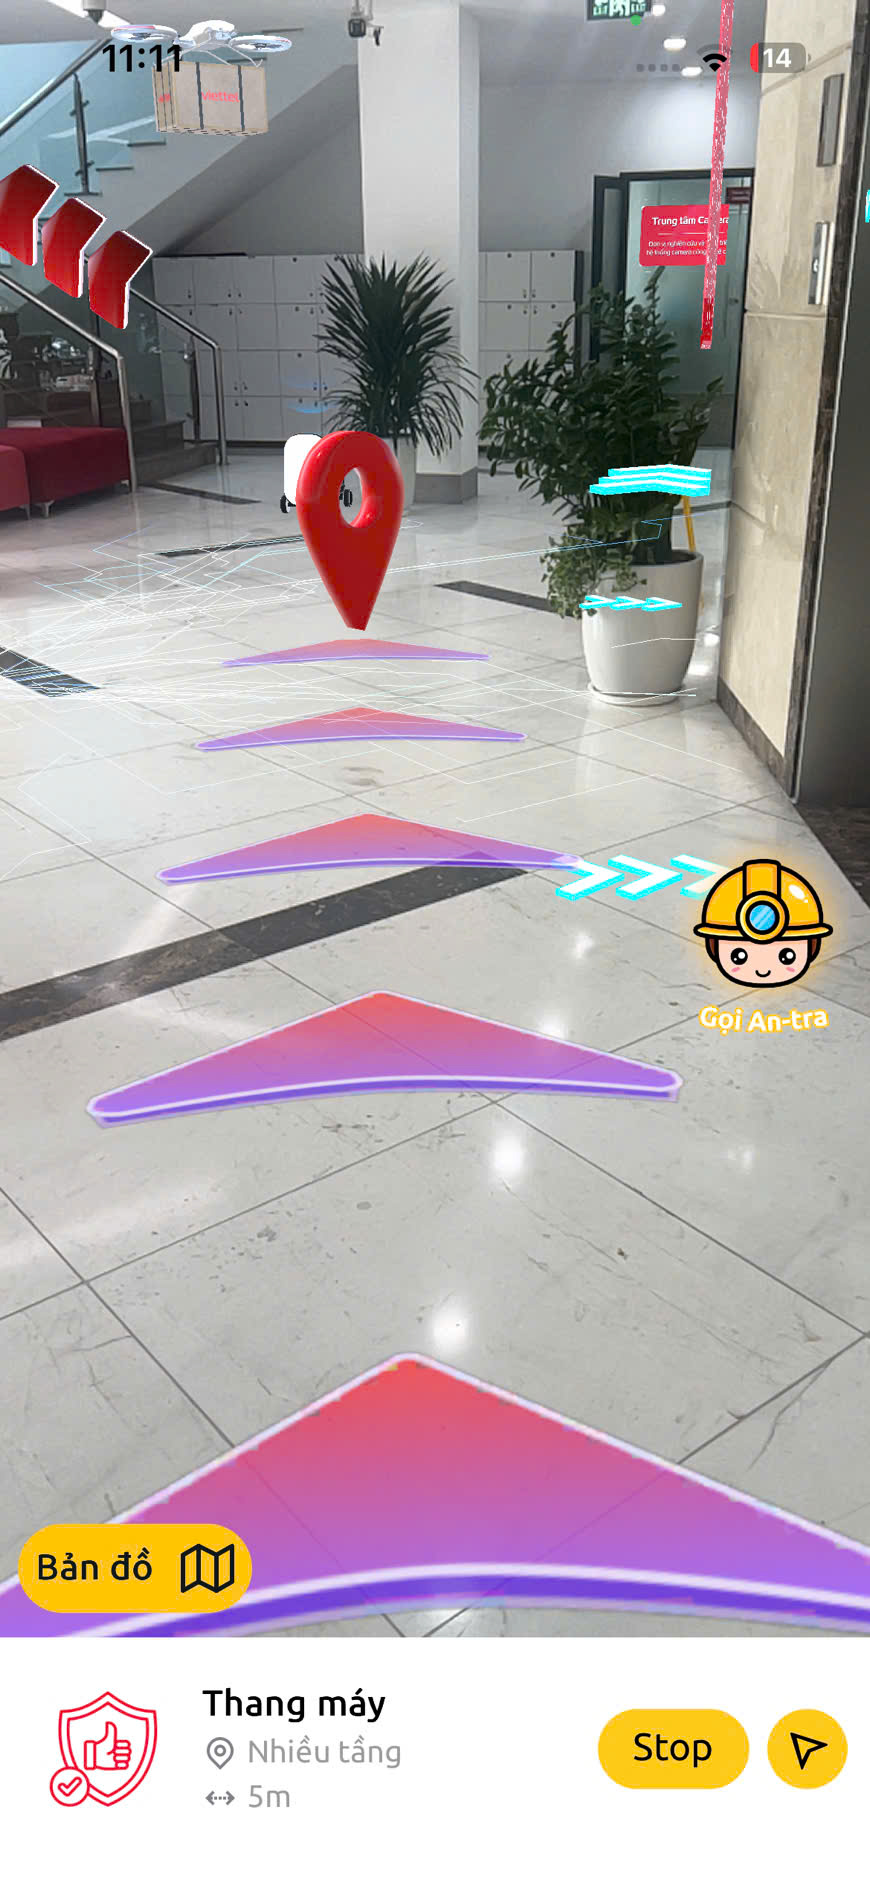
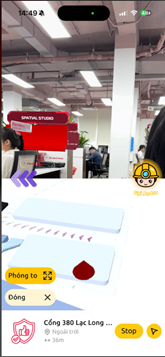
- When navigation is no longer needed, tap Stop to stop AR navigation mode.
4.5. Taking Photos and Recording Videos
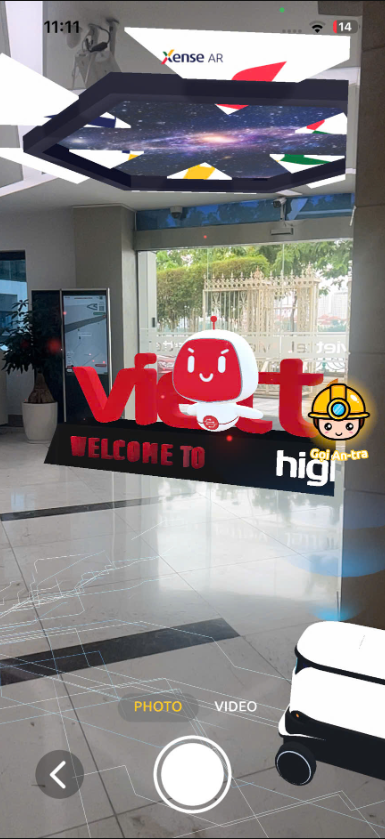
- On the AR experience screen, tap the Camera button to capture the current scene together with the AR content or record a video if supported by the experience.
- Photos/videos can be saved to the phone’s photo library if the Add to Photo permission has been granted.
4.6. Extended Interactive Features
- Depending on the specific project, an AR experience session may include additional interactive features, such as minigames, interactive quizzes, and more.
- The content and interaction methods of these extended features are updated according to each project’s deployment requirements.
After the admin reviews and approves the project, it will no longer appear in My Library and will be made publicly available in the Xense AR application to other users according to the system’s public availability mechanism.